As we work through all of the rooms in our 100+ year old home we will eventually finish some of them, no seriously a lot of them are in different stages of completion, but this one is DONE DONE!
This is what we started with…
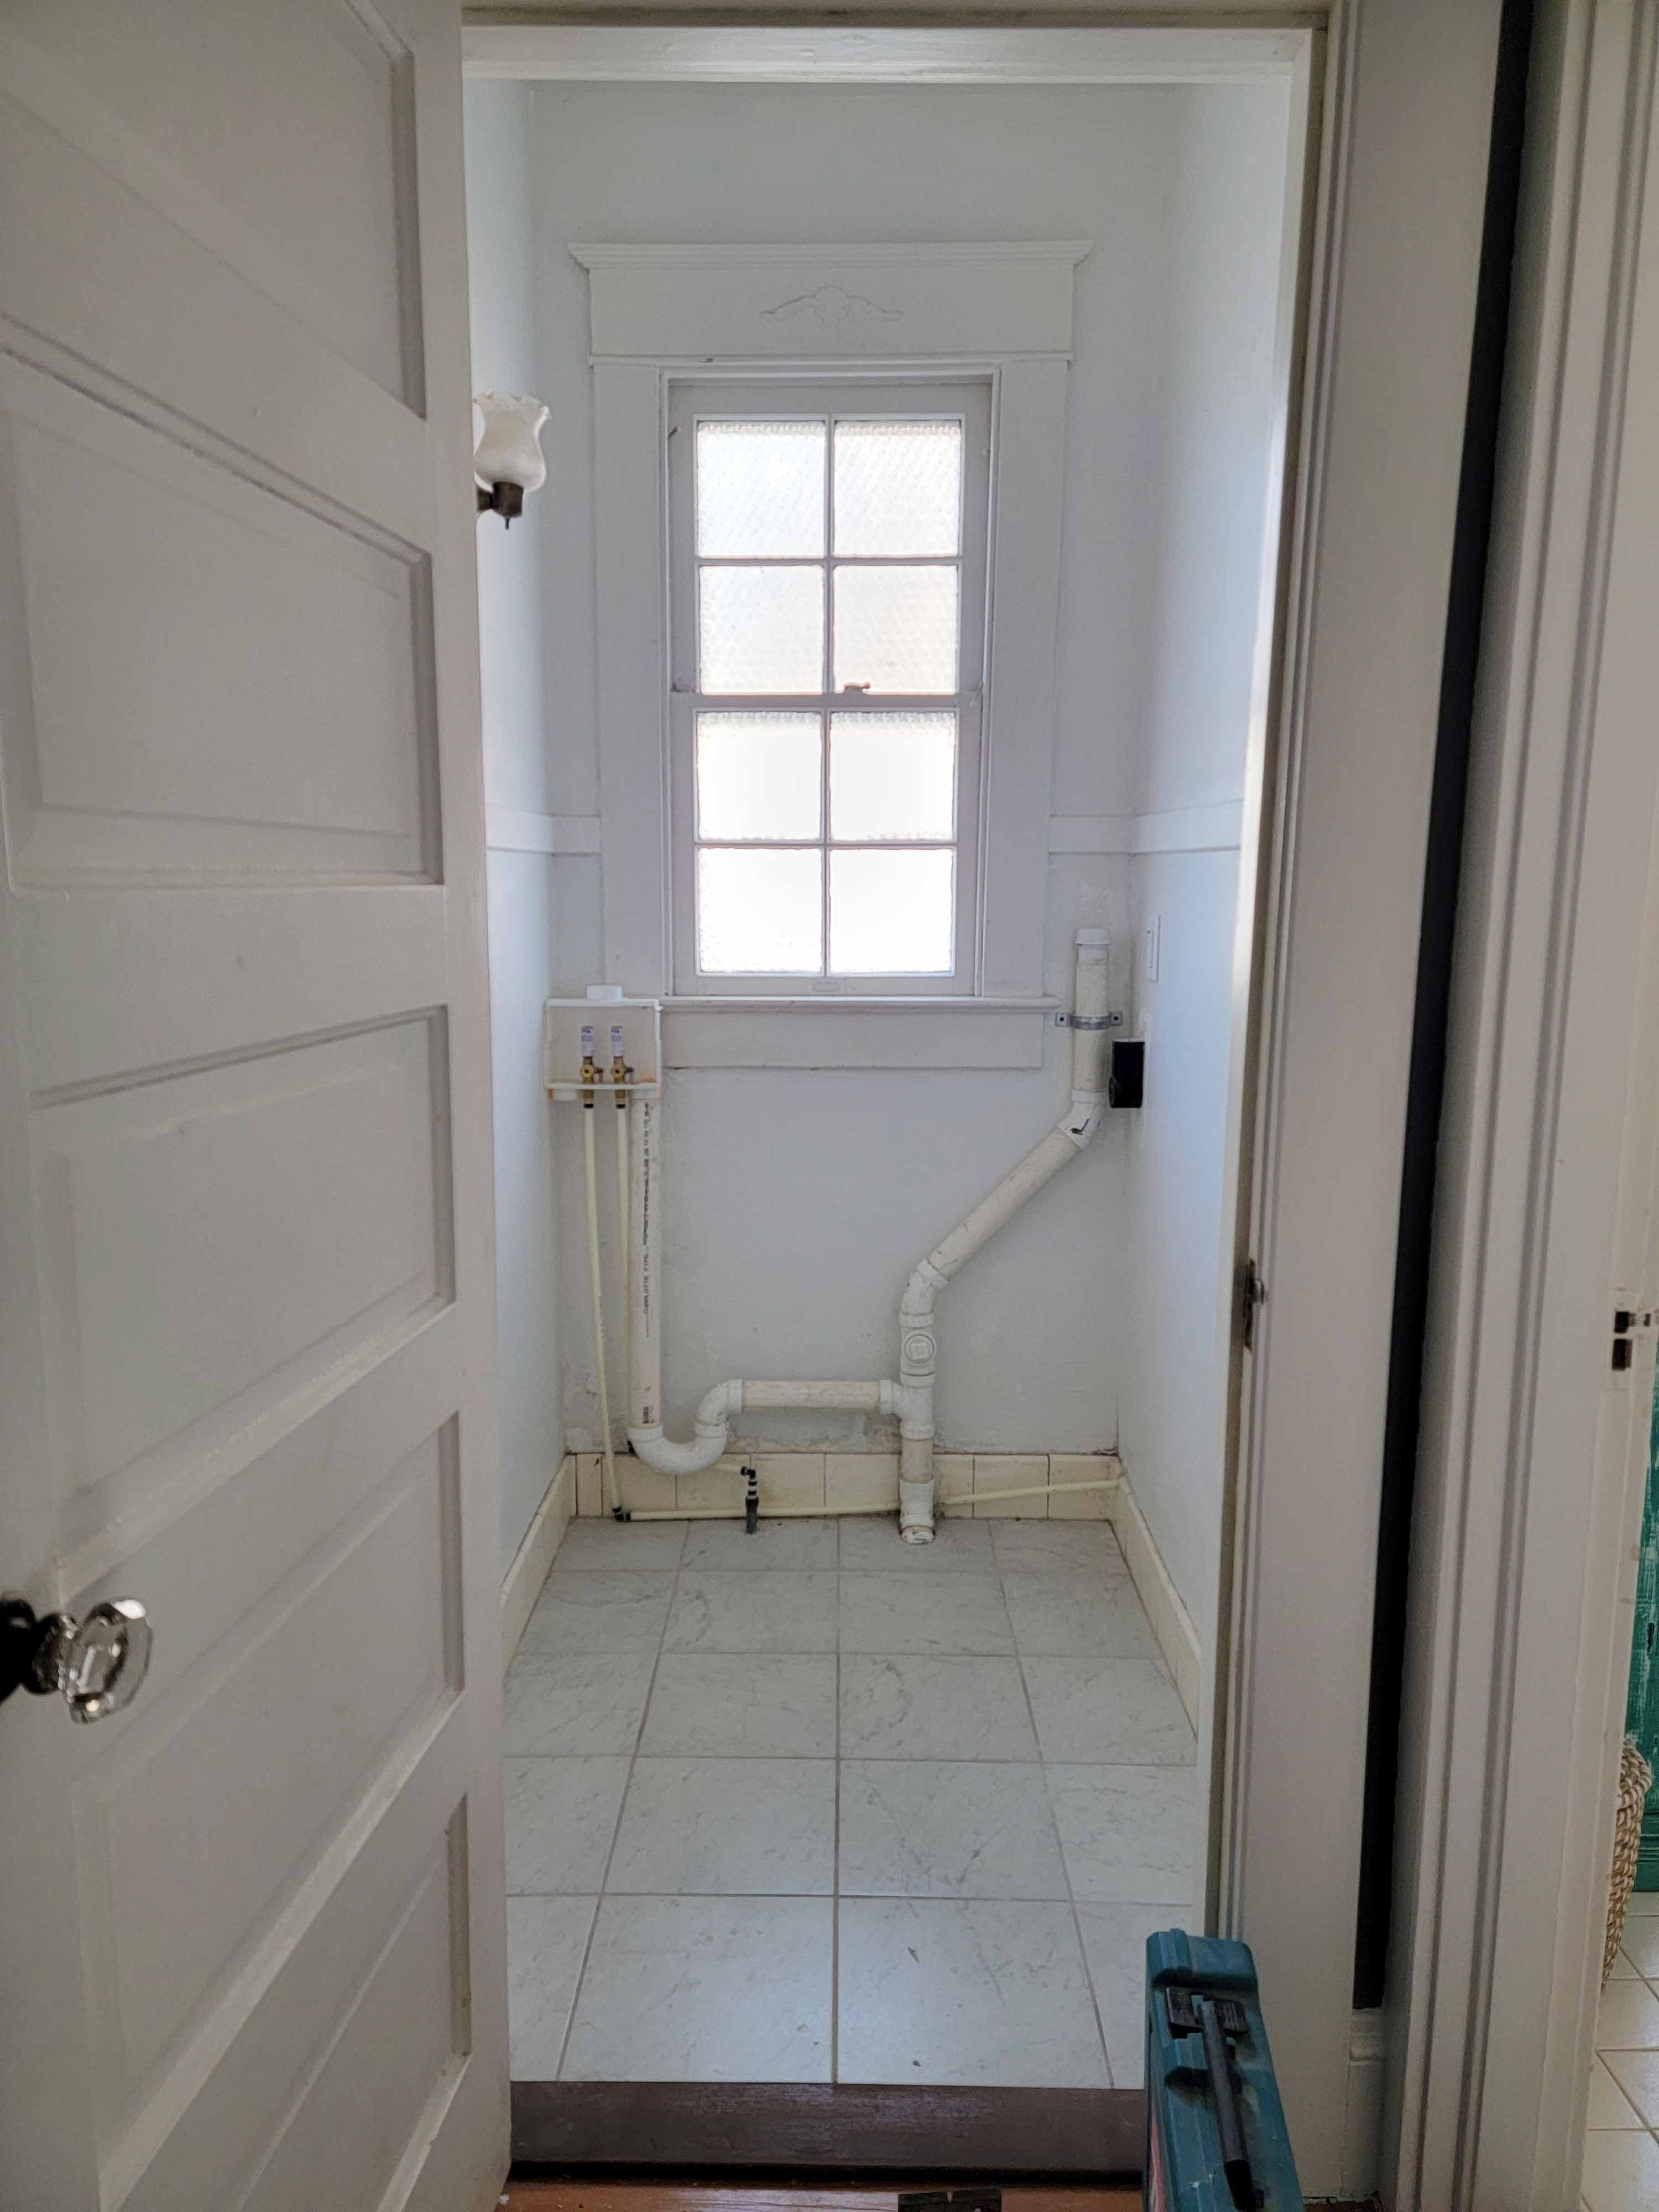
The previous owner was in the process of converting an upstairs water closet into a laundry closet, which was completely unnecessary for me, but I know some of you love your convenient bedroom level laundry rooms. However, we have a large basement where the washer and dryer were always hooked up and that space was much, much larger and quite honestly, I needed the water closet upstairs more than a laundry room.
I gave a TON of thought into incorporating the WC into the main “Family” bathroom, it could have been easily done, but I decided to return it back to what it was originally (plus a little extra). Here was my thought process, if someone is in the Family bathroom taking a shower or getting ready someone else can still use a toilet, brush their teeth, put on makeup or do their hair etc., without having to get into the Family bathroom. Now the “downside” of this is if you are one of those people who get naked and use the toilet before hopping in the shower you will have to change your routine, but we have not found that to be a big deal.

The first thing I had to do was remove the tile, this is how that went:
- First layer super easy as they “installed” cheap ceramic tile on top of VINTAGE PINK 1″ hexagon tile (so sad)
- Second layer was the 1″ hexagon, that was more difficult, and I went through 2 hammer drill tile removing blades.
- Third layer was 4 freaking inches of concrete (mixed with pumice I think), this was incredibly time consuming and dirty, but breaking it up with the hammer drill and a concrete spade was the easiest way (other than beating it with a sledge hammer which was just not an option for me).
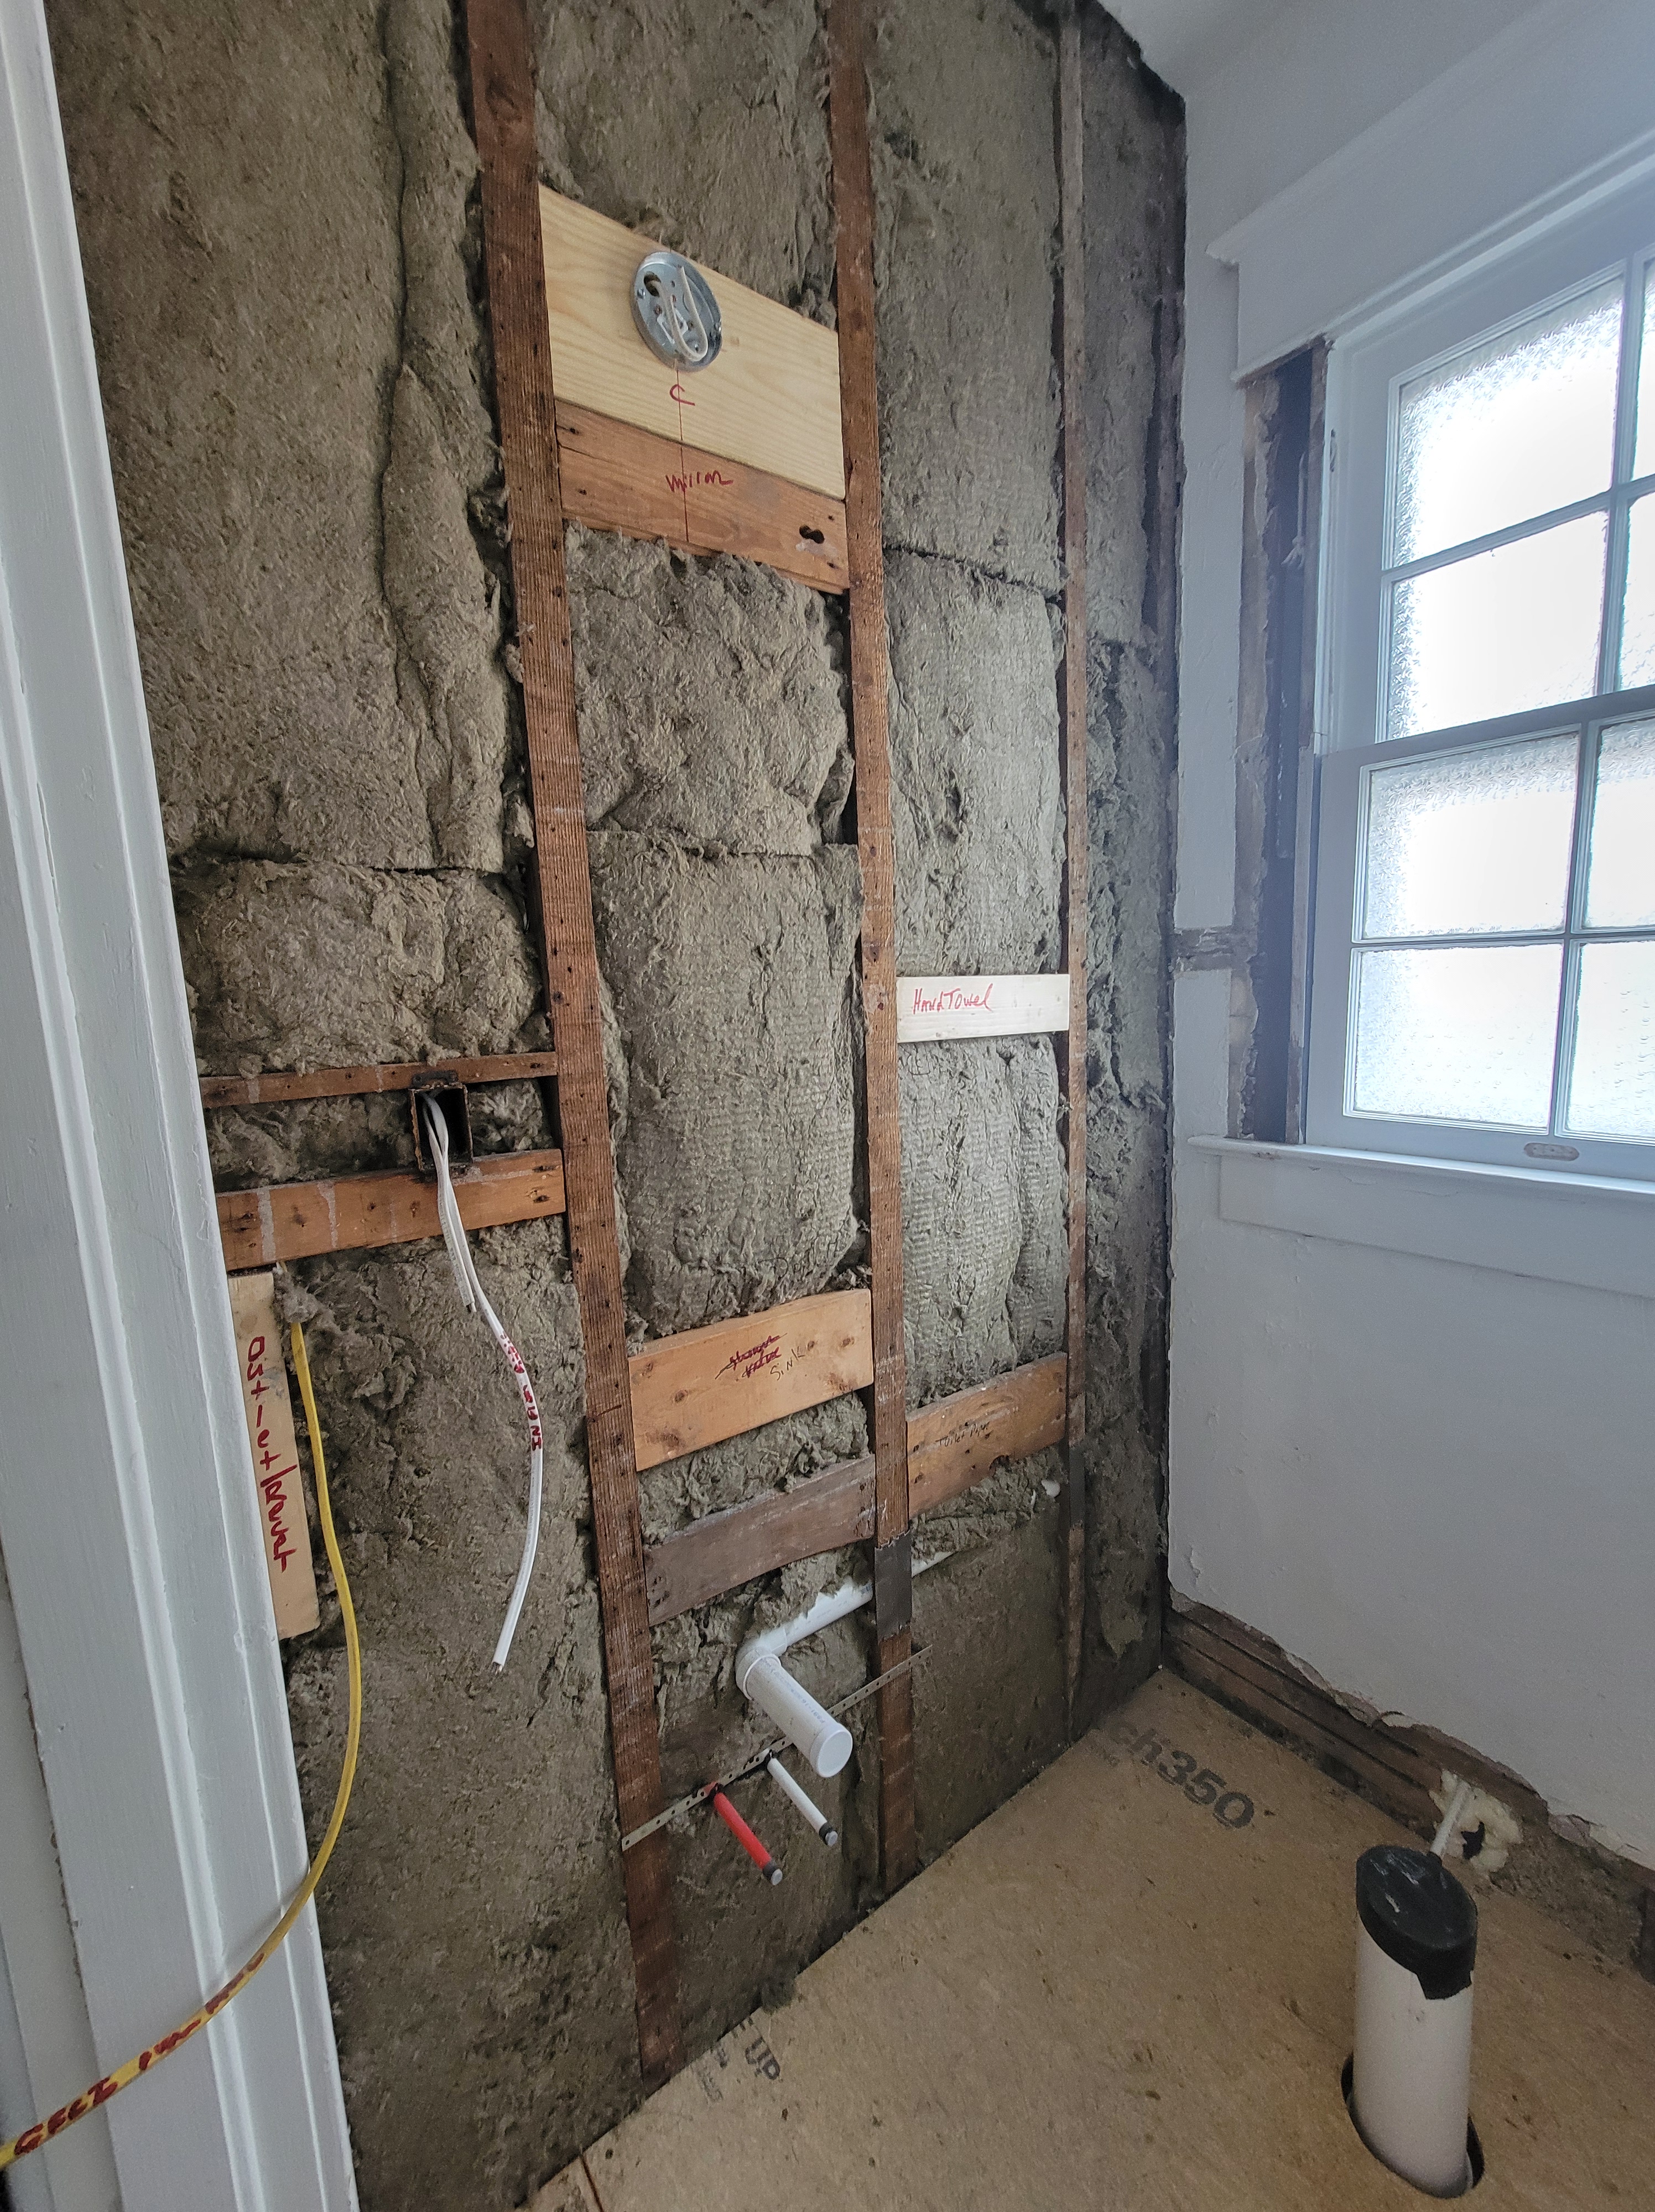
- The last and final layer, you see above, was to remove the boards in between the floor joist. I had to remove those in order to sister boards alongside the joists as the tops of the joists had been hewn to a small uneven point and the floor needed to be level and sturdy for the new floor.
The steps above were a huge pain in the ass and I can’t even imagine how much I would have had to pay a “professional” to do the job, it was tedious and heavy work. We choose to bag the debris and take it to the dump ourselves as we didn’t have a dumpster due to the timeframe we were working with. My point is it is doable, yes you CAN do it, it’s not technically “hard” and it is totally worth the savings!

We had our plumber come in and fix the plumbing for the return of the toilet and an addition of a sink. We decided to go ahead and remove all of the plaster and lathe on the one wall to not only accommodate the new plumbing, but electricity, support boards and insulation (since there is a bedroom on the other side of this wall).
The other item I worked on, and that I am extremely proud of, is repairing the wood window sash cords. The sash cords had been cut and the window was in rough shape, so I found a great tutorial and was able to fix them and repair the window pretty easily.

Just look at this original Pinwheel privacy glass from 1920! Thank goodness it wasn’t broken and that I didn’t break it repairing the windows!

We are renovating this bathroom in conjunction with our Primary Bathroom, so once we finished demo, electrical, plumbing, insulation and beadboard we turned it over to the contractors to finish the floor. They leveled the floor, installed subflooring and then the tile guy came in and BLEW me away. I mean this guy was meticulous, from waterproofing to layout to cuts he was fabulous!
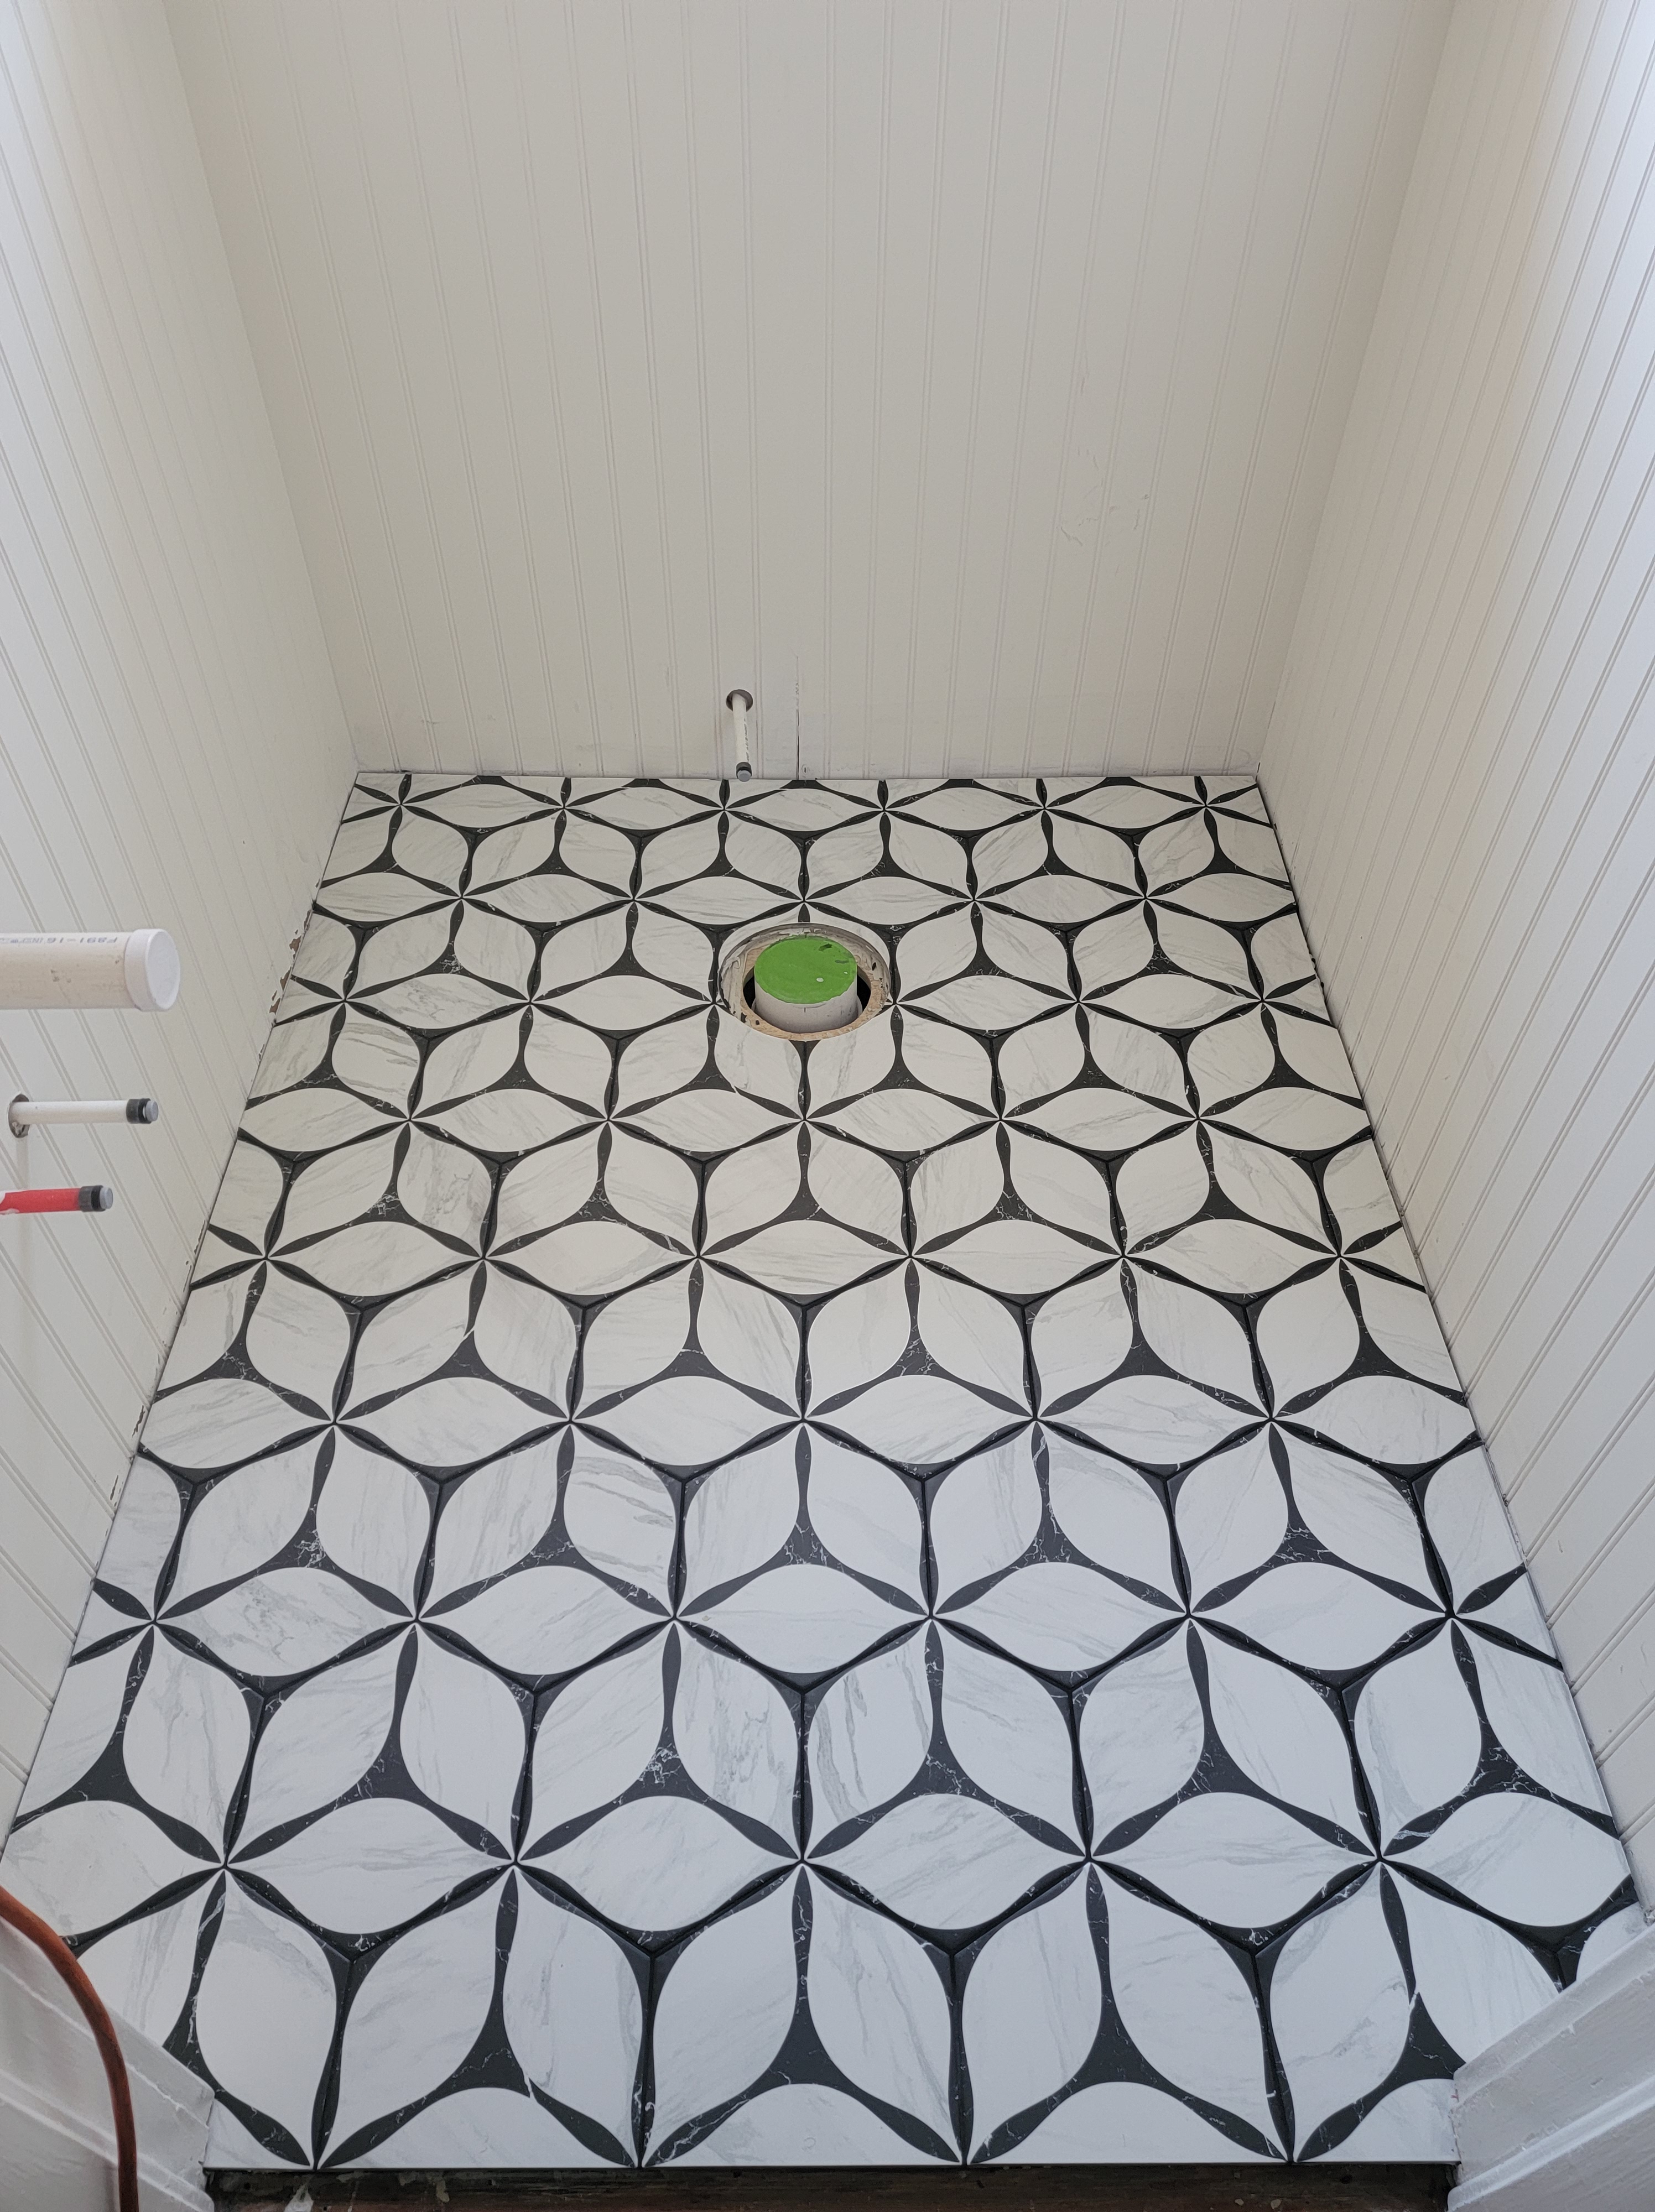
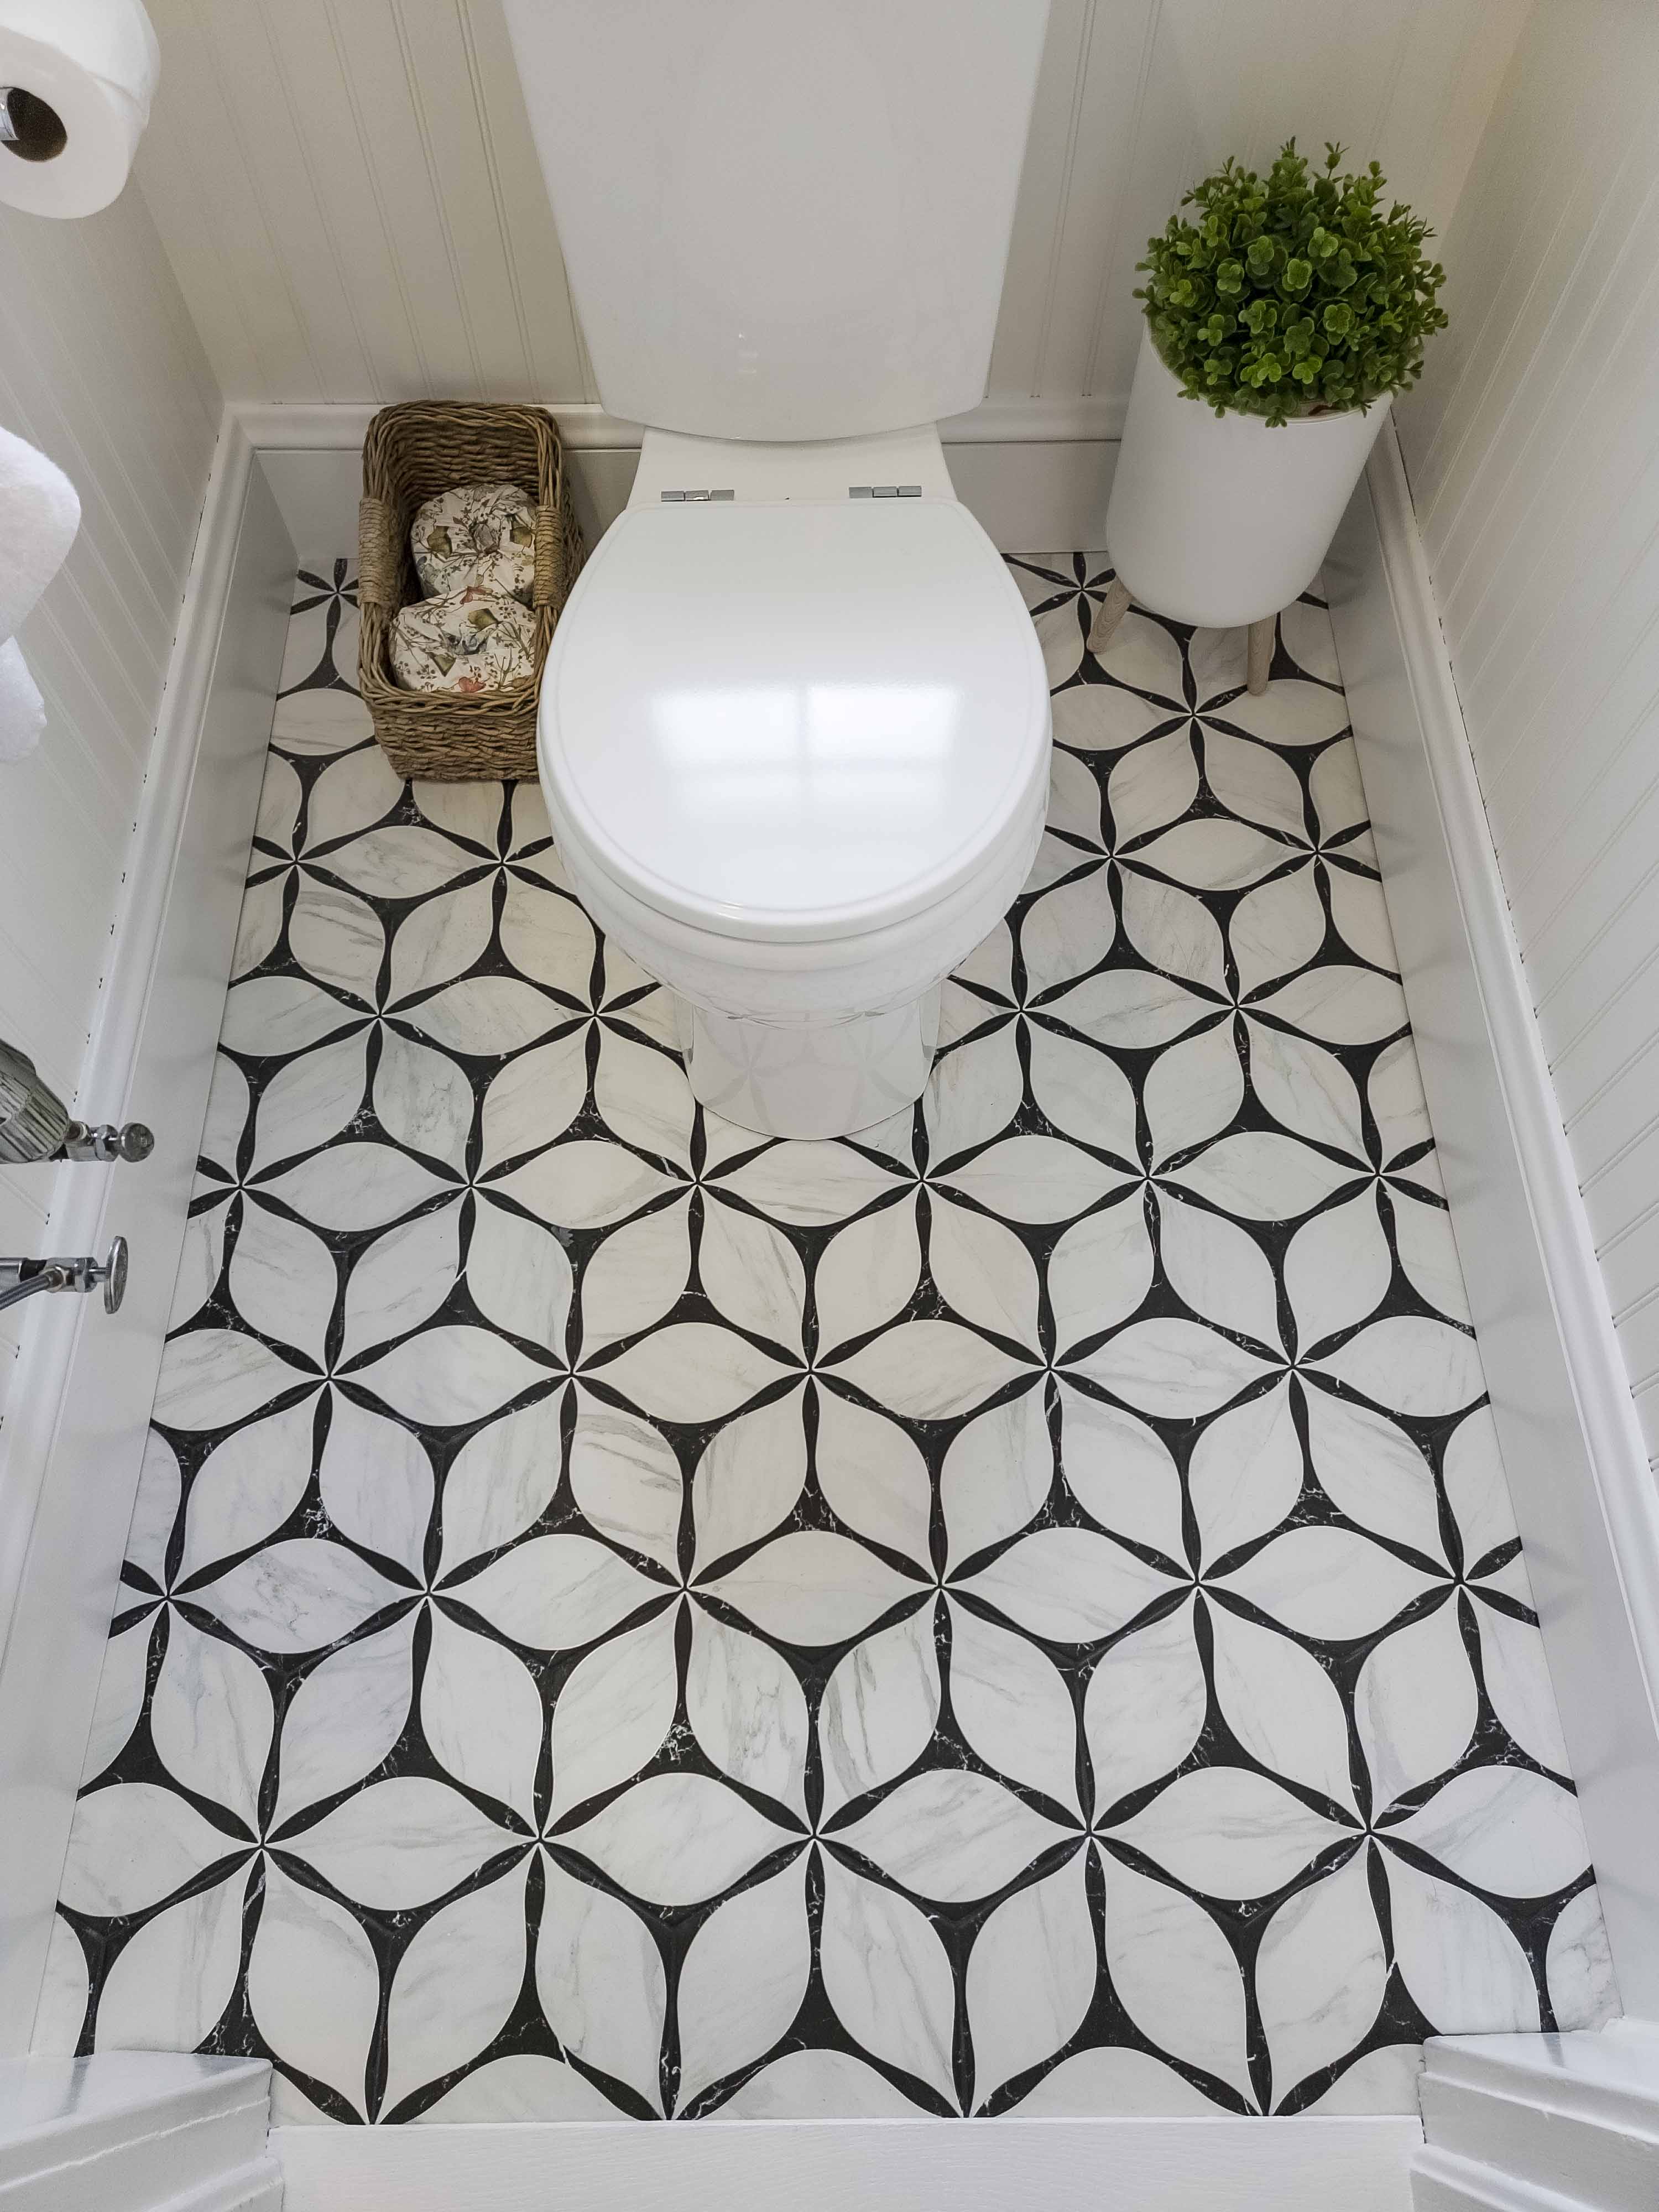
My husband and I LOVE this floor, it is a matte porcelain, it feels great underfoot and we love how our eyes will pick up different patterns from time to time (usually I see the flowers though).
After the flooring was done, I installed the baseboards, I had to have the molding on the top custom milled to match the rest of the house but overall, it wasn’t too expensive to do so as we bought extra knowing we will need some for the kitchen remodel. All of the wood (trim and beadboard) is painted Benjamin Moore Super White. I painted the walls and ceiling BM Polo Blue that I color matched to the wallpaper. Hint: painting the wall behind wallpaper the same color as the wallpaper will help hide the wallpaper seams.
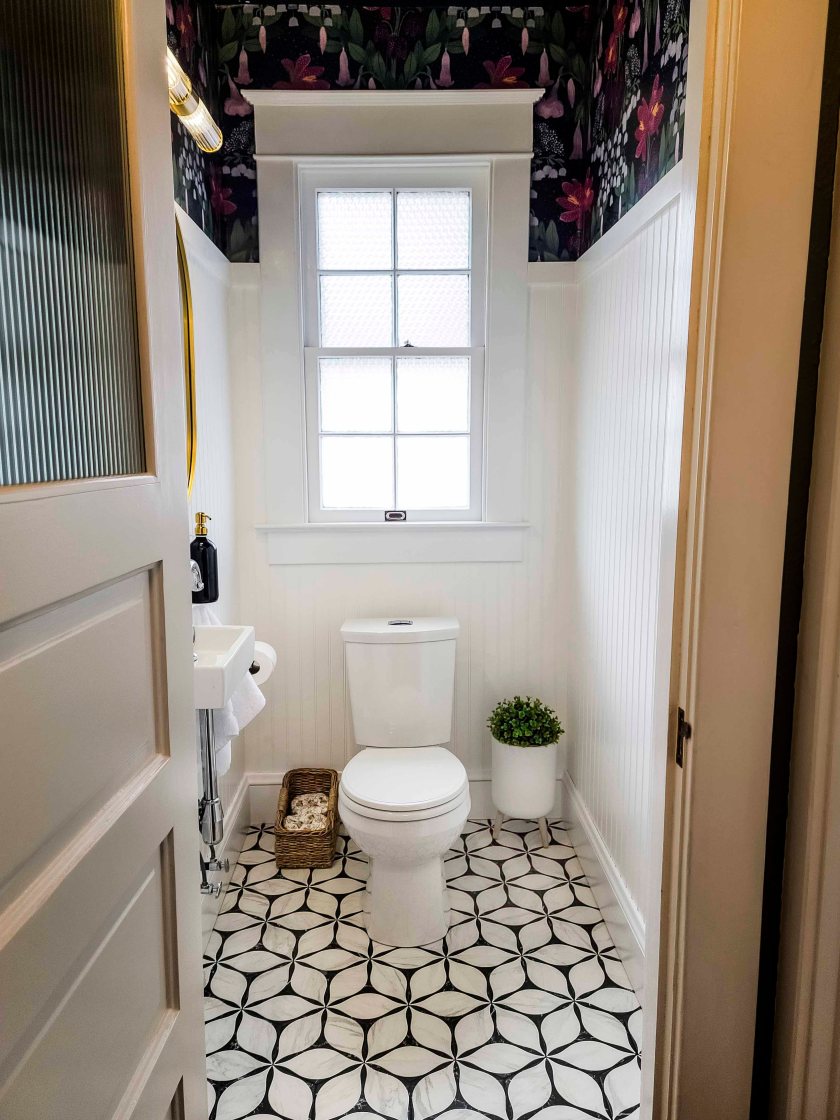
So without further ado, here is our completed water closet renovation!!

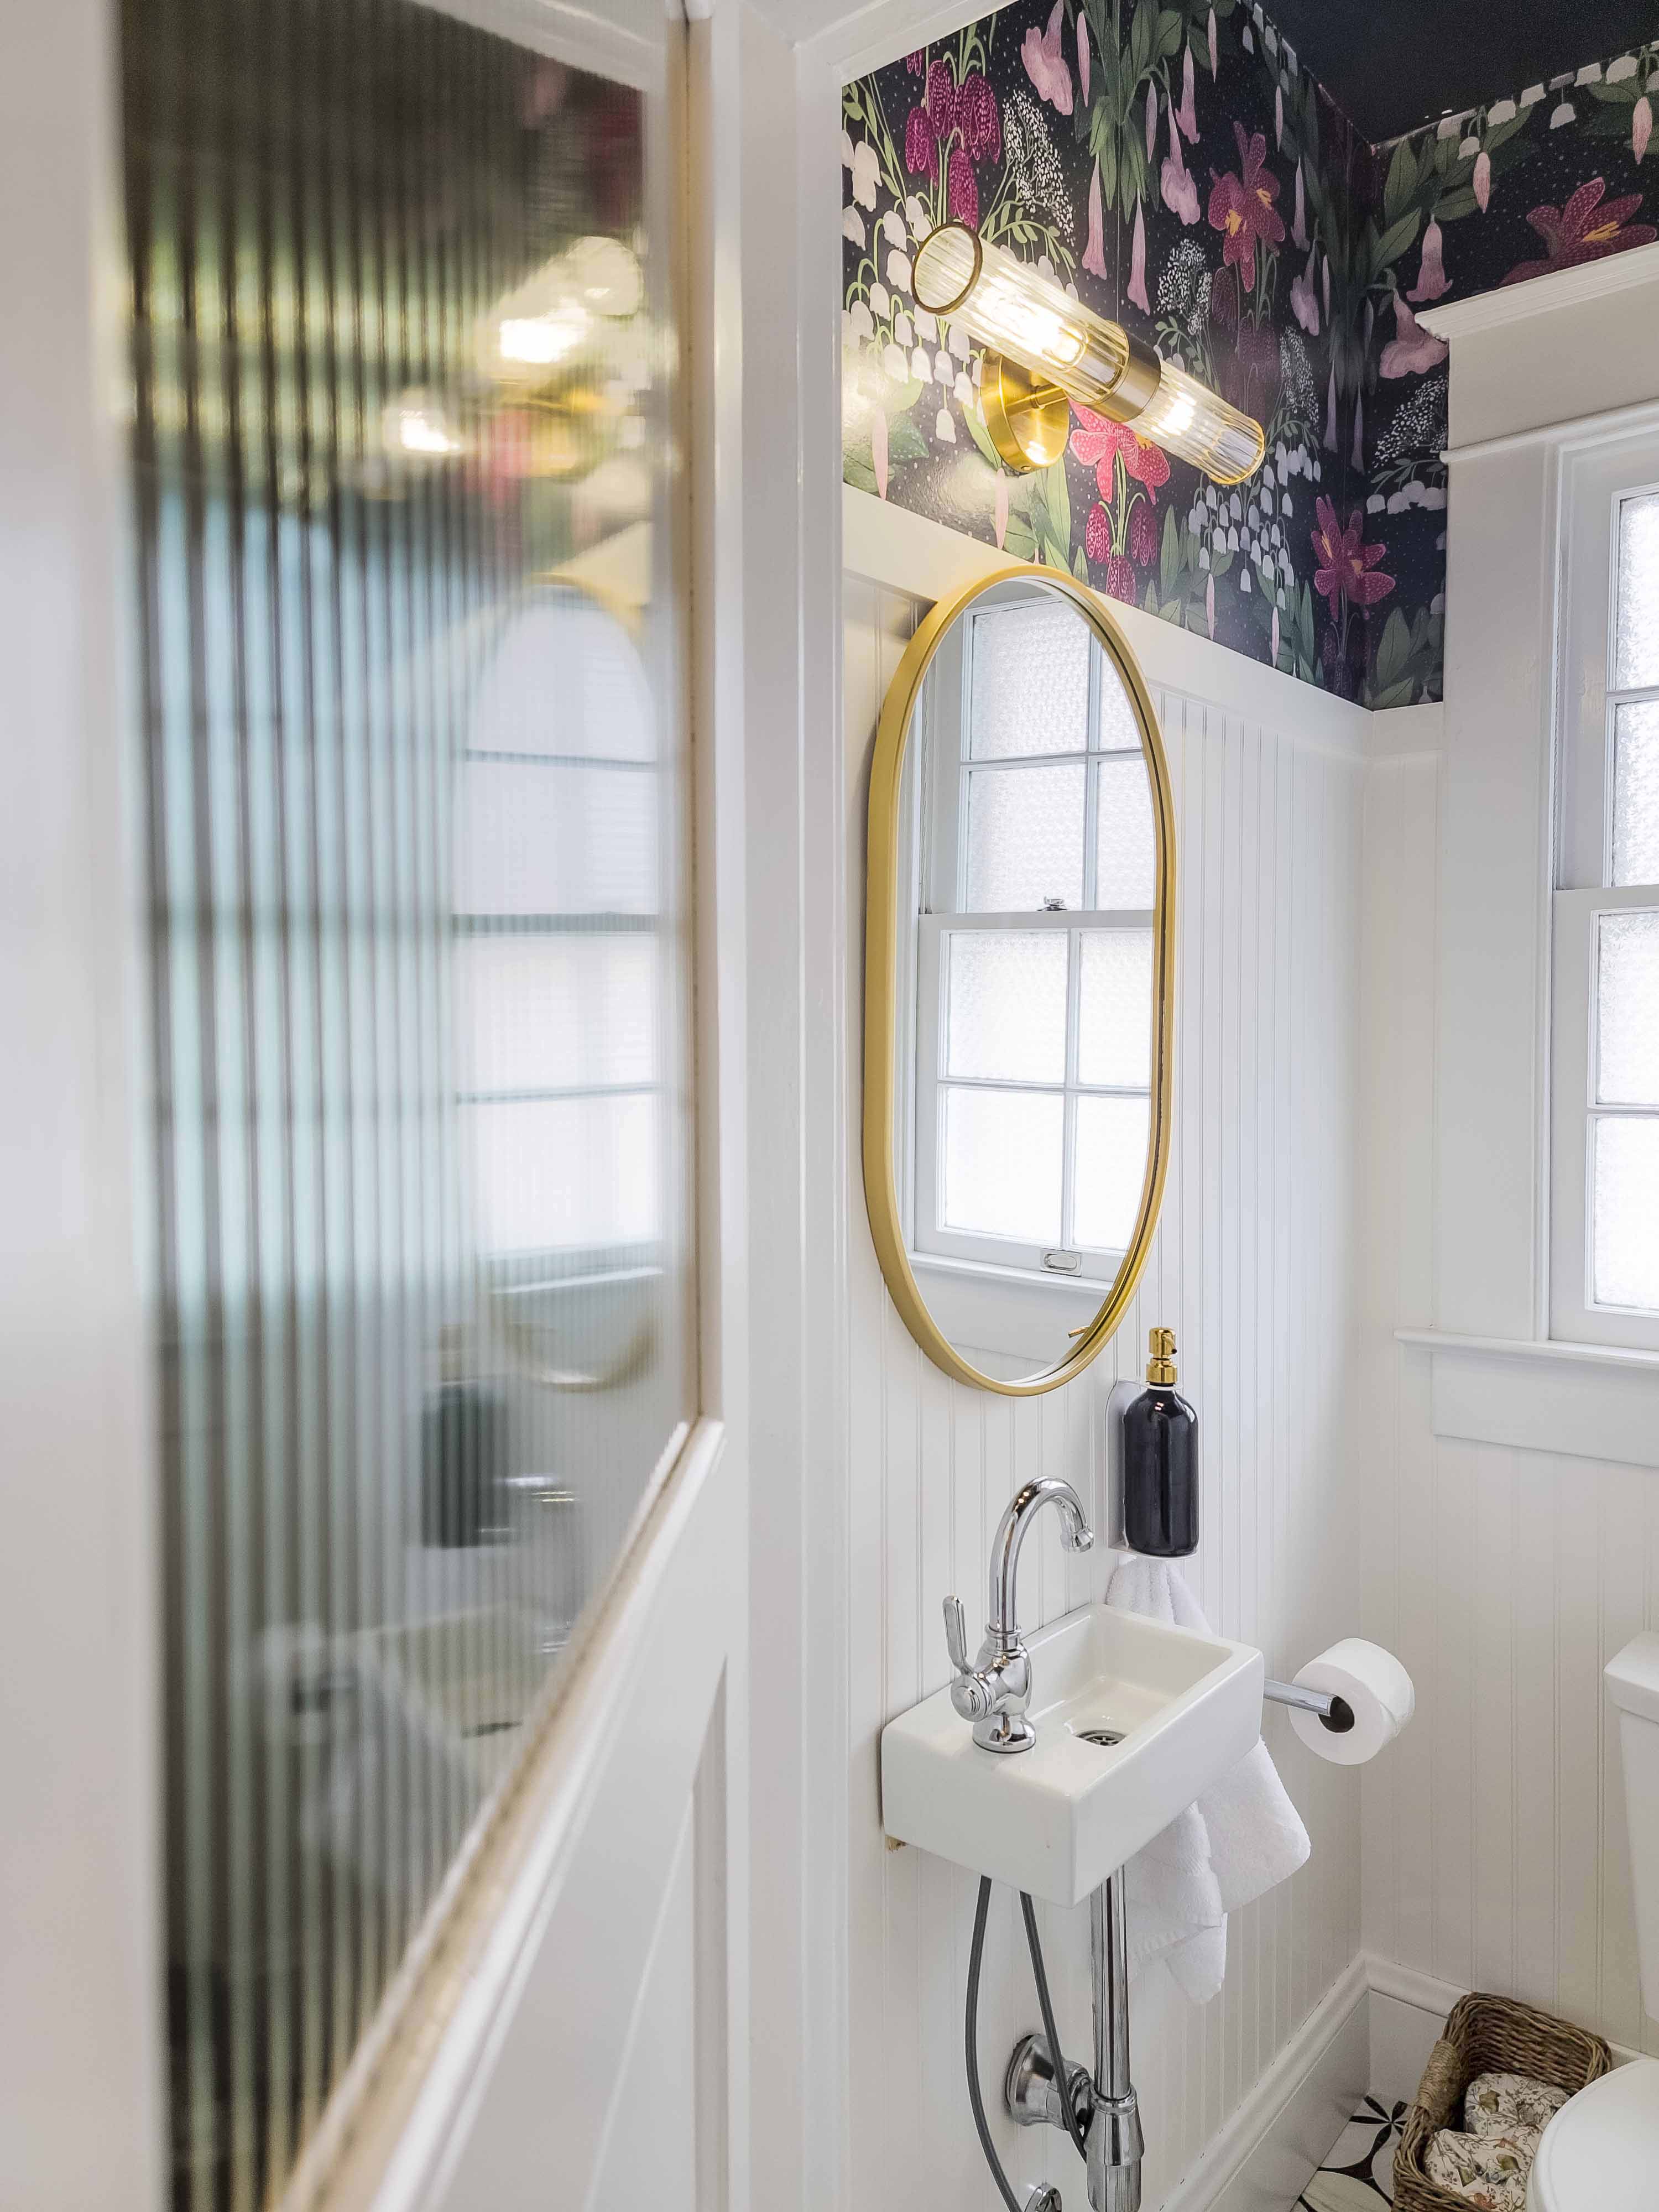
I am so in love with this little room! Yes, I installed the wallpaper and yes, I hated every moment of it, but I did a pretty darn good job and I think it is stunning! Also, all of the window casing is original to the home, I just stripped it, some of it in place and some of it while it was down for window repair.

This teeny, tiny sink is all that is necessary for the room. I will say if you ever buy something this small you will need this “special” bottle trap for it because a normal P trap will not work. All of the contractors we have had here have loved it, it was so cute to see these big dudes fawn over this cute little sink.


By the way the grout lines are just about as small as I could get them and we used black grout, they are almost invisible. And that little “plant” in the corner is actually a trashcan! I debated buying it as I thought it might be too kitschy or something , but I freaking love it!
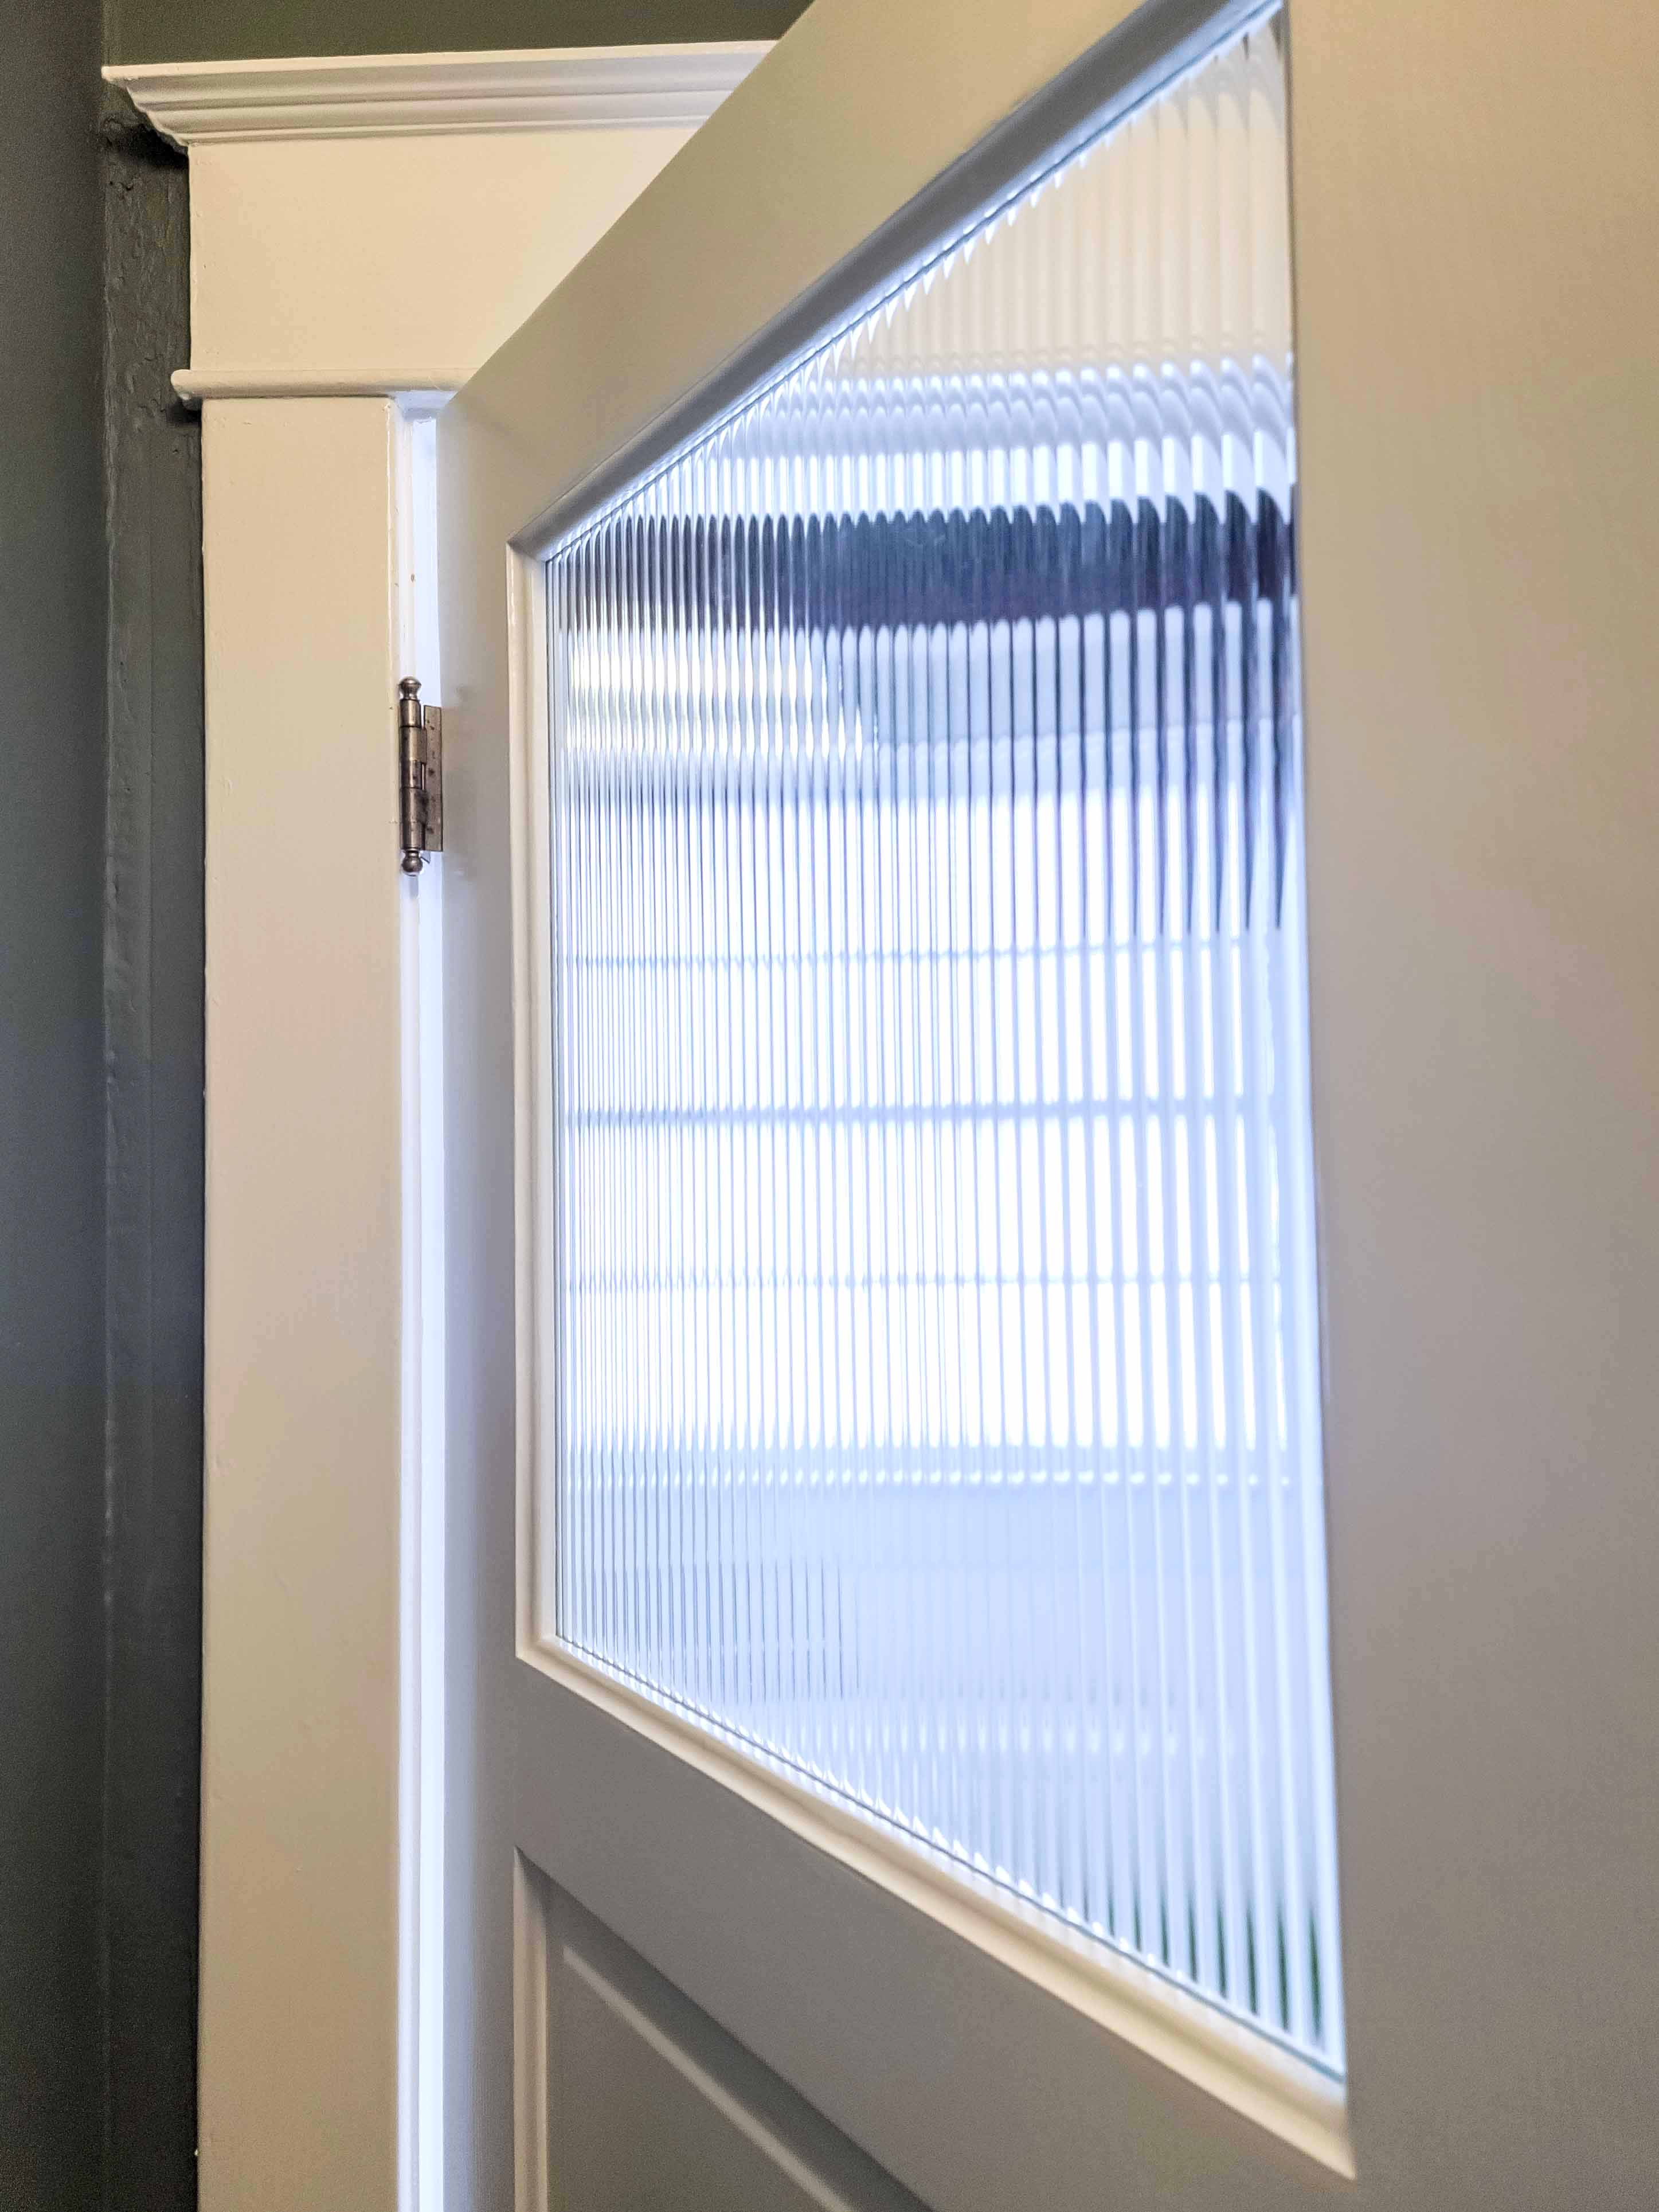
I also revamped the original door to this room. The light from the window in here is just so nice to have in the hall I wanted some glass in the door. So, I stripped the door, cut the top two panels out, installed new trim to hold the glass, installed this beautiful reeded glass and added trim to hold it in place. I painted the door and now I cannot imagine the door any other way.

Ignore the paint on the floors below, we still have work to do elsewhere in the house obviously! And in case you’re wondering all of the door hardware is original (just cleaned up) except for the window latch and pull and a new thumbscrew lock for the door that I needed since it is a bathroom. All of those items I purchased from here and they matched perfectly to the hardware found throughout our home.

So being done with this means I can return my focus on the primary bathroom, which is so tiny but stunning, I cannot wait to share it with you! I don’t have much to do, mainly trim, I just need to focus to get it done.
Anyway, I hope you enjoyed seeing this renovation, I know I love looking in this room every time I walk by!
Until next time..
– Susan


Susan,
I LOVE your water closet remodel!!! Every single feature is perfectly gorgeous AND functional/practical/logical! You’re amazing!
Thanks so much for posting this. I look forward to your seeing your future projects! (We miss you in Hillcrest!)
Warm Regards,
Dana McLendon
LikeLike
Aww, thanks so much Dana for your sweet comments! I miss being in Hillcrest too and Louisville in general (even though I love it in Norfolk as well). I’m so glad you liked the WC renovation, it’s such a small space I thought I could have some fun with it but also make it practical for future families!
LikeLike
It sounds like the project was more work than fun but the result is very impressive! 🙂 I’m glad you’re enjoying Norfolk. It’s certainly a beautiful area. I actually have a friend from Germantown, TN, (east of Memphis) who lives in Norfolk. Judy McCullough and her husband, Dick, now split their time between Norfolk and Bentonville, AR, where their son and his family live.
LikeLiked by 1 person
I didn’t intend to hit send yet. Wishing you well on the renovations of your home. I look forward to seeing more results in your future blog posts. 🙂
LikeLike
I didn’t intend to hit send yet. Wishing you well on the renovations of your home. I look forward to seeing more results in your future blog posts. 🙂
LikeLike
I didn’t intend to hit send yet. Wishing you well on the renovations of your home. I look forward to seeing more results in your future blog posts. 🙂
LikeLike
I didn’t intend to hit send yet. Wishing you well on the renovations of your home. I look forward to seeing more results in your future blog posts. 🙂
LikeLike
I didn’t intend to hit send yet. Wishing you well on the renovations of your home. I look forward to seeing more results in your future blog posts. 🙂
LikeLike