
The demo lasted a very long time, while demo isn’t super exciting it is important to me to record as much of it as possible because I seem to need to refer back to these photos and information from time to time so having it documented is very helpful.
We did “waste” some time with wallpaper removal as we ended up removing all but a few walls. Some for access to plumbing and electrical, some for insulation, some just because the walls were jacked up and needed to be fixed.


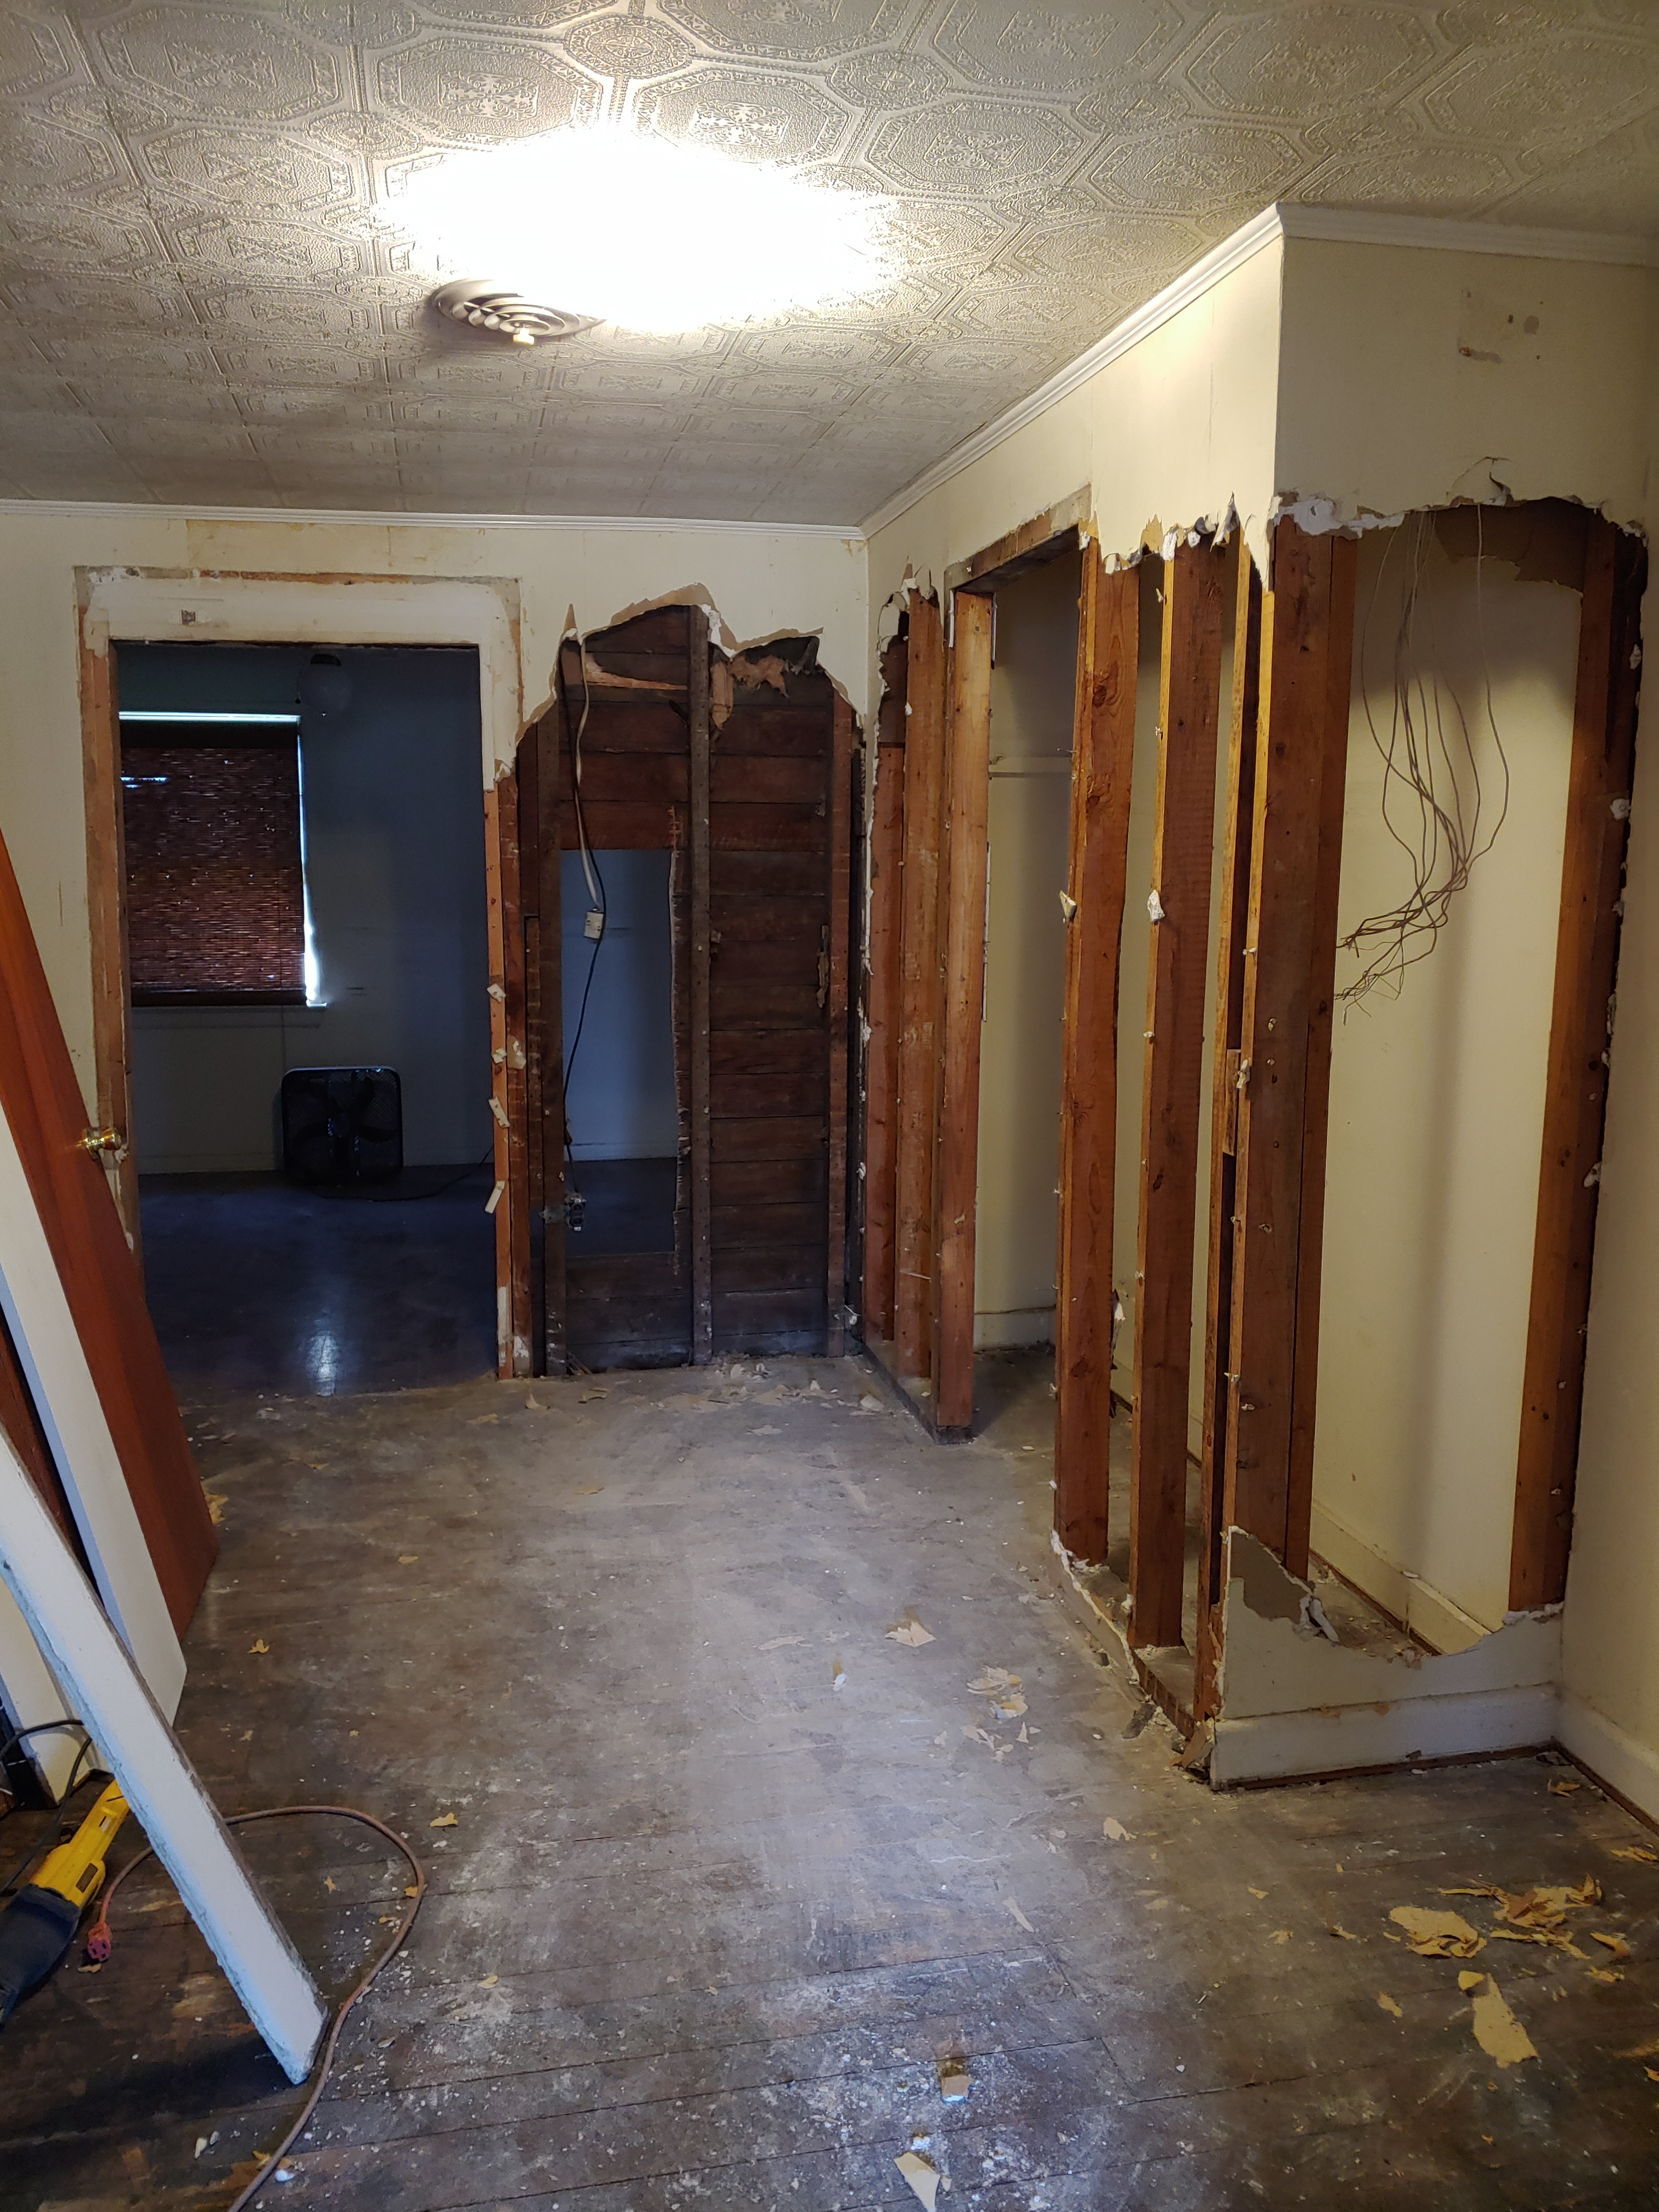


All of the flooring from the kitchen, two bathrooms and a spot here and there had to be removed due to rot. We had a contractor come in and replace the rotten joists etc. so we could install the new subflooring.
We also had a chimney contractor come out and inspect the chimney, as I was hoping I could work it into the design of the new kitchen. Well that was not going to happen as the chimney was pretty much collapsing. It was fairly inexpensive to have them remove it from the roof through the attic and to the first floor and repair the roof. We removed it the rest of the way and saved the bricks for a future something in the back yard. The “mortar” that was holding these bricks together just fell out with barely a tap of the brick, so we were glad we removed the chimney.
It was a very messy job though, plenty of soot towards the bottom of the chimney. I had lots of help from my daughter and her girlfriend, who were true sports about it and thank goodness they didn’t mind getting dirty! By the way we all wore safety glasses, masks and gloves…

One wall of sheetrock I chose to remove in order to expose the original wood siding, I was very happy to showcase this piece of history in this newer addition to the home. This room will be my daughters and she didn’t quite see the vision of saving this old wall, but I know she will when it’s finished!

I will have to patch some pieces and remove a crap ton of staples & nails and fill a bunch of holes, but I’m not going to strip the surface, just repair, prime and paint.
My husband does a fabulous job of making floor plans, this always helps us visualize the space and discuss changes.
This is the original floor plan:
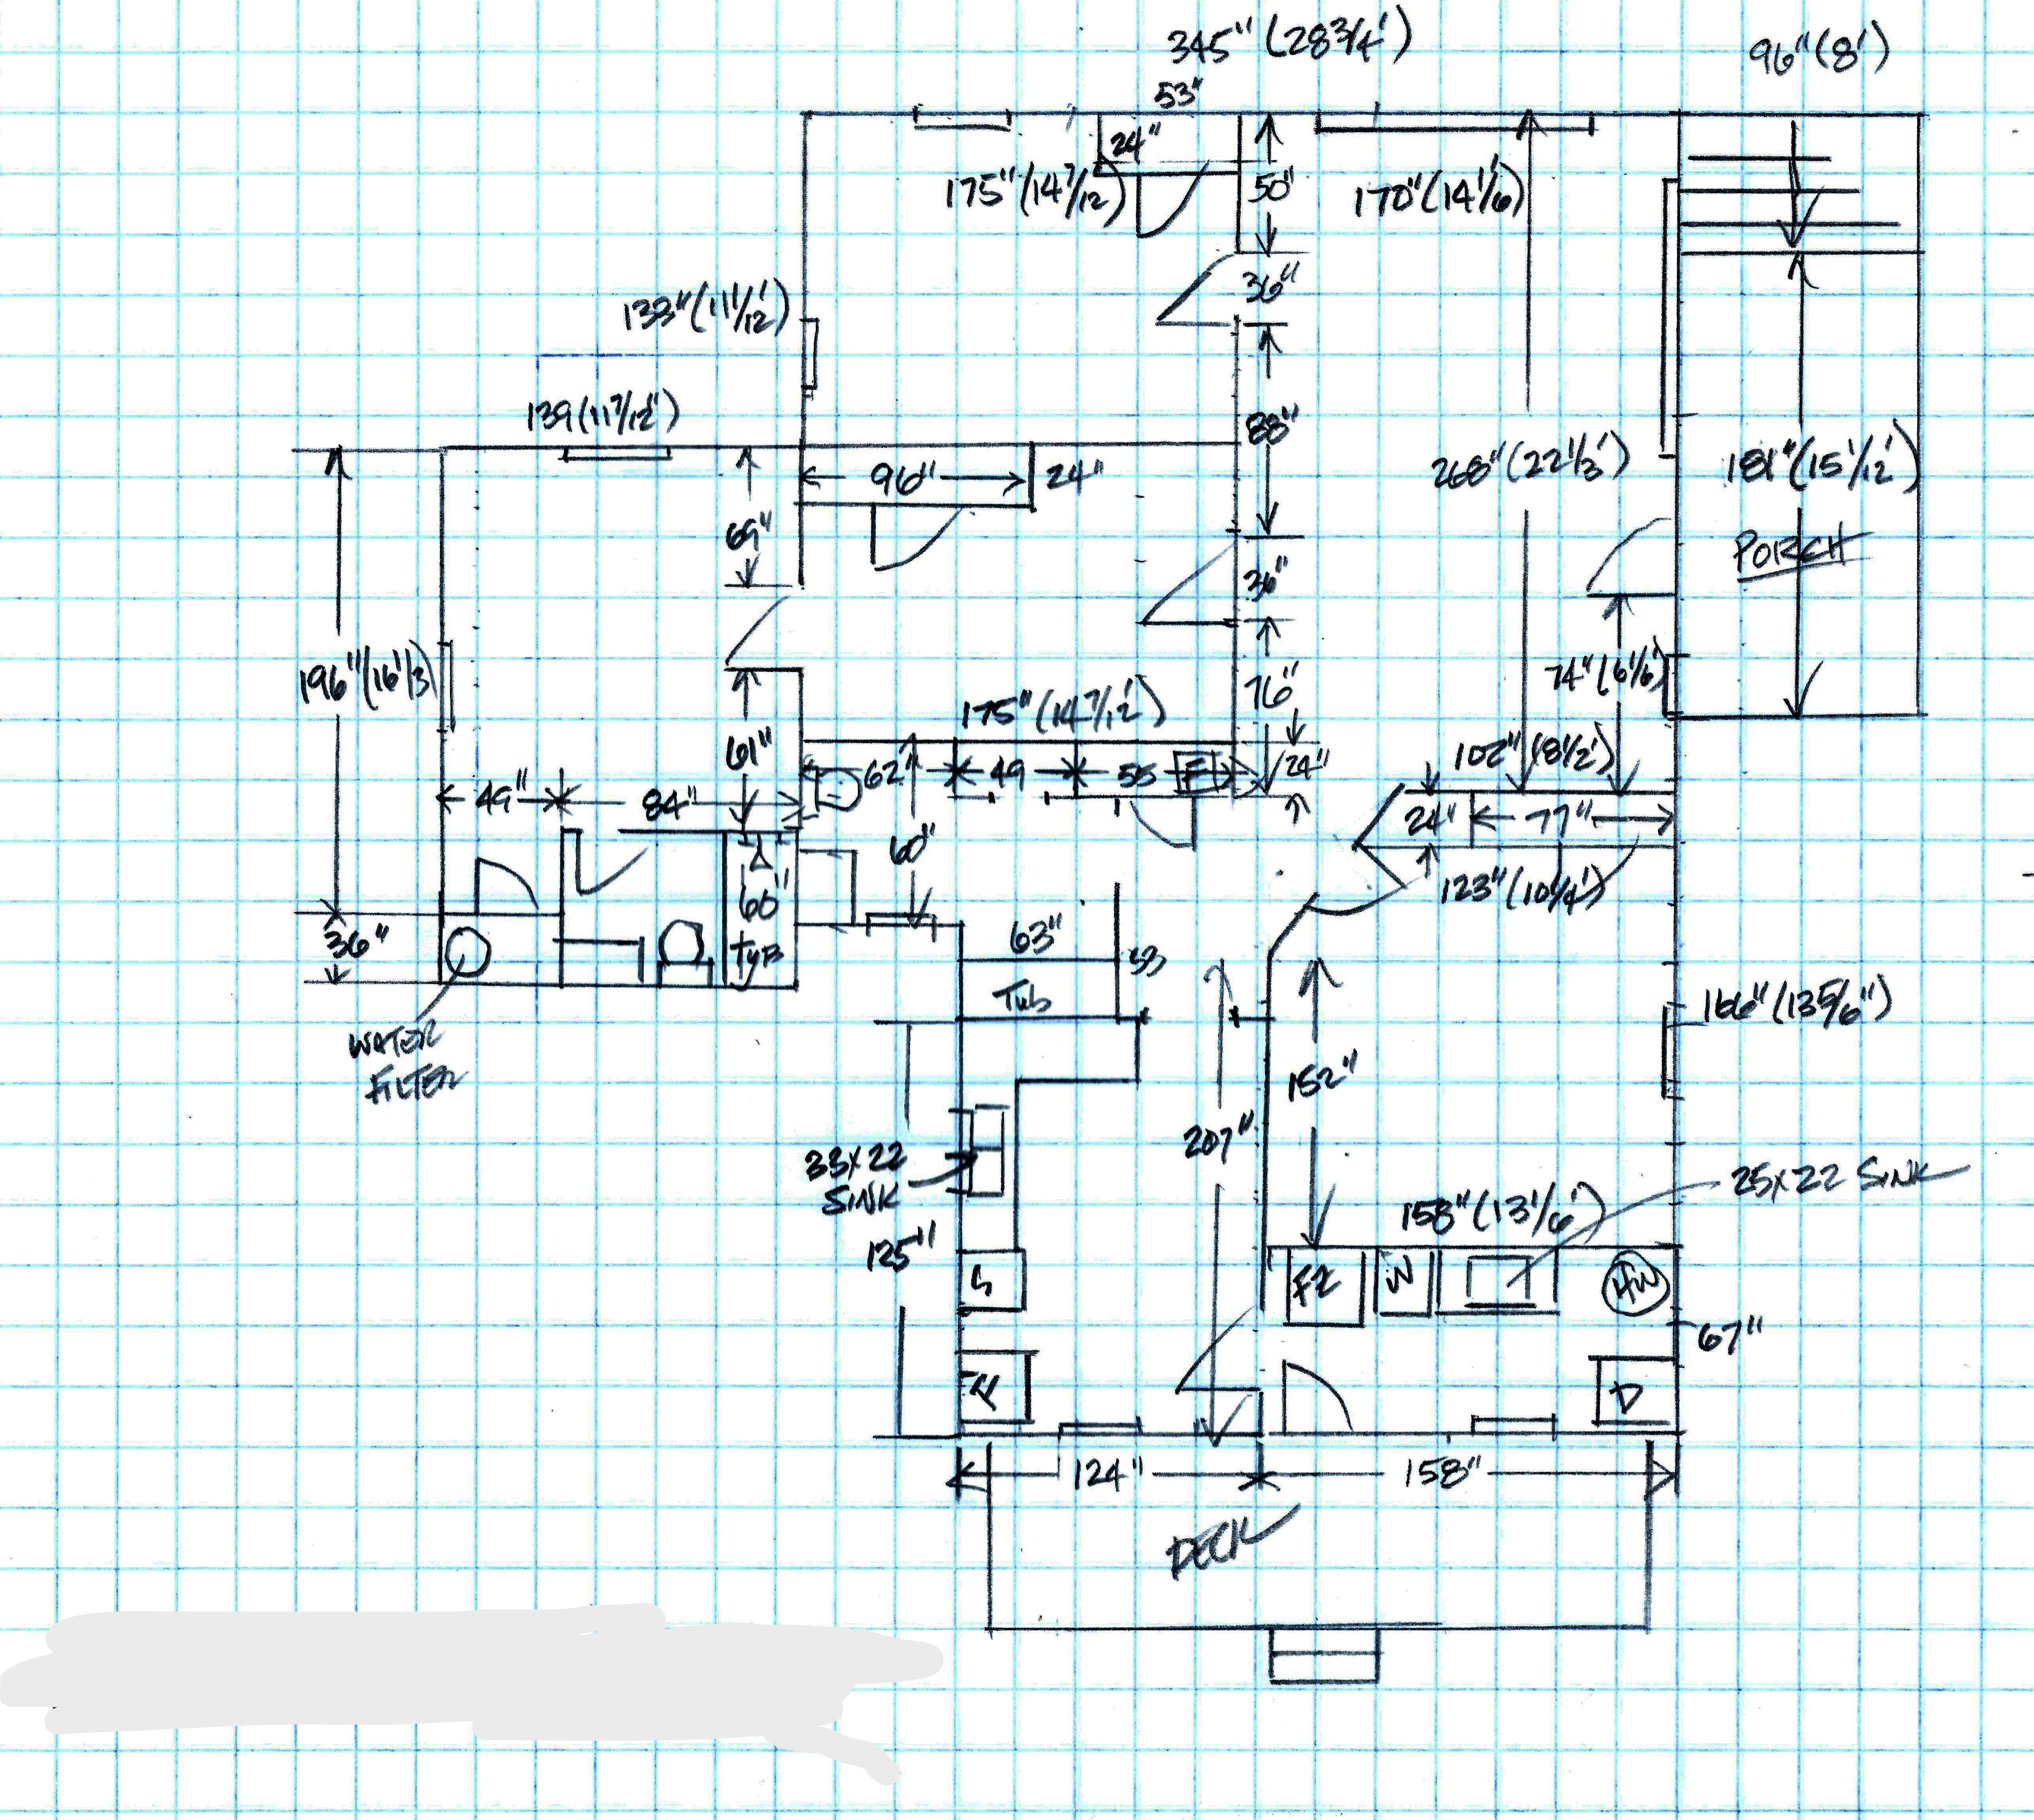
My changes to the floorplan, which I did quickly in order to get the plumbers something to work from:

The biggest changes to the layout are moving the kitchen to where a bedroom was, which allows for the kitchen and living room to be one big room. The original kitchen didn’t have room for eating and there is no dining room, so this layout makes the most sense in order to have somewhere to eat. We also modified one of the rooms into a dressing room for the master bedroom. This room was originally a bedroom, but you had to pass through it to get to the master bedroom so didn’t make sense to stay a bedroom. We also closed off the door to the laundry room from the original kitchen and moved it into the new kitchen.

I have a suspicion that the area we are moving the kitchen to was the original kitchen location. There are ceiling elevation changes and markings on the floor where it looked like there used to be a pantry and a doorway to the laundry room (old back porch) was already framed in.
I’ll work on the rebuilding posts next, as you will not believe how great these spaces turn out!
Thanks as always for stopping by!


