Renovating the master closet and converting it into a dressing room has been a true labor of love for us! This renovation was just part of the overall Master Bathroom renovation, but it had a few small items we still needed to complete in order to consider it 100% done! I’ll take you through a quick photo before and after but if you’re interested in seeing more of the renovation photos and details check out my links at the end of this post.
This was the view into the closet, there was a door off of the master bathroom which is why I consider it a closet before but a “dressing room” now. My side is the first left, hubby’s side is behind mine with the most natural light (he has a tad issue with determining whether clothing is black or blue ![]() )
)

This is the totally unusable dormer window area, with a separate light switch for what purpose I do not know.

This is my hubby’s side of the closet, have I mentioned enough how I hate wire shelving!

Another shot of my side of the closet with the door that lead into the unconditioned storage space.

Original closet layout plan

Renovated closet plans

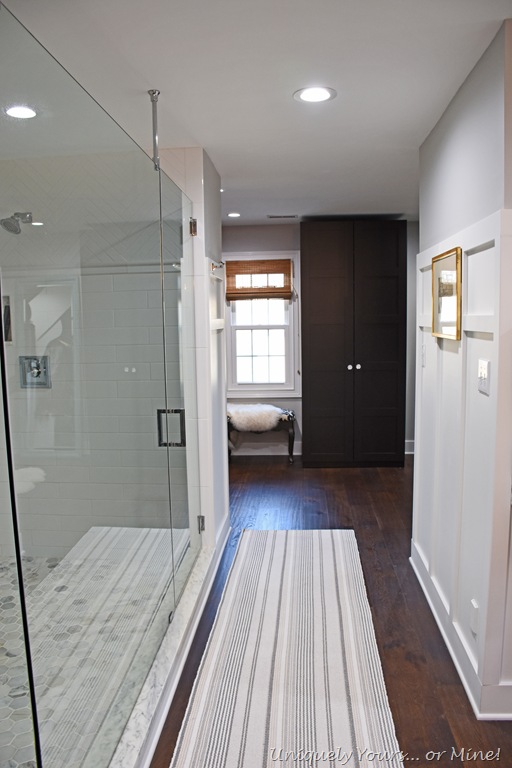
So this is our new view through the master bathroom into the new dressing room. When I was originally designing this space I was concerned about not having a door on the closet (not sure why now), so I did design the walls on either side of this hallway to be able to accommodate a future door if that was what we wanted. I can tell you with absolute certainty though I would never put a door here! I love all of the natural light that pours into the bathroom from the dressing room windows and the overall open feel of the whole design. By the way we installed a high quality exhaust fan in the bathroom that has allayed any fears about moisture I may have had.

My closed wardrobe area that I have setup for my “delicates” and jewelry. Clearly I have a ton of unused space, but I don’t really have anything else to store. I love it though! The doors I painted to match the IKEA brown/black color of the cabinet.

My hanging area for dresses, skirts and long items. I love the solution we designed in order to hang the closet rod on the inclined ceiling.


My custom pull outs for shoes and additional storage for purses etc.


We used heavy duty metal closet rods from Home Depot for all of our hanging. They are very pretty and extremely strong!

My hubby made this simple hanging cabinet for my boots, but I also keep a few sweater items on top.

More hanging space here, with custom wood tops I stained and attached to the brackets.

Now for my hubbies side of the closet. Again using the heavy duty metal rods and custom cut and stained wood tops.


My husband built this small cabinet I designed to fit in this otherwise unused space.

A nice space to charge phones and decorate!


Oh how excited my husband was when he learned he had plenty of room leftover in this cabinet for new shoes!!

Still lots of empty shelf space!

We custom made these dividers for his sock drawer, love them!


An just because Chewy is so nosy and cute I thought I would share this photo with you too…


Our dogs really crack me up!
Anyway I hope you enjoyed my little tour of our completed dressing room! We are loving every square inch of it and are thrilled at how well our design has worked so well for us!
Thanks as always for stopping by and I hope that you all have a Merry Christmas, Happy Hanukkah and a wonderful New Year!!!
Until next time…

PS as promised other closet renovation posts:


This walk in wardrobe space is fantastic – I love it when everything is all in it’s place. It must be nice to have a hubbie that can diy and make stuff for you – no doubt you already know your a lucky lady 🙂
LikeLike