Ok, so if the title didn’t scare you off I think you may enjoy this post! I know there is a bunch of tutorials out there on how to frame a mirror, but you can endure one more right? Maybe you’ll even learn how NOT to do something, which can be helpful as well…
Let me start by saying that we built this house 4 years ago and for most of that time I have wanted to frame out the mirrors. Why did I wait that long you ask… well I always sometimes have the tendency to make a project much bigger than it needs to be as in “lets put frames around the mirrors, but if we do that then we need to enlarge the shower, replace the tub, remove the tiles” oh it goes on & on with me sometimes! I finally said screw it! It cost us about $30 to make these frames and I just love them!
Enough blathering, on with the project…
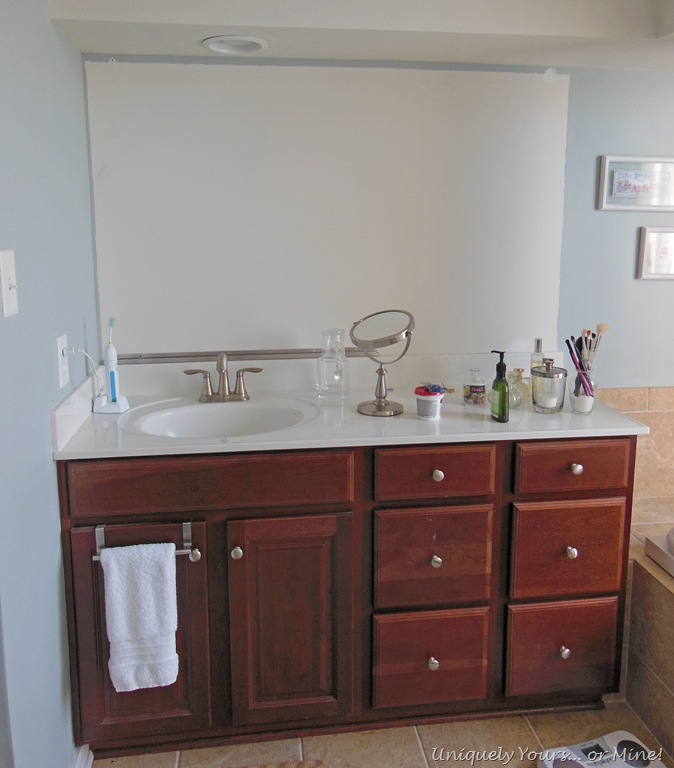
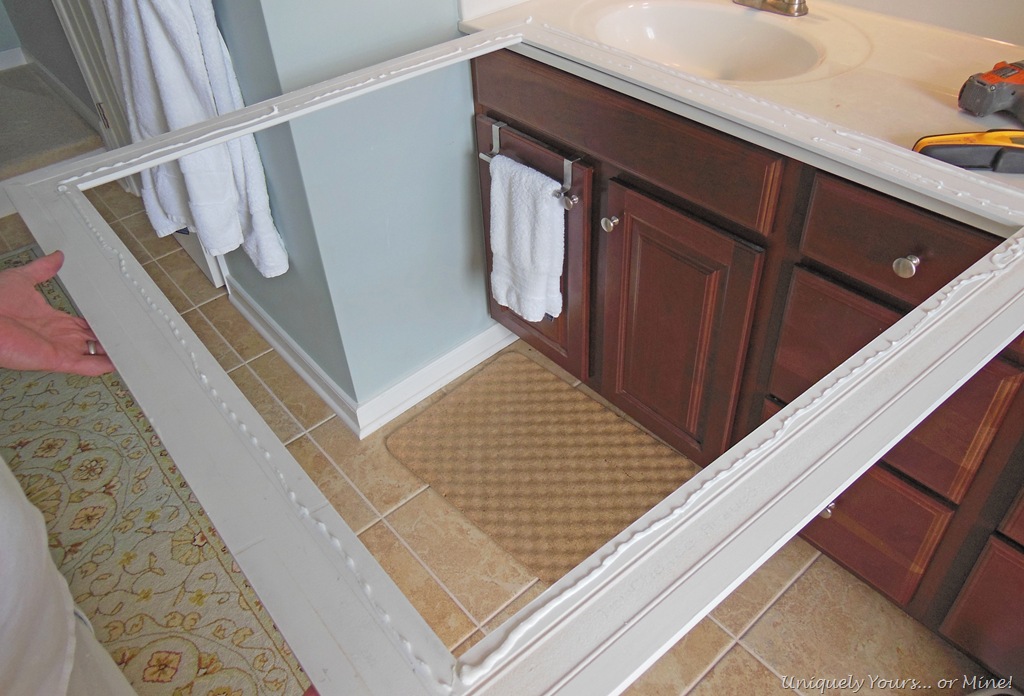
So we started off sort of like this… but imagine a big mirror covering the entire space over the vanity (where the white paint is), I’m sure some of you must have this or have had this setup in your own homes.
We decided to make the frames first, then install them and this is the way we did it…
First we cut the wood trim to size using our miter saw, cutting the ends at 45 degree angles. Then we use a biscuit joiner tool to cut a biscuit notch in the wood trim on each end. We did a dry fit around the mirror to make sure it fit right before moving onto the next step… see we have learned from our “mistakes” in the past.
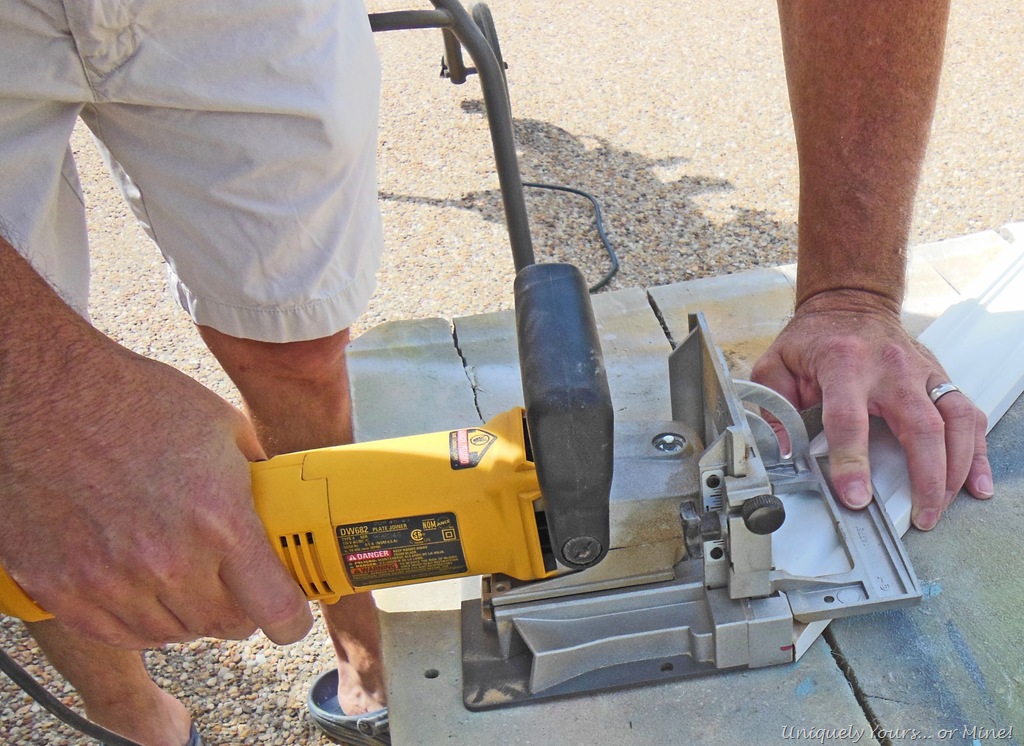
We applied wood glue and a biscuit in the notches.

We then attached all of the pieces together and clamped it with my frame clamp. My frame clamp is one of my all time favorite tools, perfect for all kinds of clamping projects, I highly recommend buying one! Are you wondering why this frame looks so small? If you’re not don’t worry about it, if so good catch! I’ll show you why…

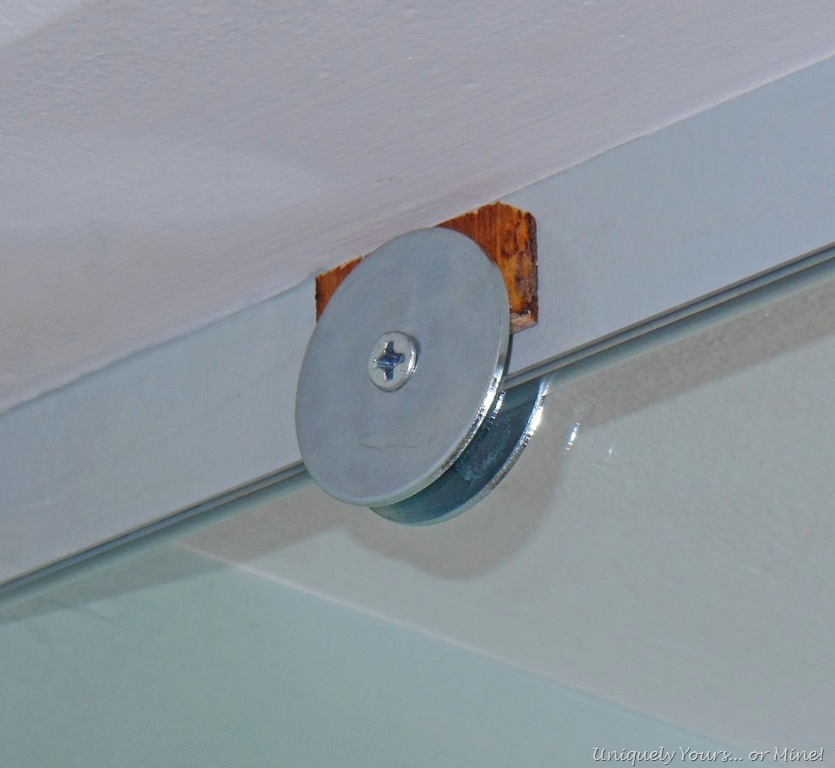
This is why… “someone” (not saying who) over tightened the washer when he was replacing the original mirror clip and it broke my mirror… I think he thought I was going to have a fit (which is SO unlike me), but really I never wanted the huge mirror so this little oops worked out well for me!

My hubby (or the usual suspect as I like to affectionately refer to him as) took the mirror to the glass shop and for $8 had it cut down to the size I wanted… a WIN for both of us!
Here is the solution we came up with in order for the frame to sit as flush as possible to the mirror. We replaced the original clips with washers and added a small piece of wood behind them to keep them level with the mirror… I cannot stress this enough DON’T OVER TIGHTEN THE SCREWS or you may be making a trip to the glass cutter too! ![]()
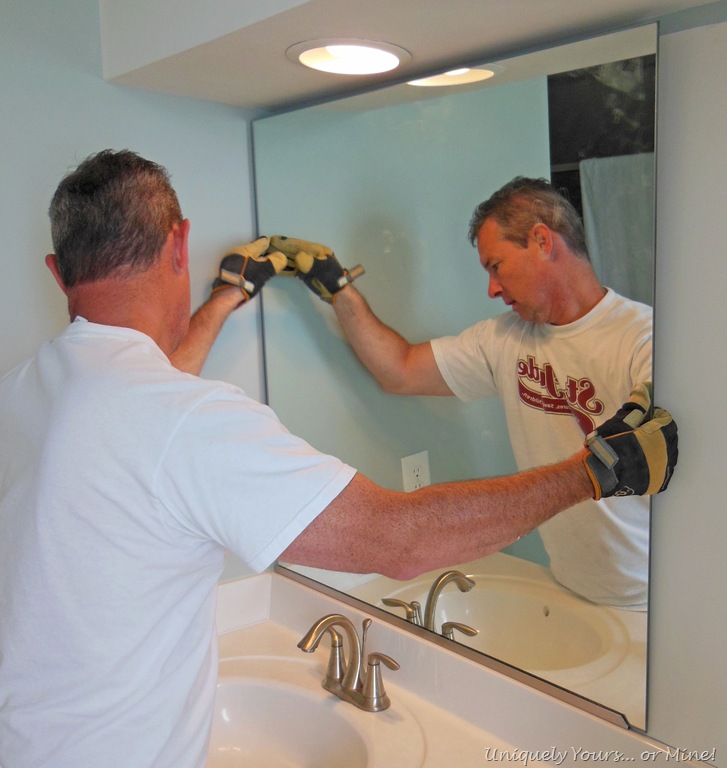
After we primed and painted the frames we brought them to the bathroom, applied Loctite caulk to the back of the frame and then placed it on the mirror, pressing firmly.
We used painters tape to temporarily hold the frame in place overnight.

I seriously CANNOT believe I waited 4 years for these! And now that we’re moving someone else gets to enjoy these… I WILL do this project again in our next house and not wait 4 years to do it either!
Here are the finished frames…

These are the floating shelves my SAH made me… aren’t they fabulous! Did I mention he used cheap hollow core doors and some molding to make them? Well he did and I love them… I guess I have to leave them behind too ![]()

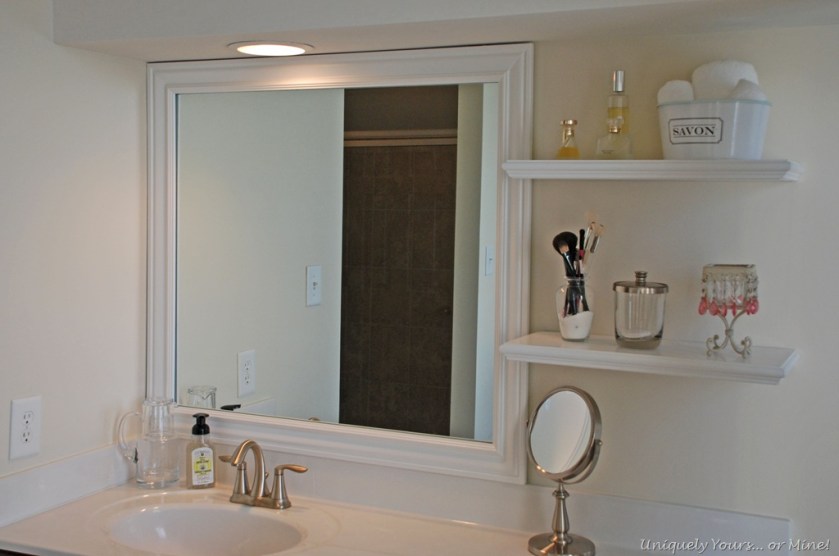
Here is my Hubby’s side… he has the huge mirror so he can do all his “primping”… just kidding he doesn’t primp… but the mirror looks 1000x’s better with just a simple frame around it.

As I have this HUGE tub deck I needed something to fill the space on this side, my new hutch is on the other side so now the deck feels balanced.

This cute bench from Home Goods works PERFECTLY… add a “few” candles and it’s a focal point! I also get lots of morning light streaming in my bathroom window in the morning, so I added these plants that love it there and grow crazy long… I have to cut them back all of the time!

This is the only chandelier left hanging in the house that will not convey… I bought it in Savannah at a cute store called the Paris Flea Market and I’m not leaving it!

Finally the whole tub deck area… see all of that morning light!

Hope you liked my little mirror frame tutorial and bathroom tour! Does it look good enough for someone else to want to move in? I hope so…
Until next time…
Thanks so much for stopping by!


Ok – first of all your bathroom is the size of my home –
AND second of all your husband screws things in exactly like John LMHO – seriously
John shakes with the force he uses!
The mirror looks fantastic 🙂
XOXO
LikeLike
That’s funny Suzan! My bathroom looks huge, but really it’s just the tub deck area… Shower is pitifully inadequate 😦
LikeLike