
I guess I can sort of call the work on the Laundry Room a renovation, as we did strip a lot of it down to the studs, but we left the original flooring so I will call it a makeover… Don’t get me wrong, if I had had my way I would have replaced the floor too, but honestly it really is unoffensive, if not exactly what I would have chosen, plus it was only 2 years old so it is in very good shape… maybe one day…
I can tell you what was offensive and, in my mind, had to change:
- Lack of storage, why oh why do you install one piddly ass cabinet over the washer dryer I will never understand…

- No place to actually fold laundry, except for right on top of the washer and dryer of course.
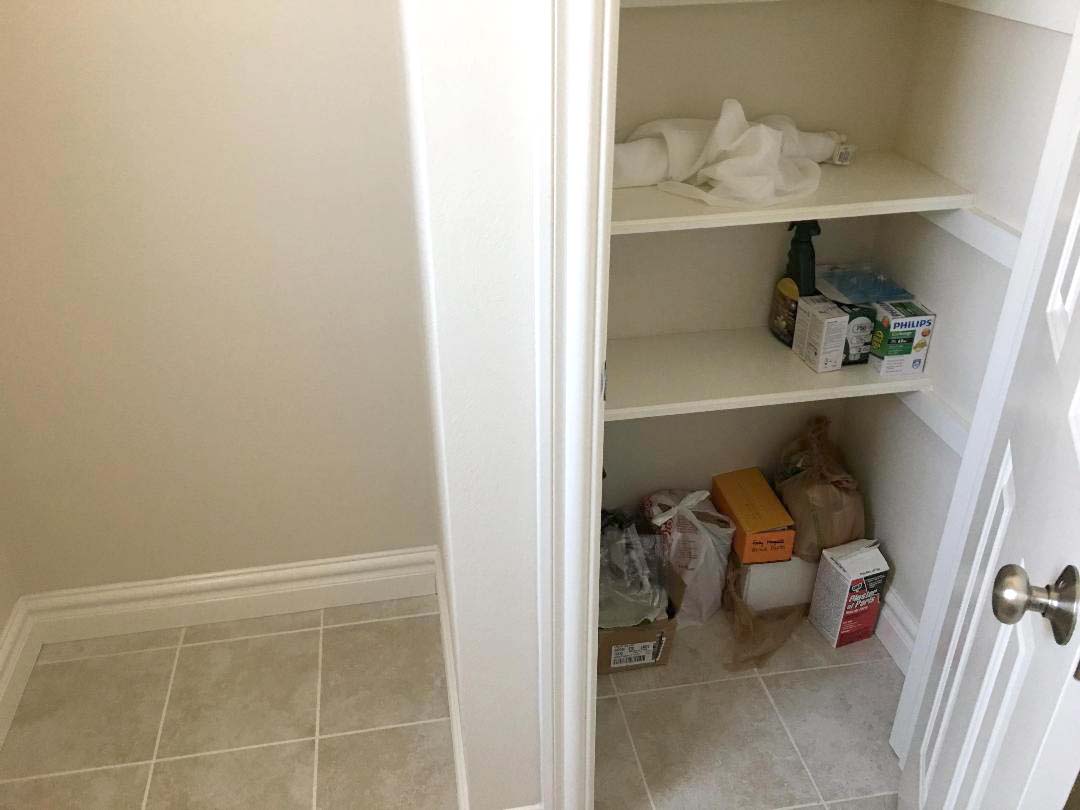
- There was a storage closet in the room, but you had to close the laundry room door once you were in the room in order to open the closet door, very dysfunctional. Plus, it had only 12” deep shelves (again?) and lots of wasted space at the top since the door was only 7ft. tall.

- Why the original owners didn’t spring for a laundry sink in the open space next to the closet I don’t understand, but this issue turned out to be a blessing in disguise.
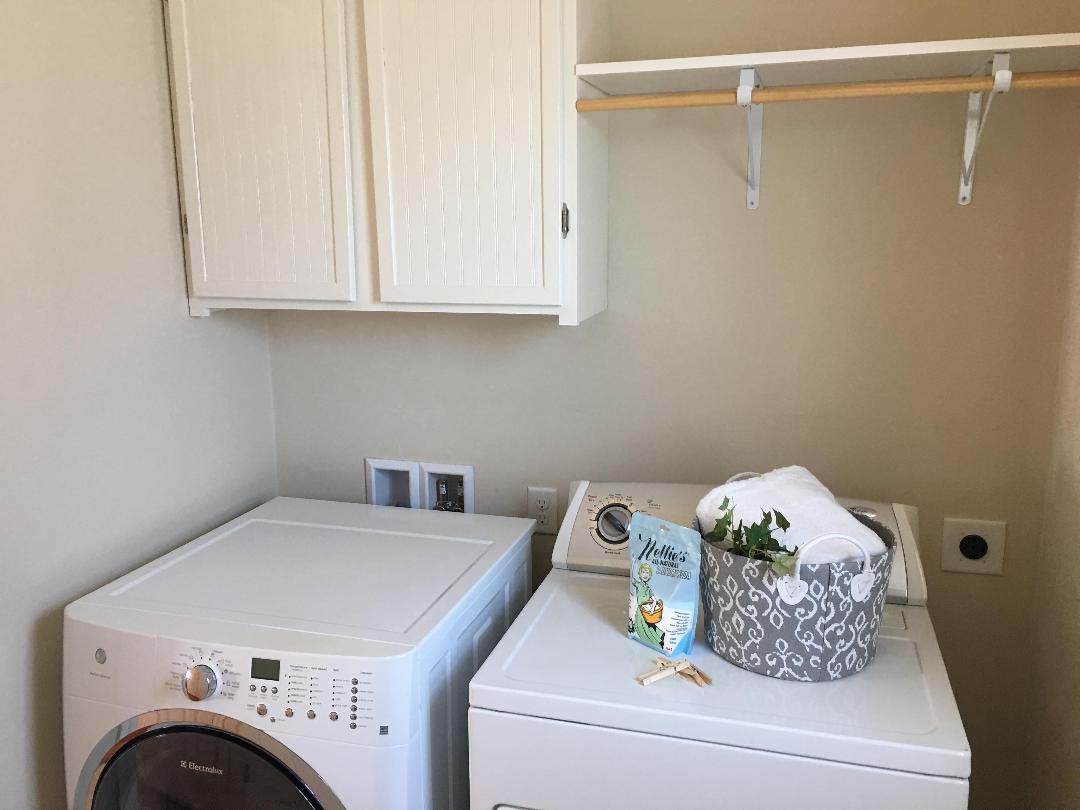
So, my goals were better and more storage (because I am a freak for storage), laundry (read paint) sink, dedicated folding area and an overall better vibe and organization for the room…
The first action we took was to remove the closet (these are the best “before” photos I could find), leaving the frame at the very top of the ceiling and the left side. We were trying to set it up in such a way that we wouldn’t have to repair the textured ceiling or replace floor tiles, but maximized storage potential

We also took the opportunity to add electricity to the now open closet AND the pantry (which is right beside the laundry room in the kitchen), I have some serious pantry ideas that will require electricity in there in the future. Don’t worry hubby is a mechanical engineer and fully qualified and experienced to perform this particular electrical work..


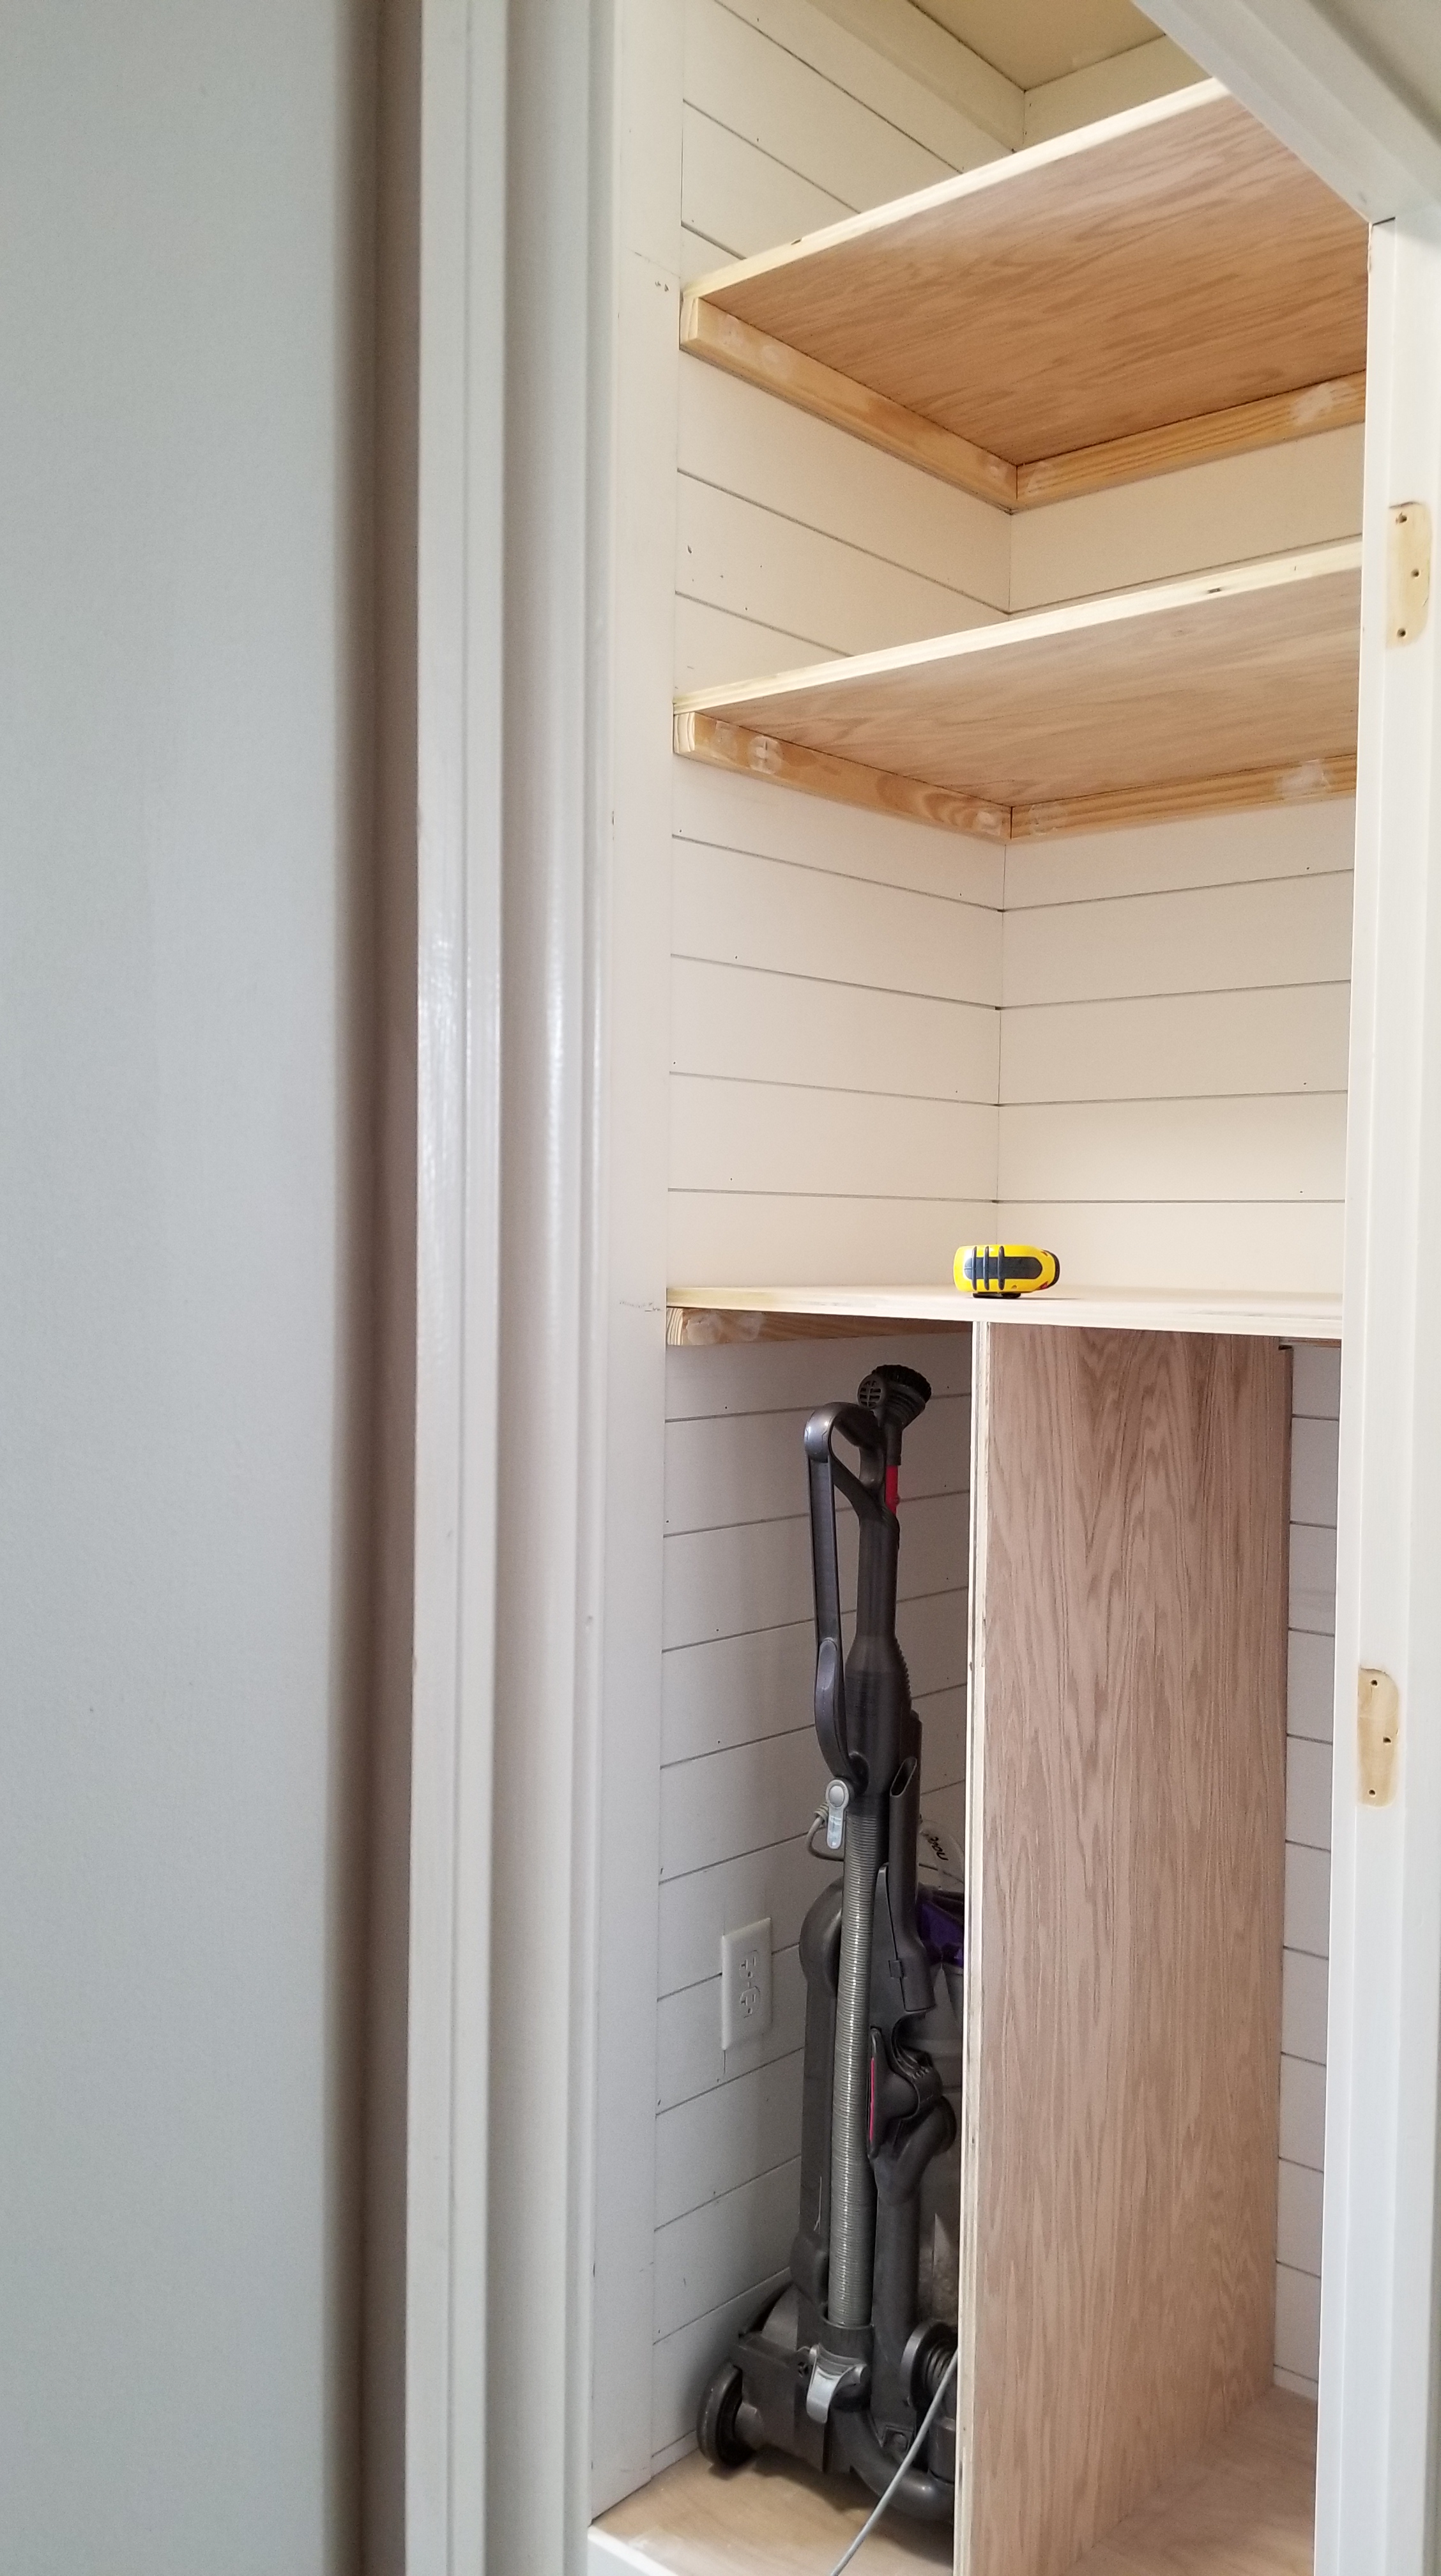
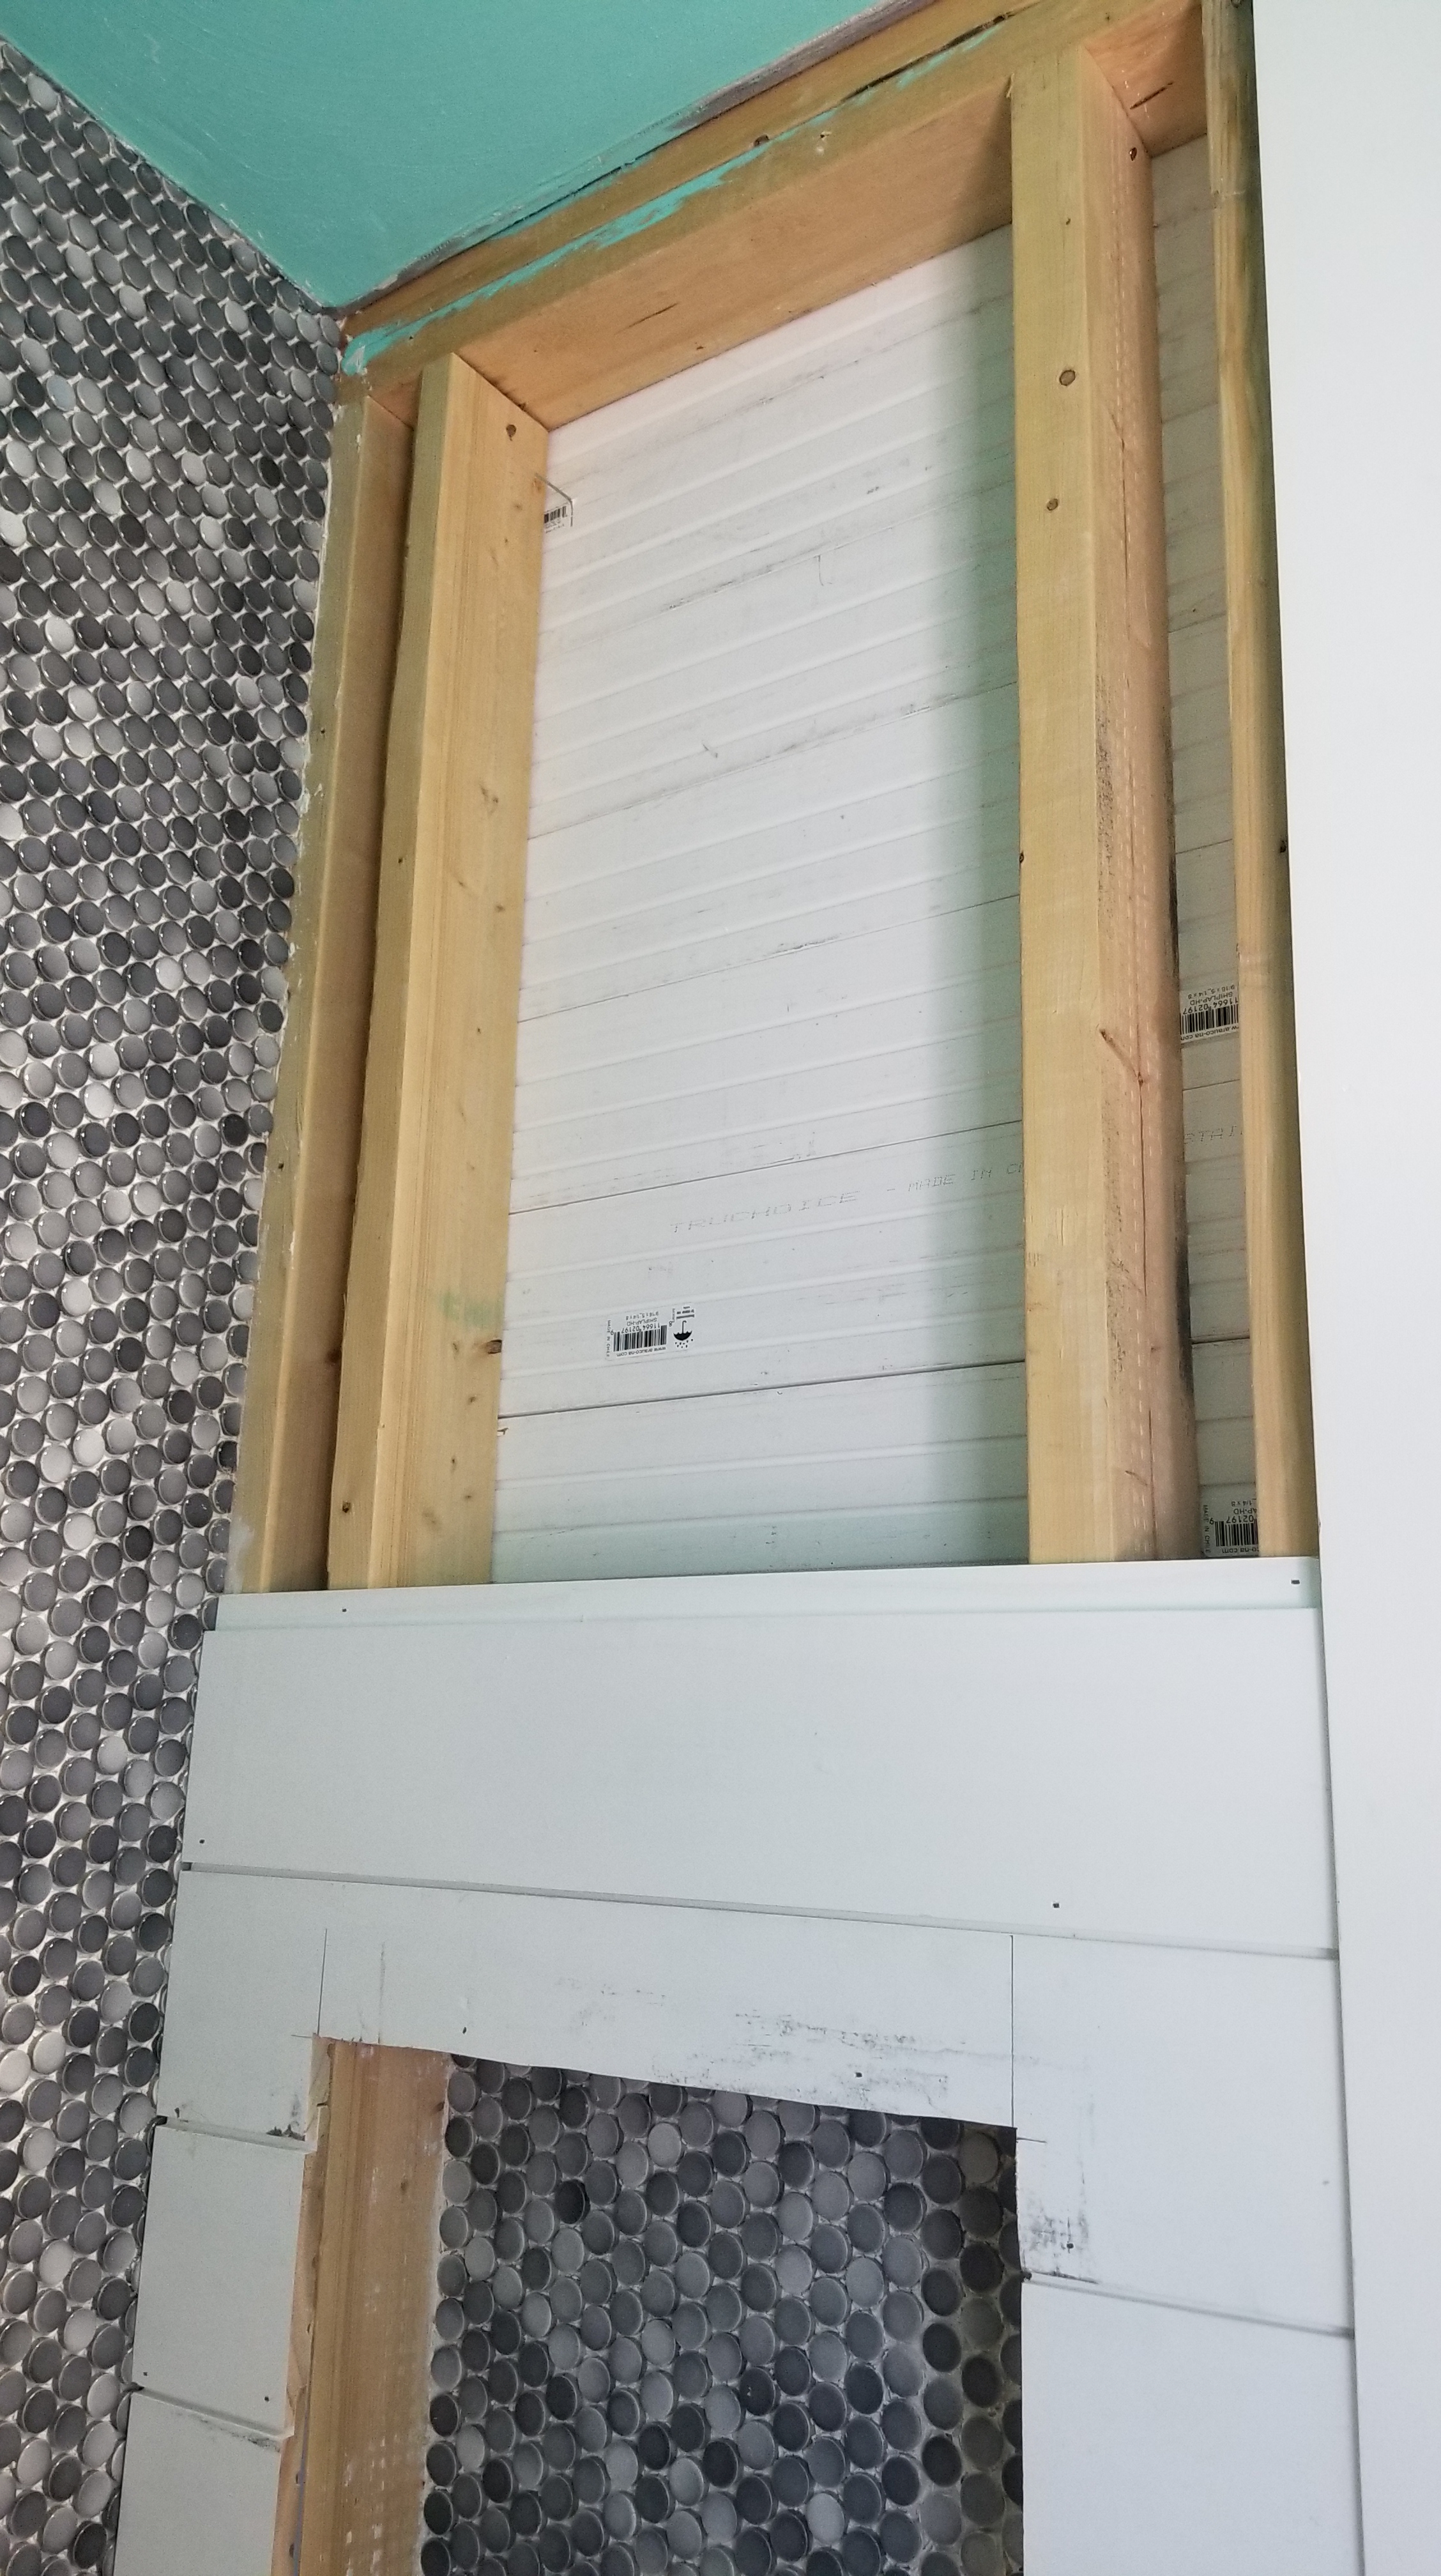
The bottom 2/3rd’s or so of the walls and the entire new open closet we decided to plank in ½” nickel gap planks. I looked at a ton of “easier” options, but at the end of the day this was the look I wanted for the room.

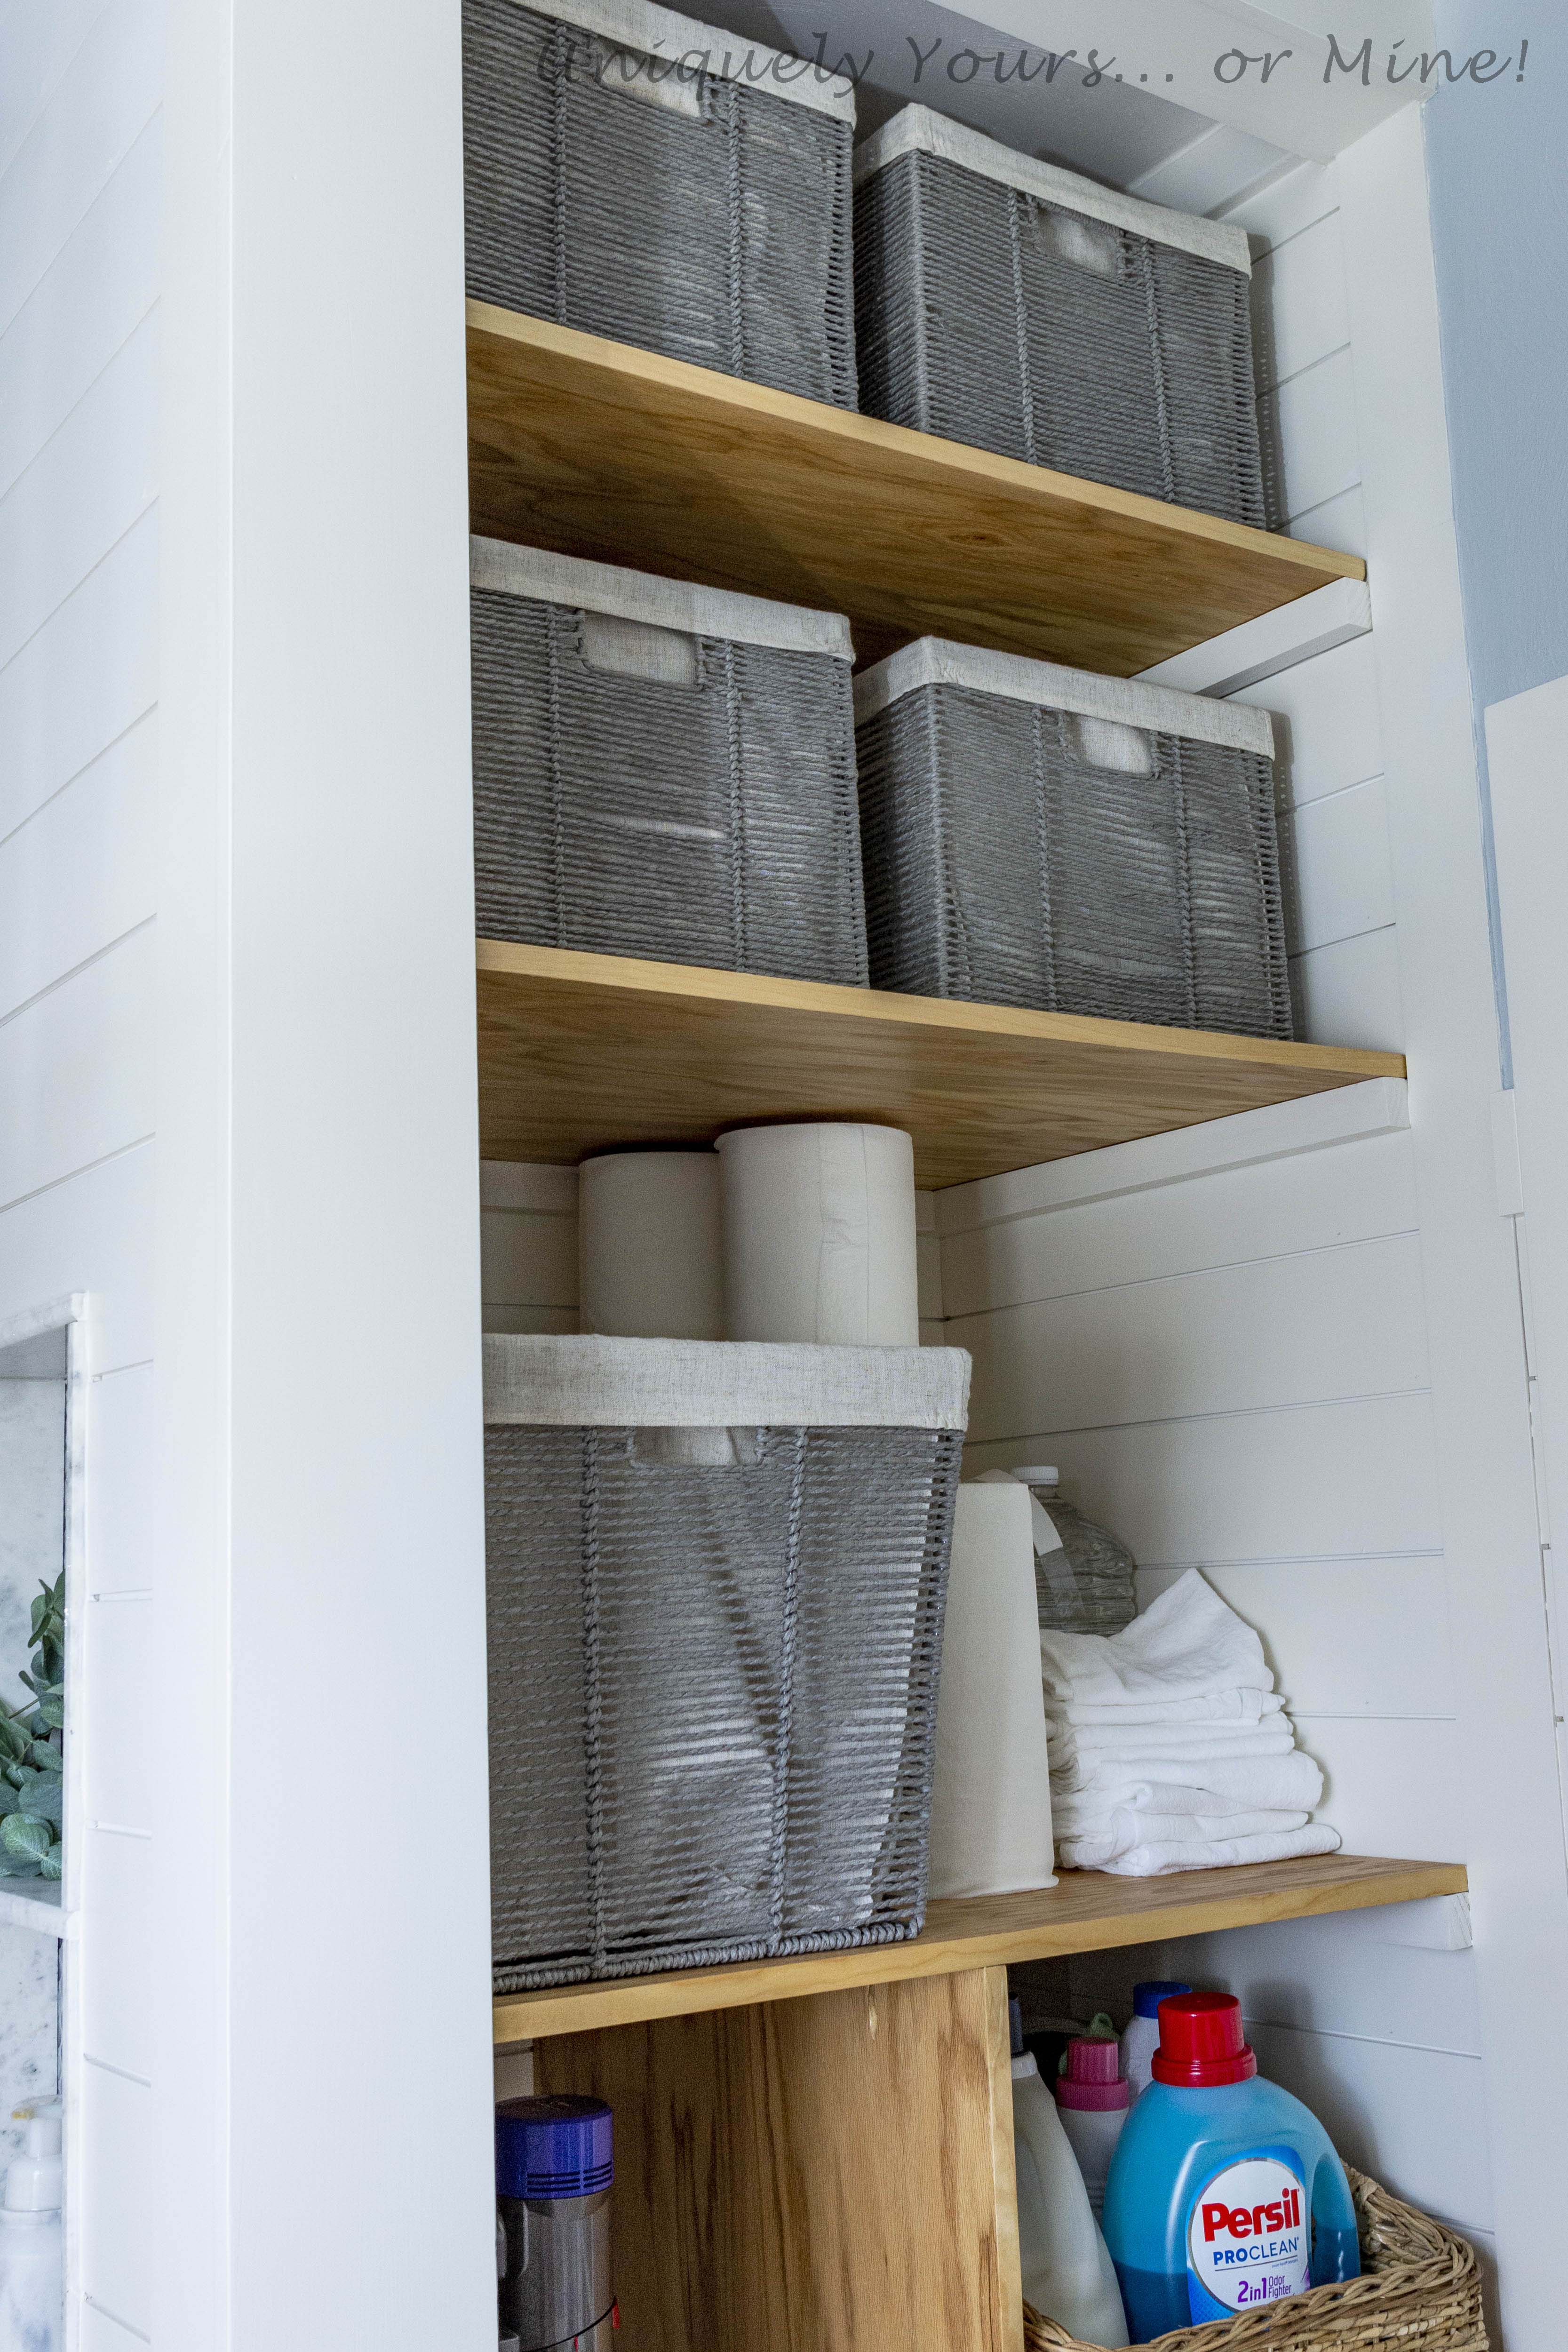
I decided on the closet layout based on what I thought I wanted to store in it and my hubby built shelves and partitions out of plywood. I stained them in a natural stain and waxed them with a hard paste wax. Waxing is my preference as it is so much easier to repair than a poly finish, but either would have worked fine… although the wax finish was dry and ready to install within minutes.
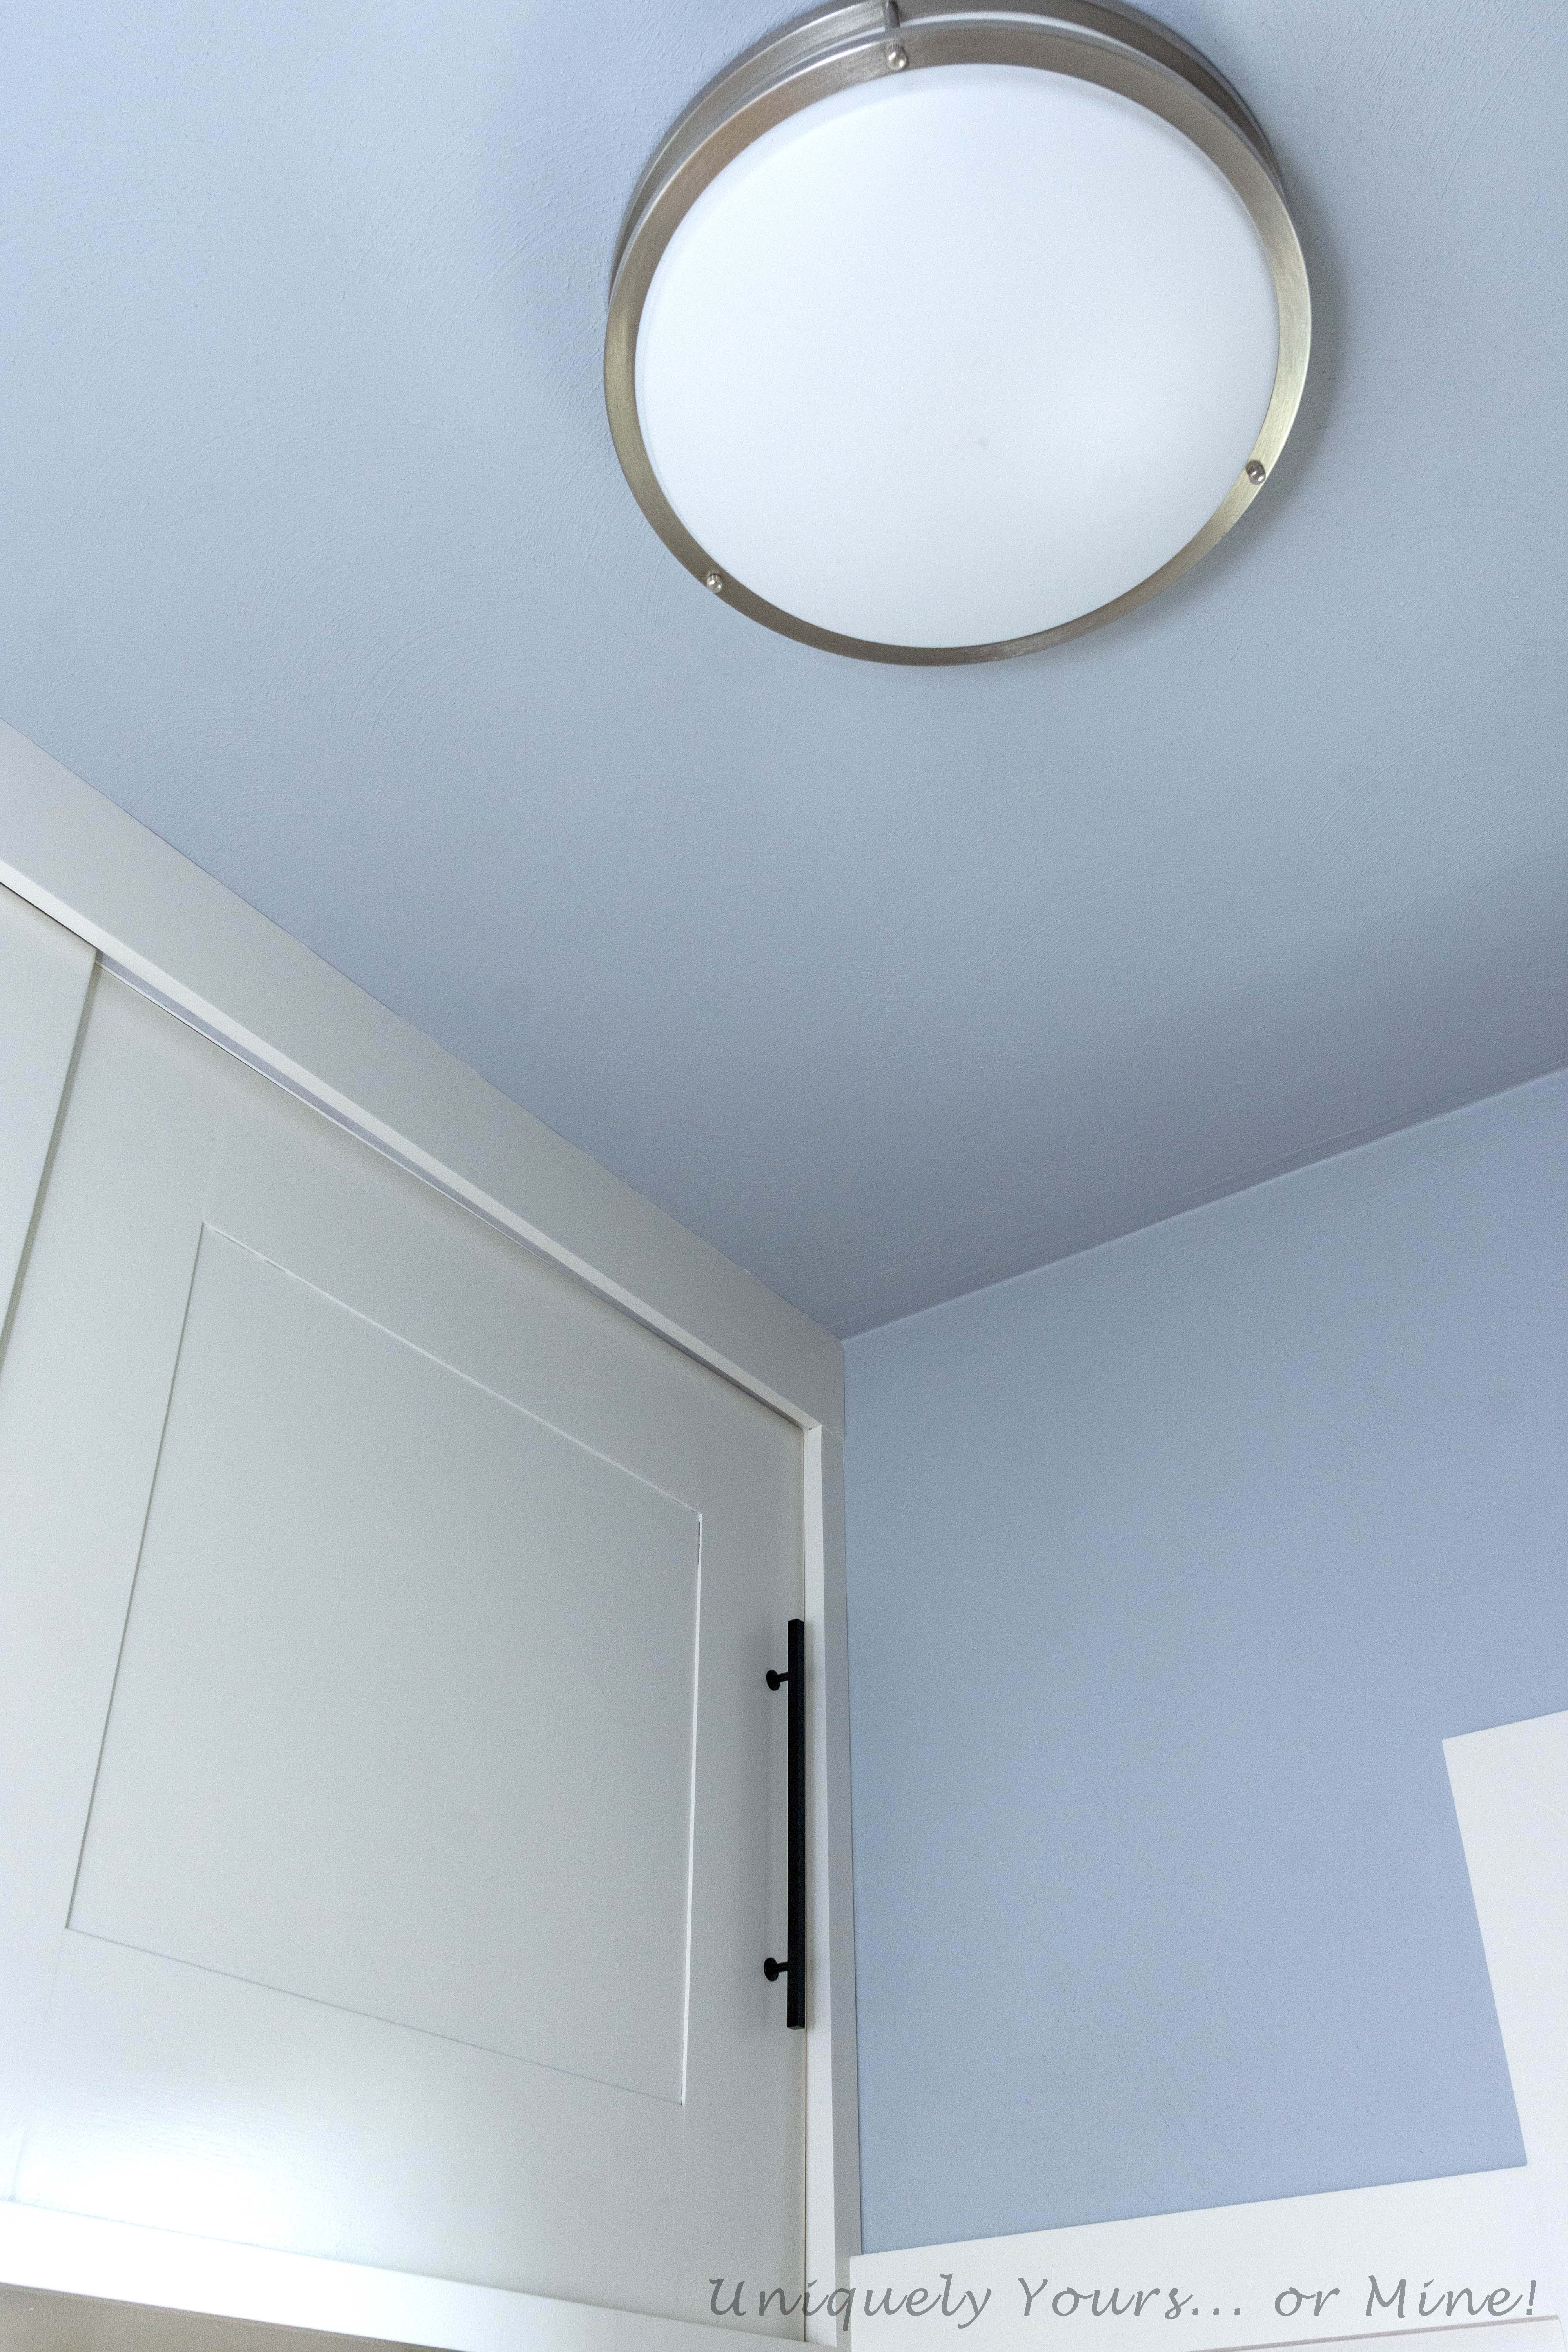
I also decided that I wanted to use a very vibrant blue paint (similar to our last laundry room), and since most of the walls (and cabinets) would be white I went out on a limb and painted the ceiling the same color. Now I know this looks pretty bright (and I am not going to lie it was bright) but I really did love it and thought it would work.. and quite honestly anything other than the dirty beige that was there would be an improvement.

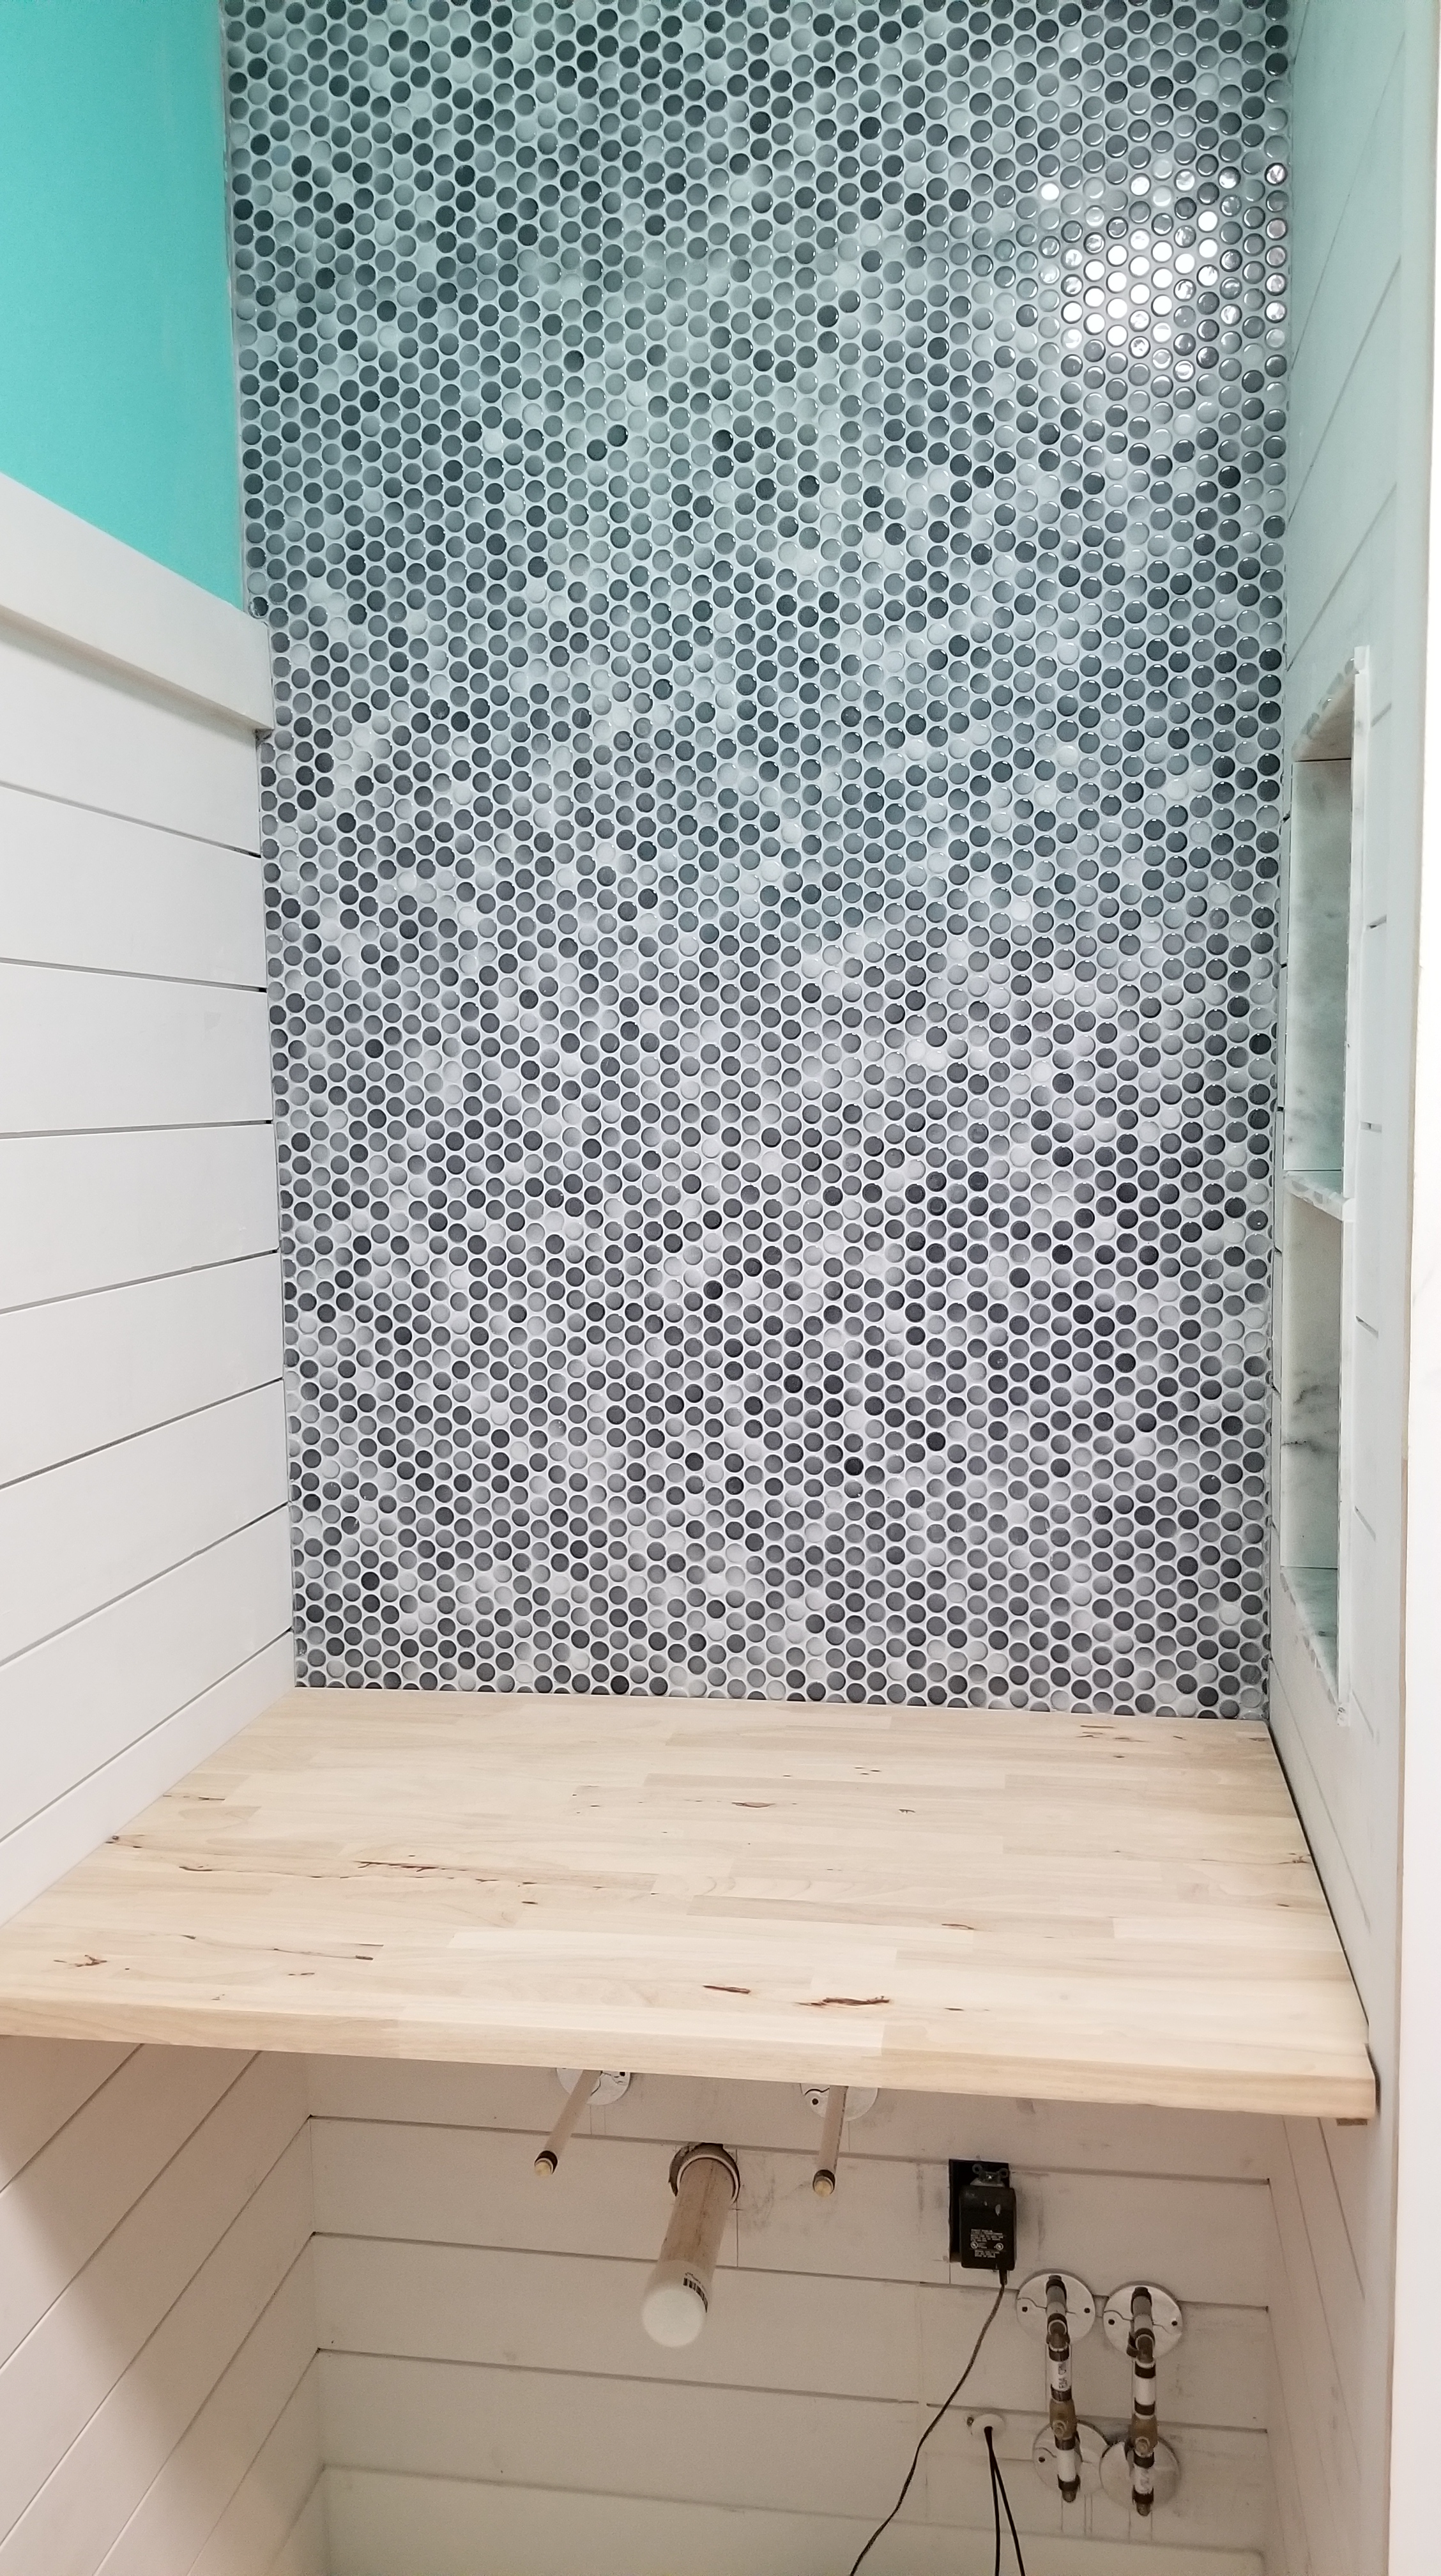
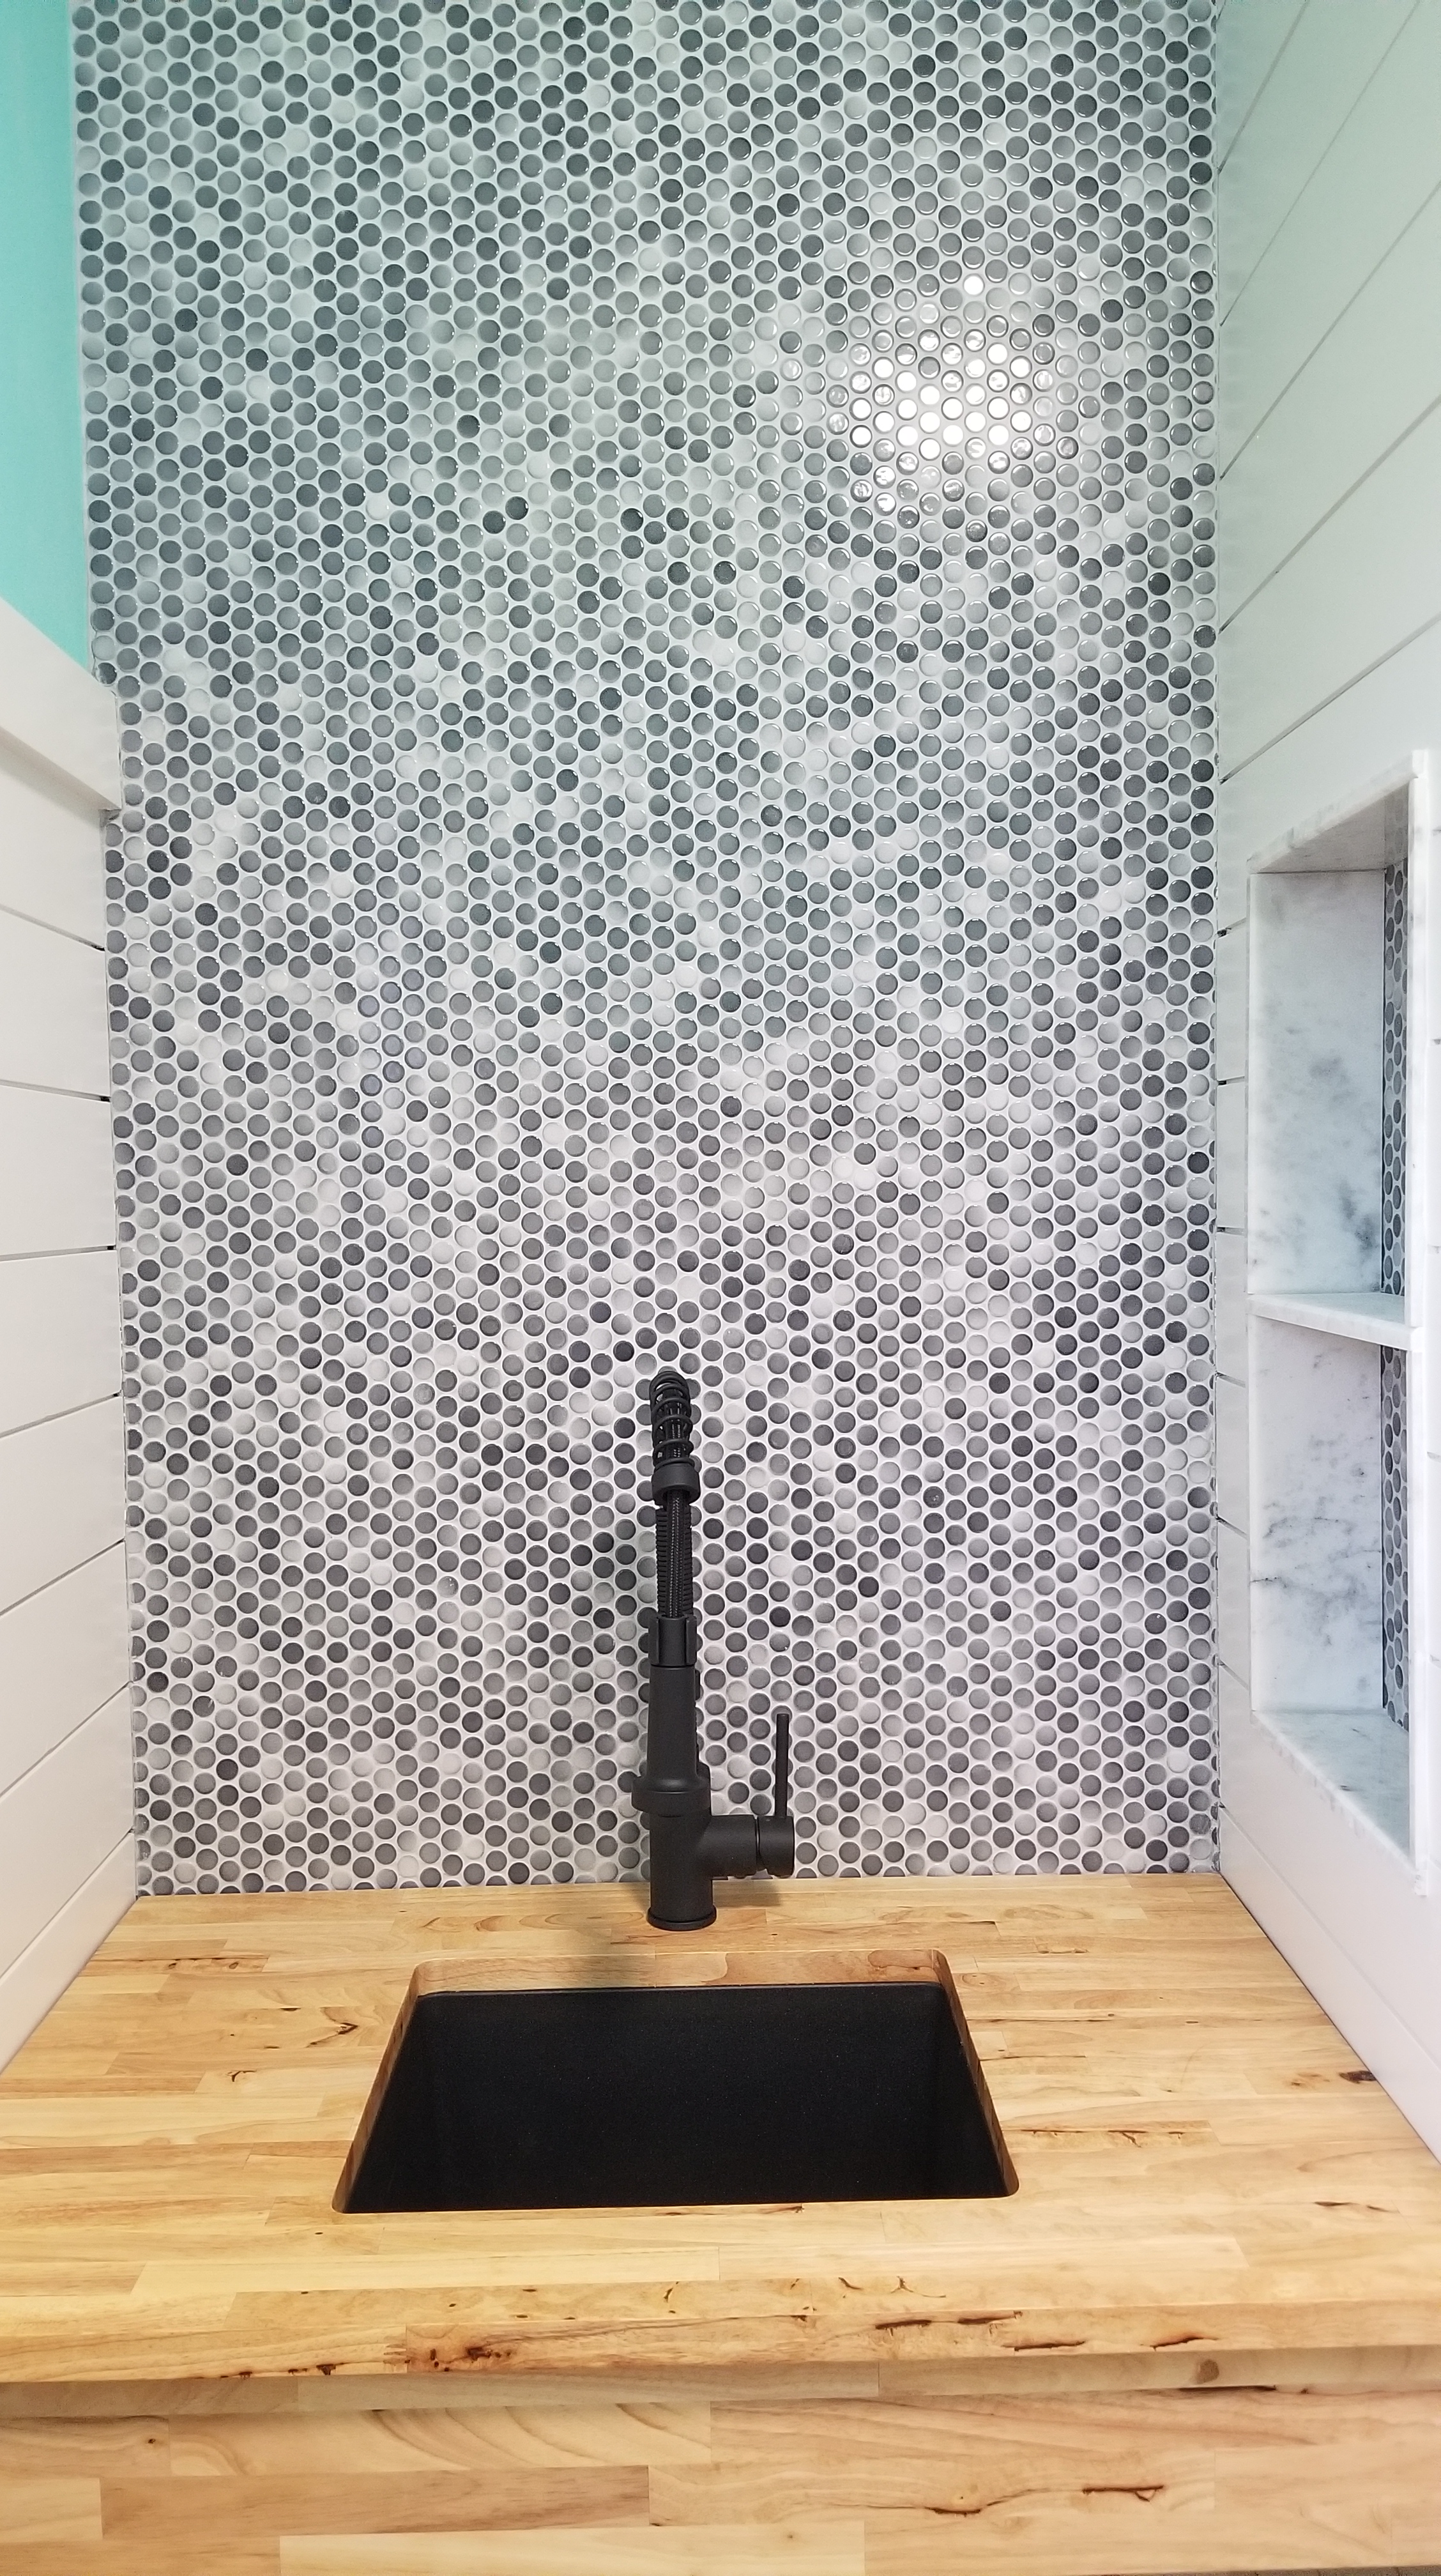
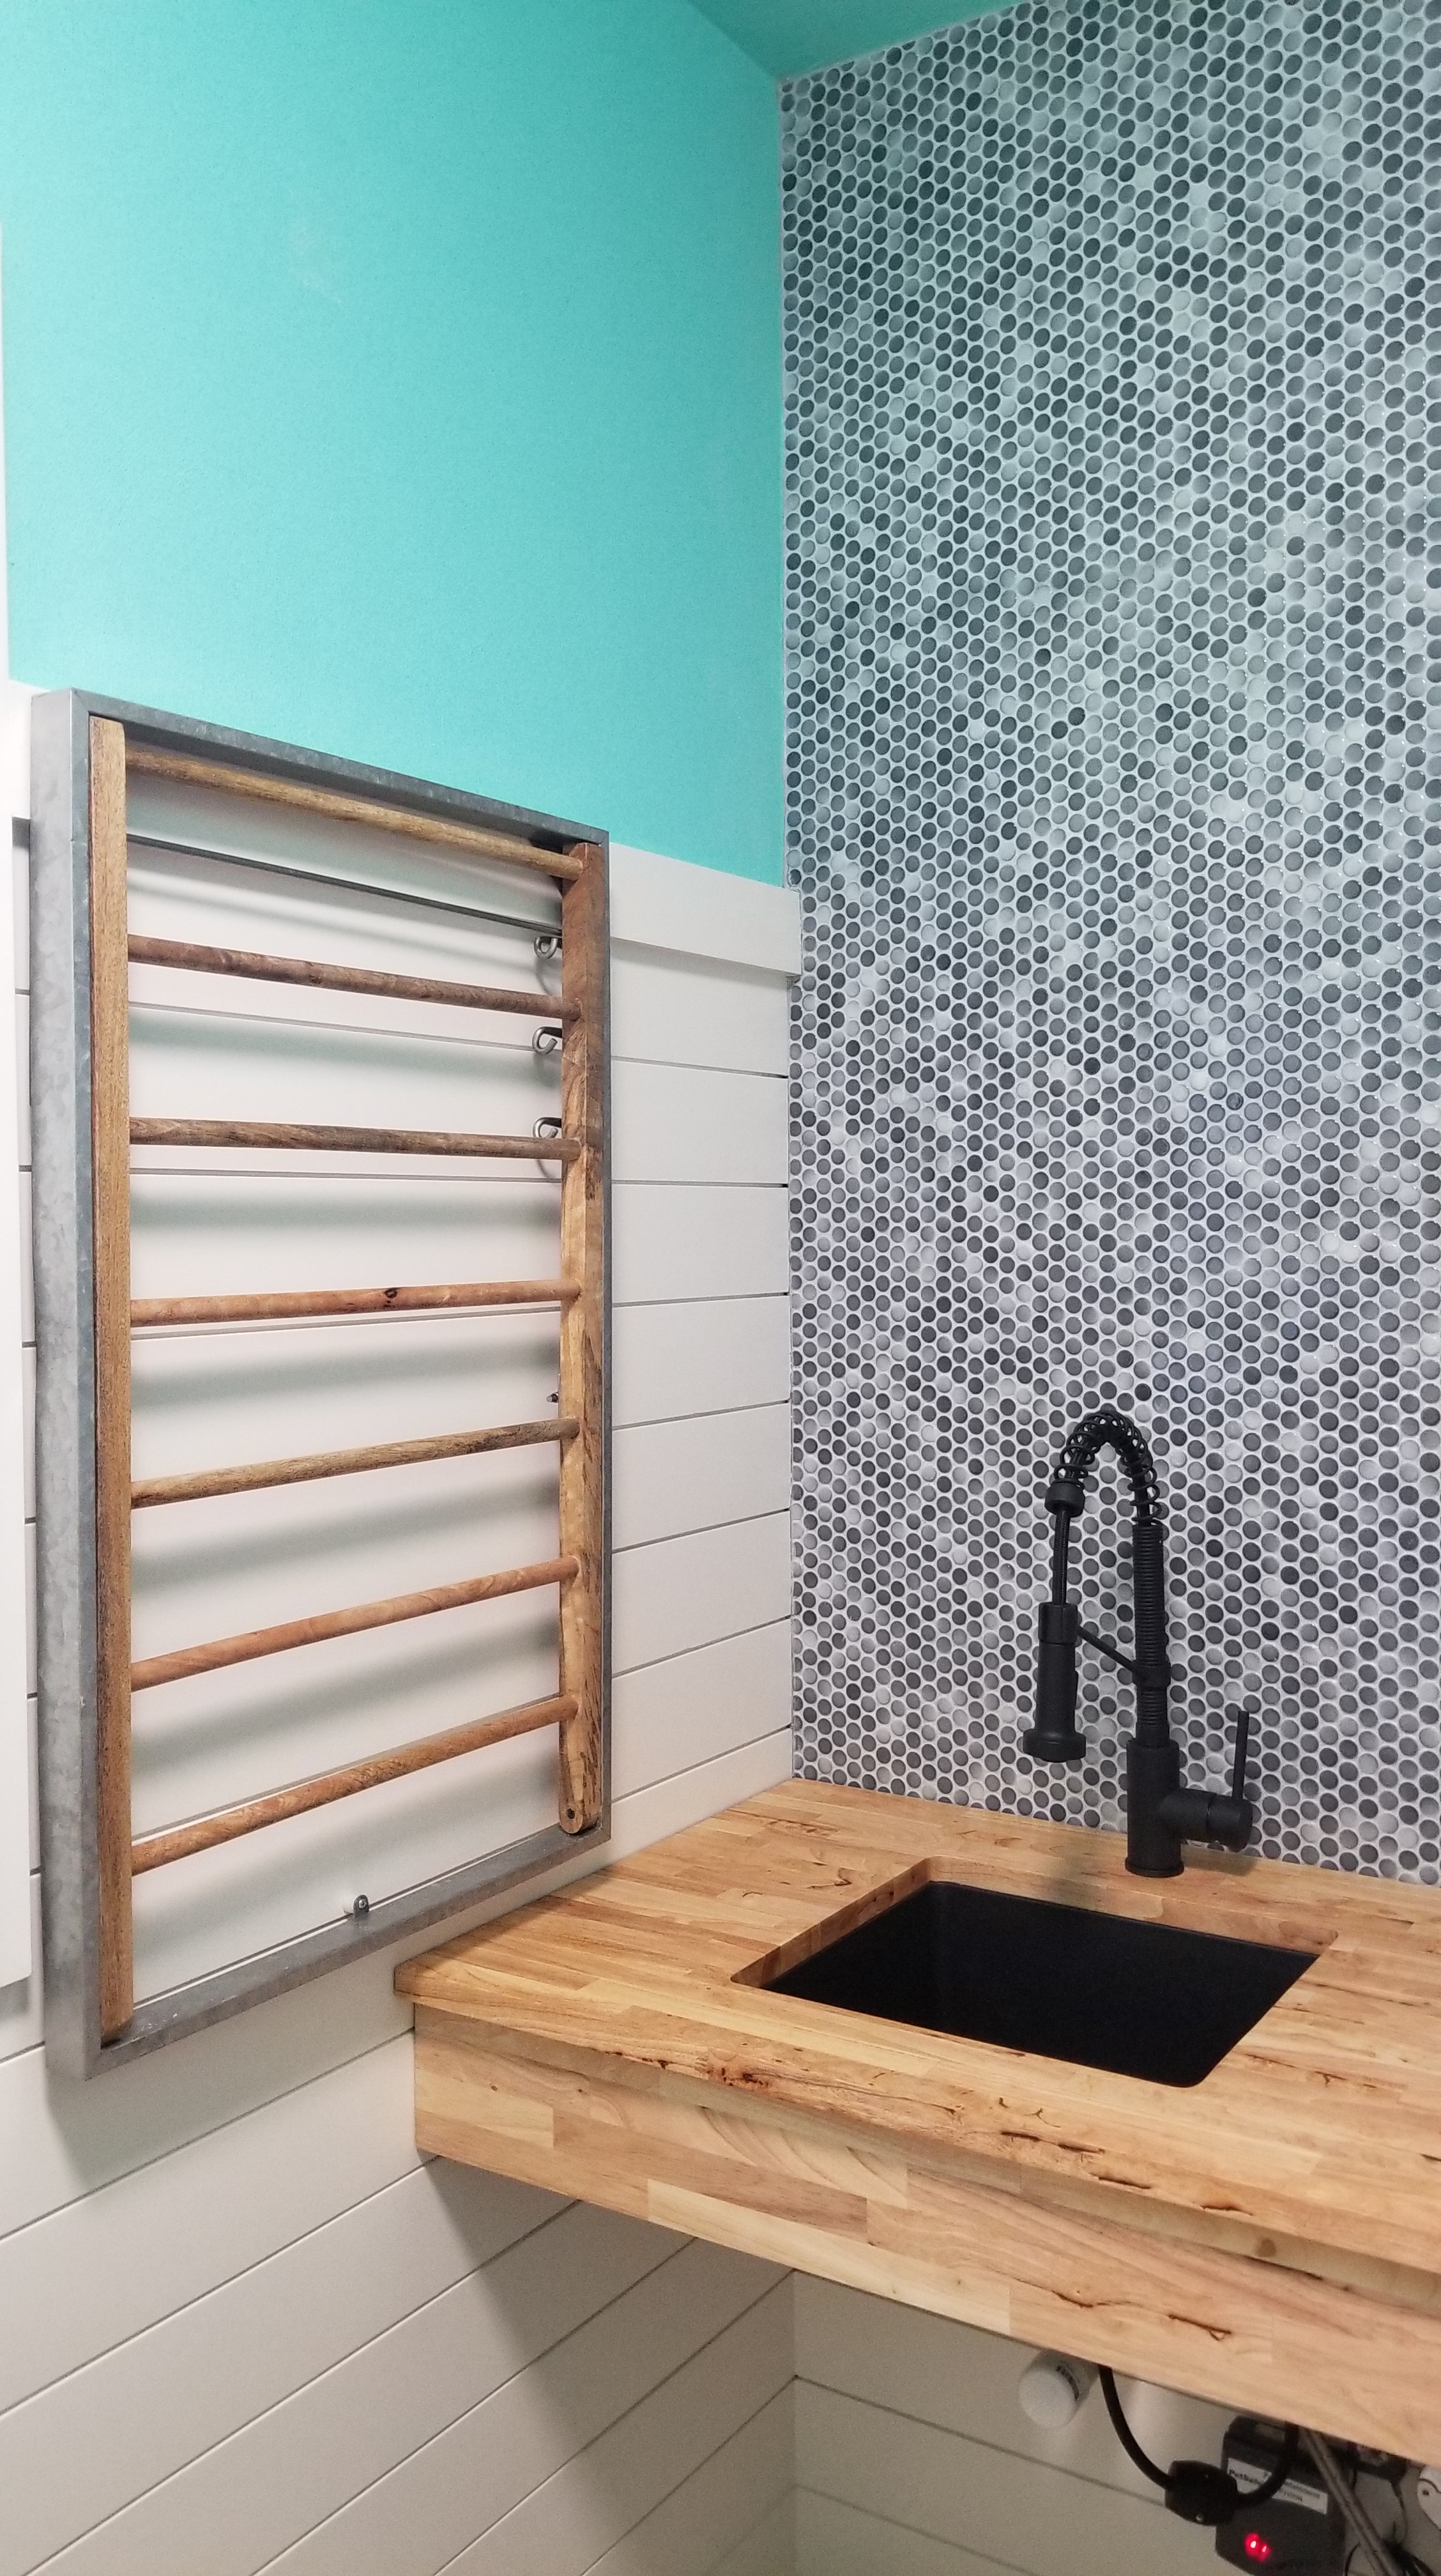
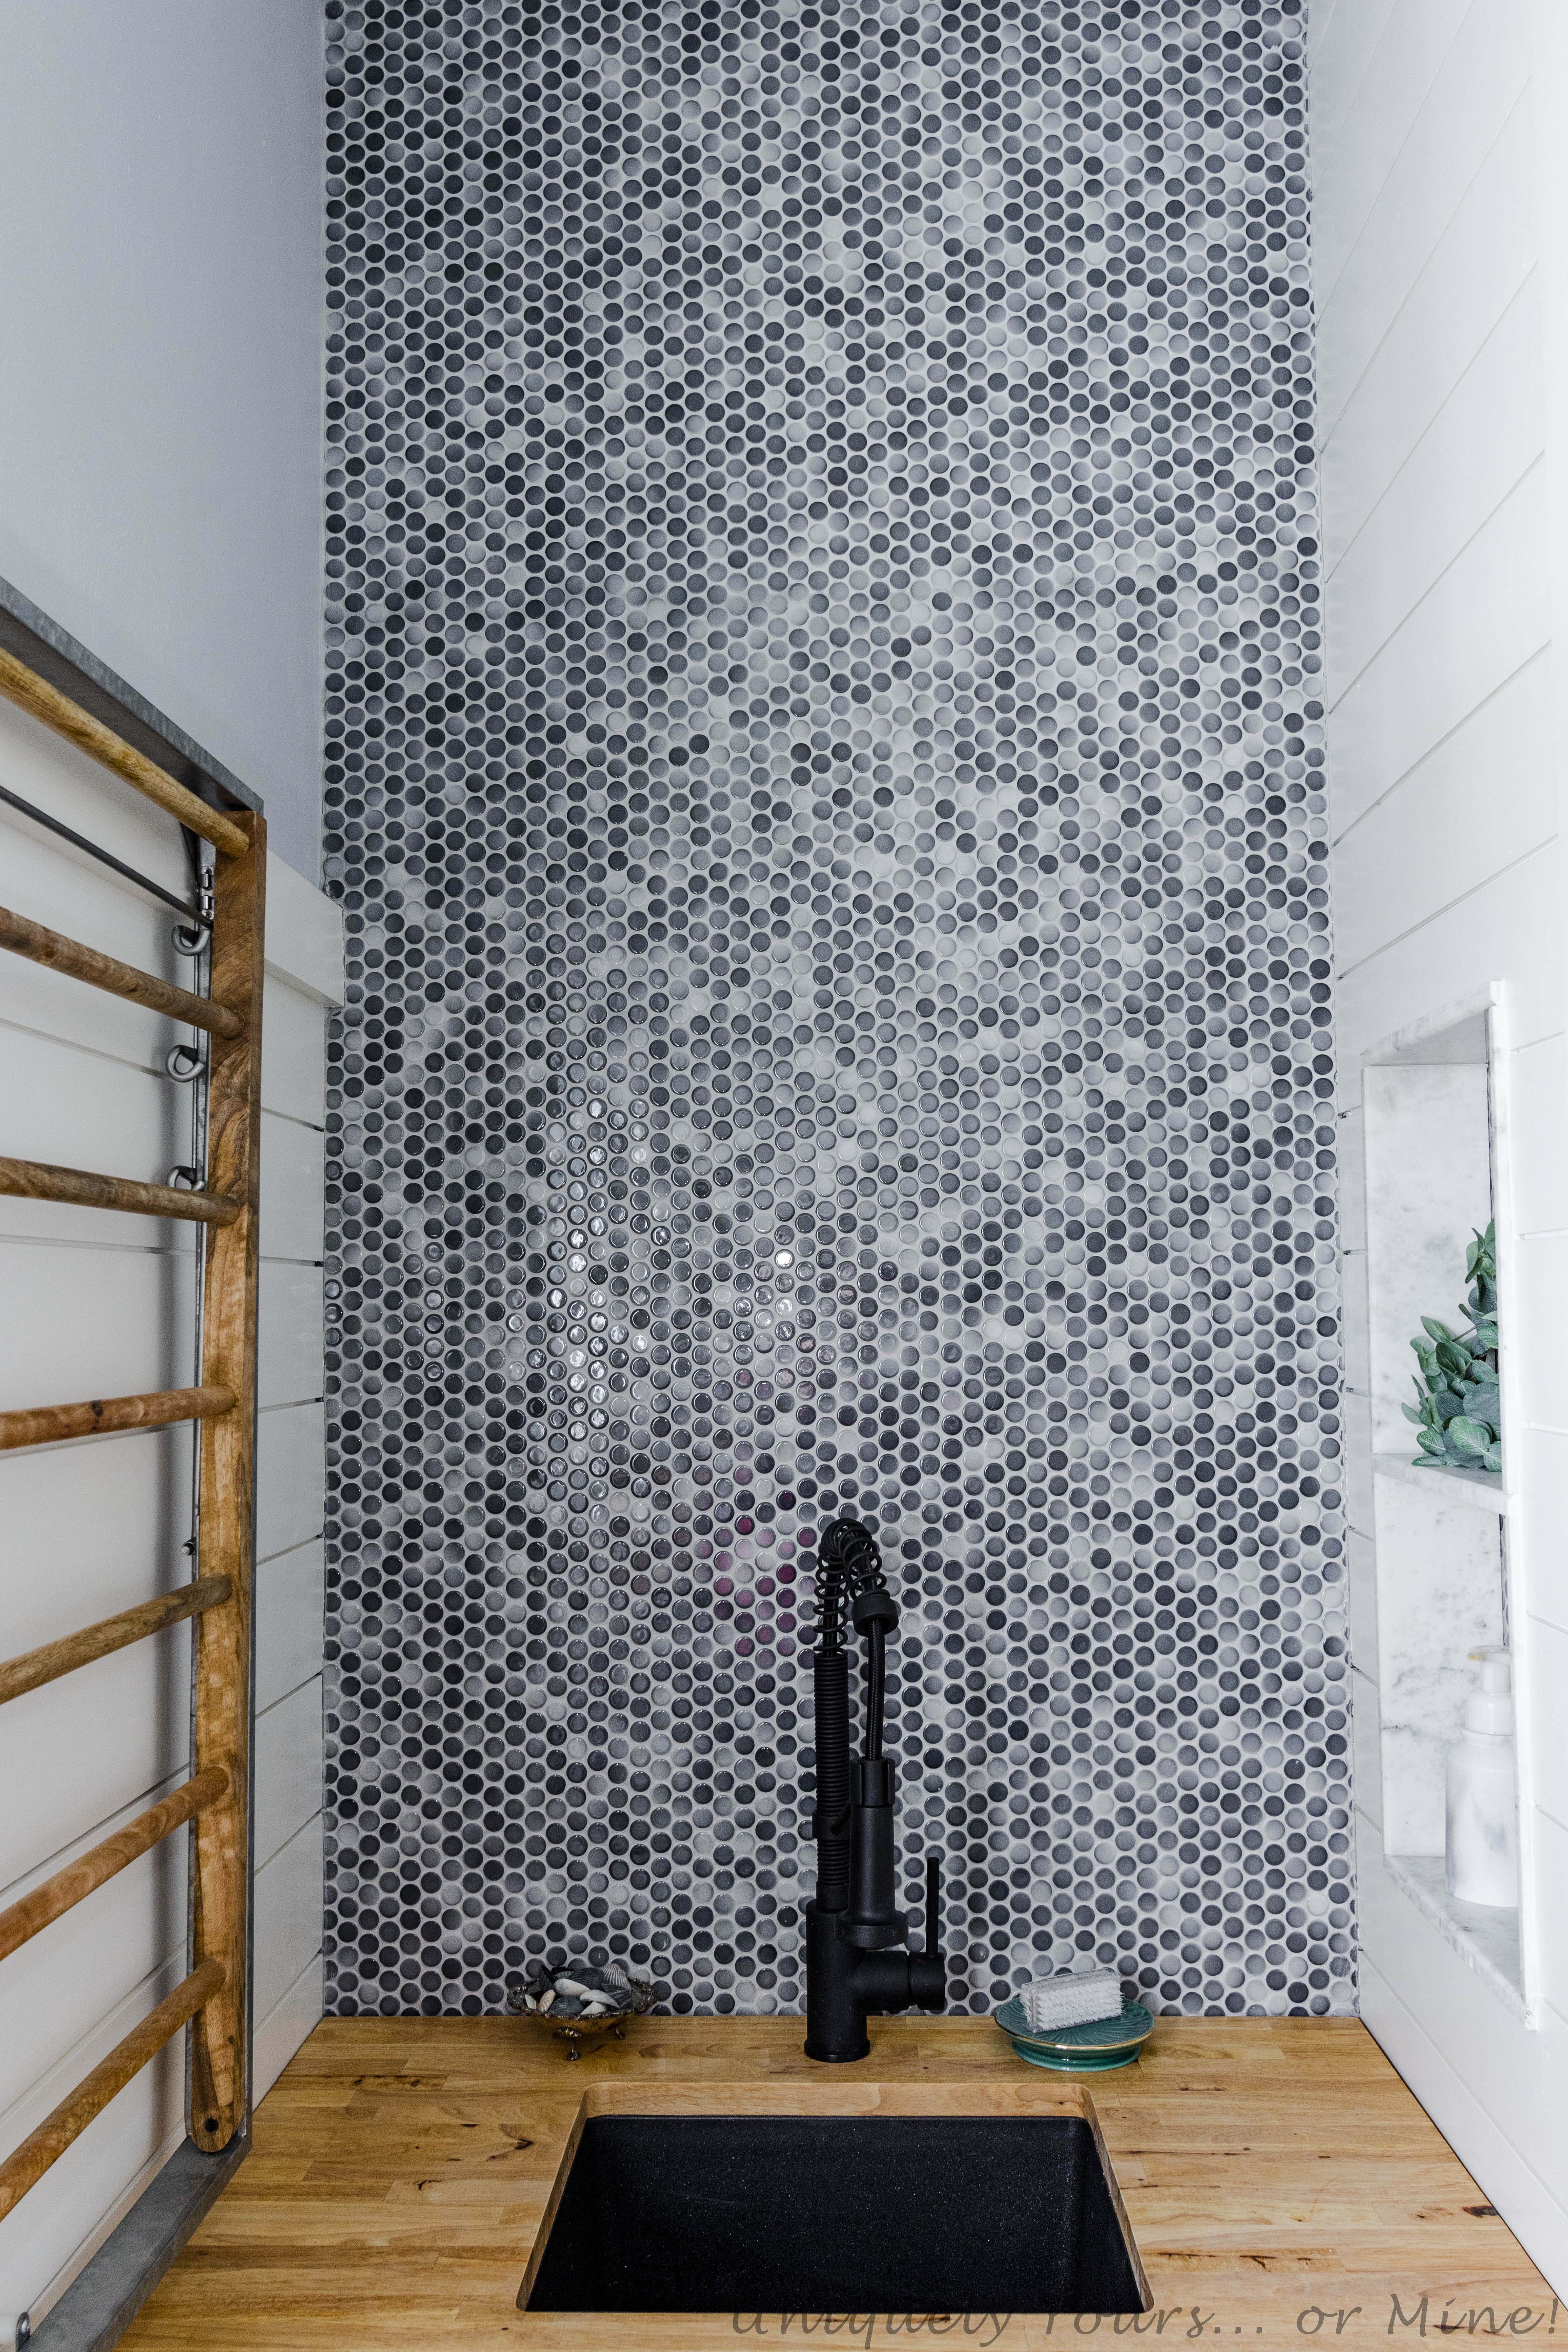
A new Floor and Decor store came to town and my GOD did I find so much gorgeous tile there! Lots of beautiful unique tile, but at $3.99 a sheet this penny tile was the clear winner in price, looks and ease of install. However, once we installed the penny tile, which is all shades of blue and grey, I noticed that Houston we have a problem..

..UGH!! I’m not going to lie I ignored this problem for a few months hoping it would go away…
Spoiler alert… IT. DID. NOT…
We hired a plumber to come in and run the line for the new sink area and you know what else, an outdoor shower!!! We knew we would be expanding the deck and this was the perfect opportunity to have the plumbing for the shower completed at the same time. We live at the beach and have 2 dogs, so an outdoor shower really is fabulous, even if I have only washed the dogs in it this summer!
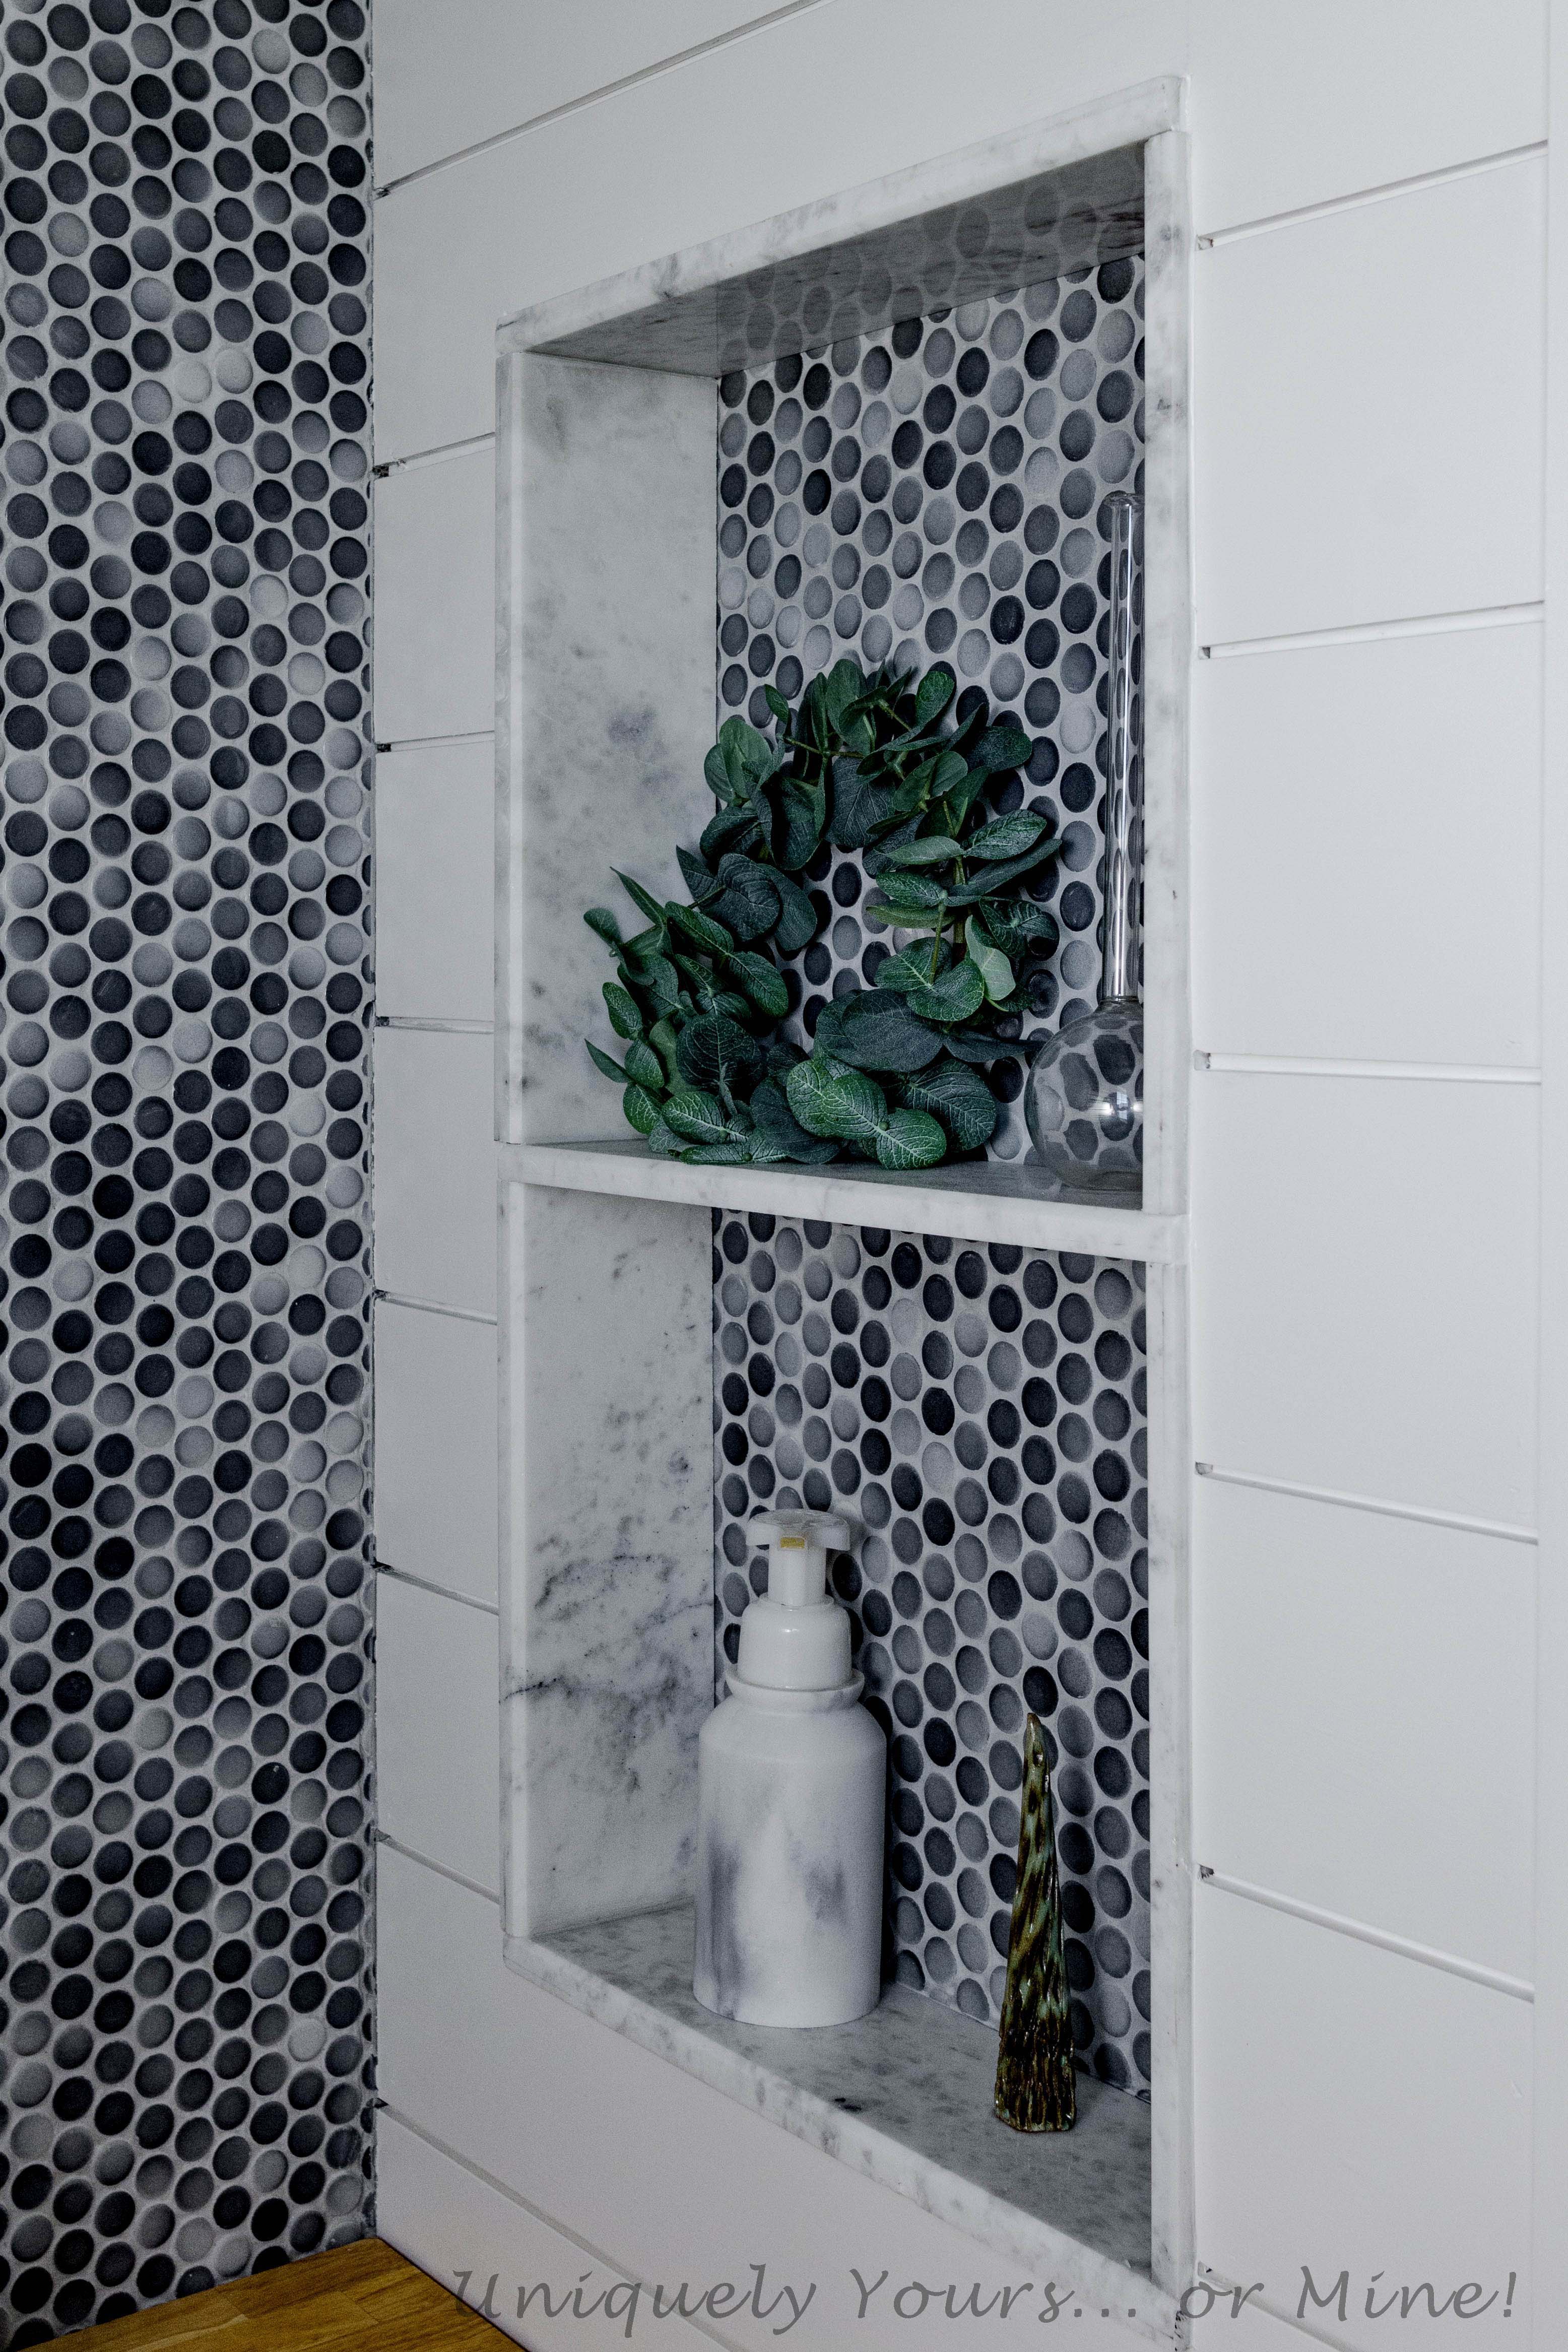
I also decided I just “had to have” a little nook beside the sink, why not, we had the walls open and the space was right! I hate it when builders don’t take advantage of any of the nooks and crannies they can!
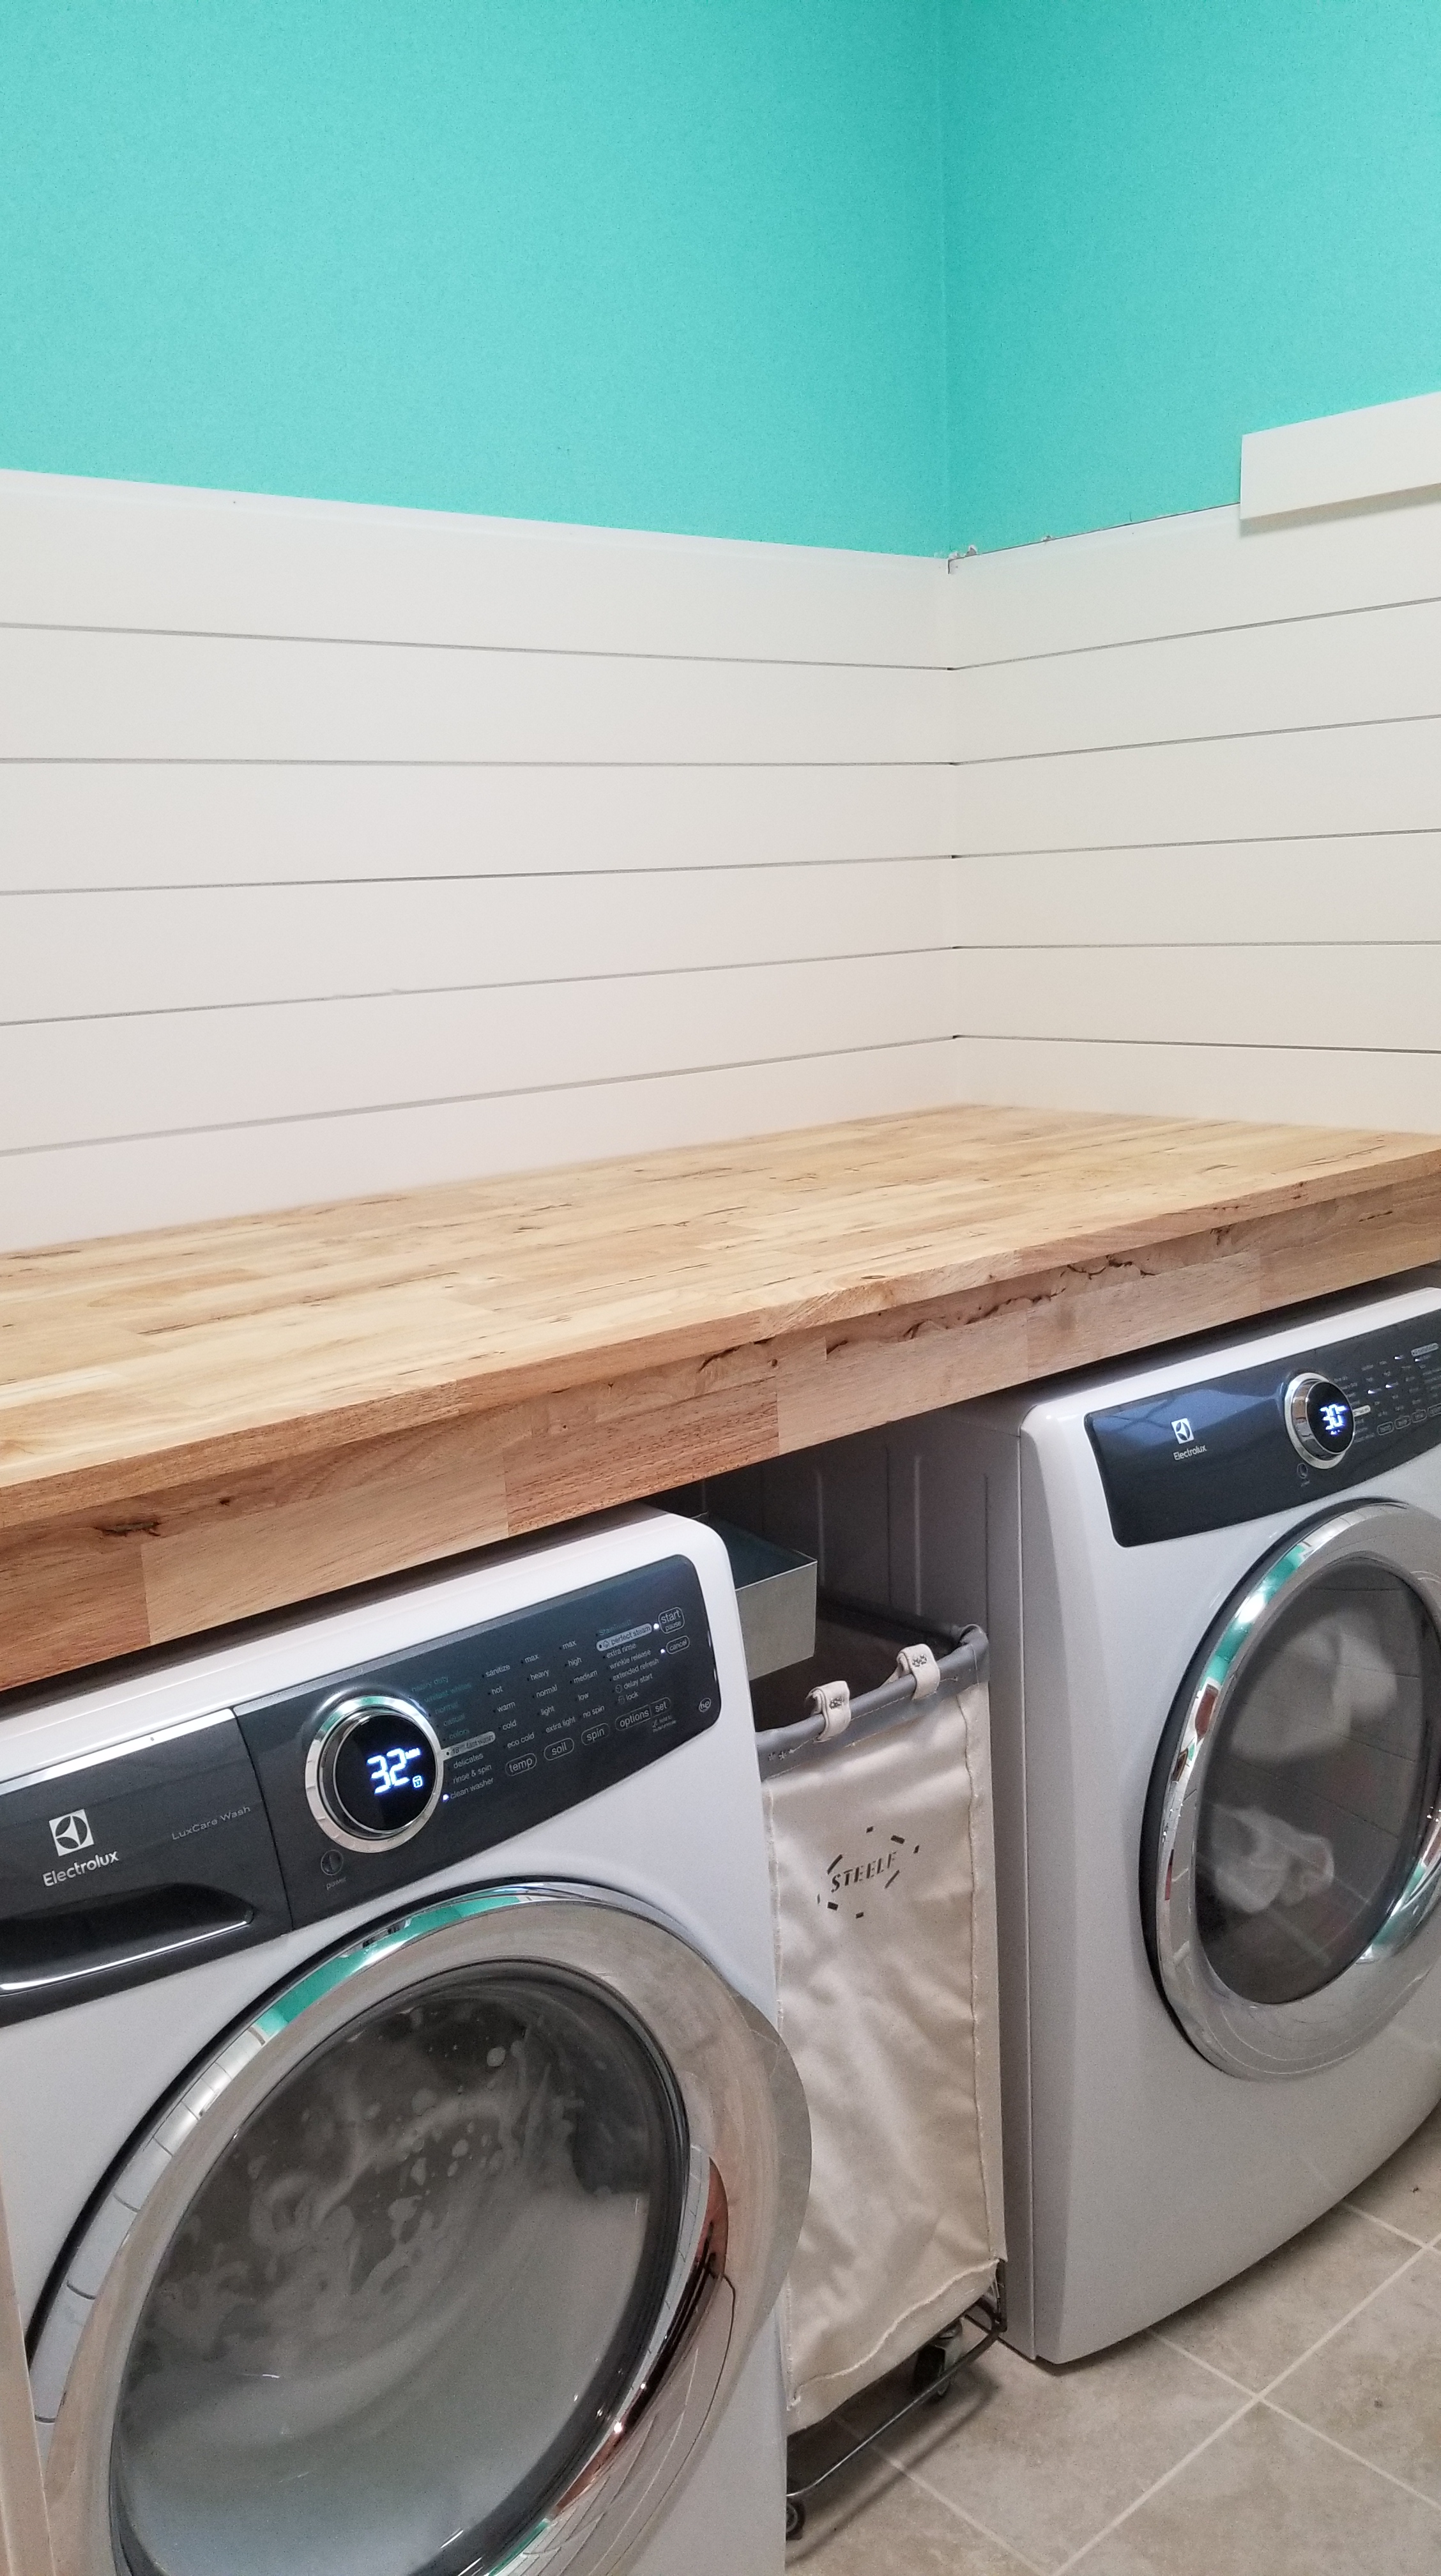
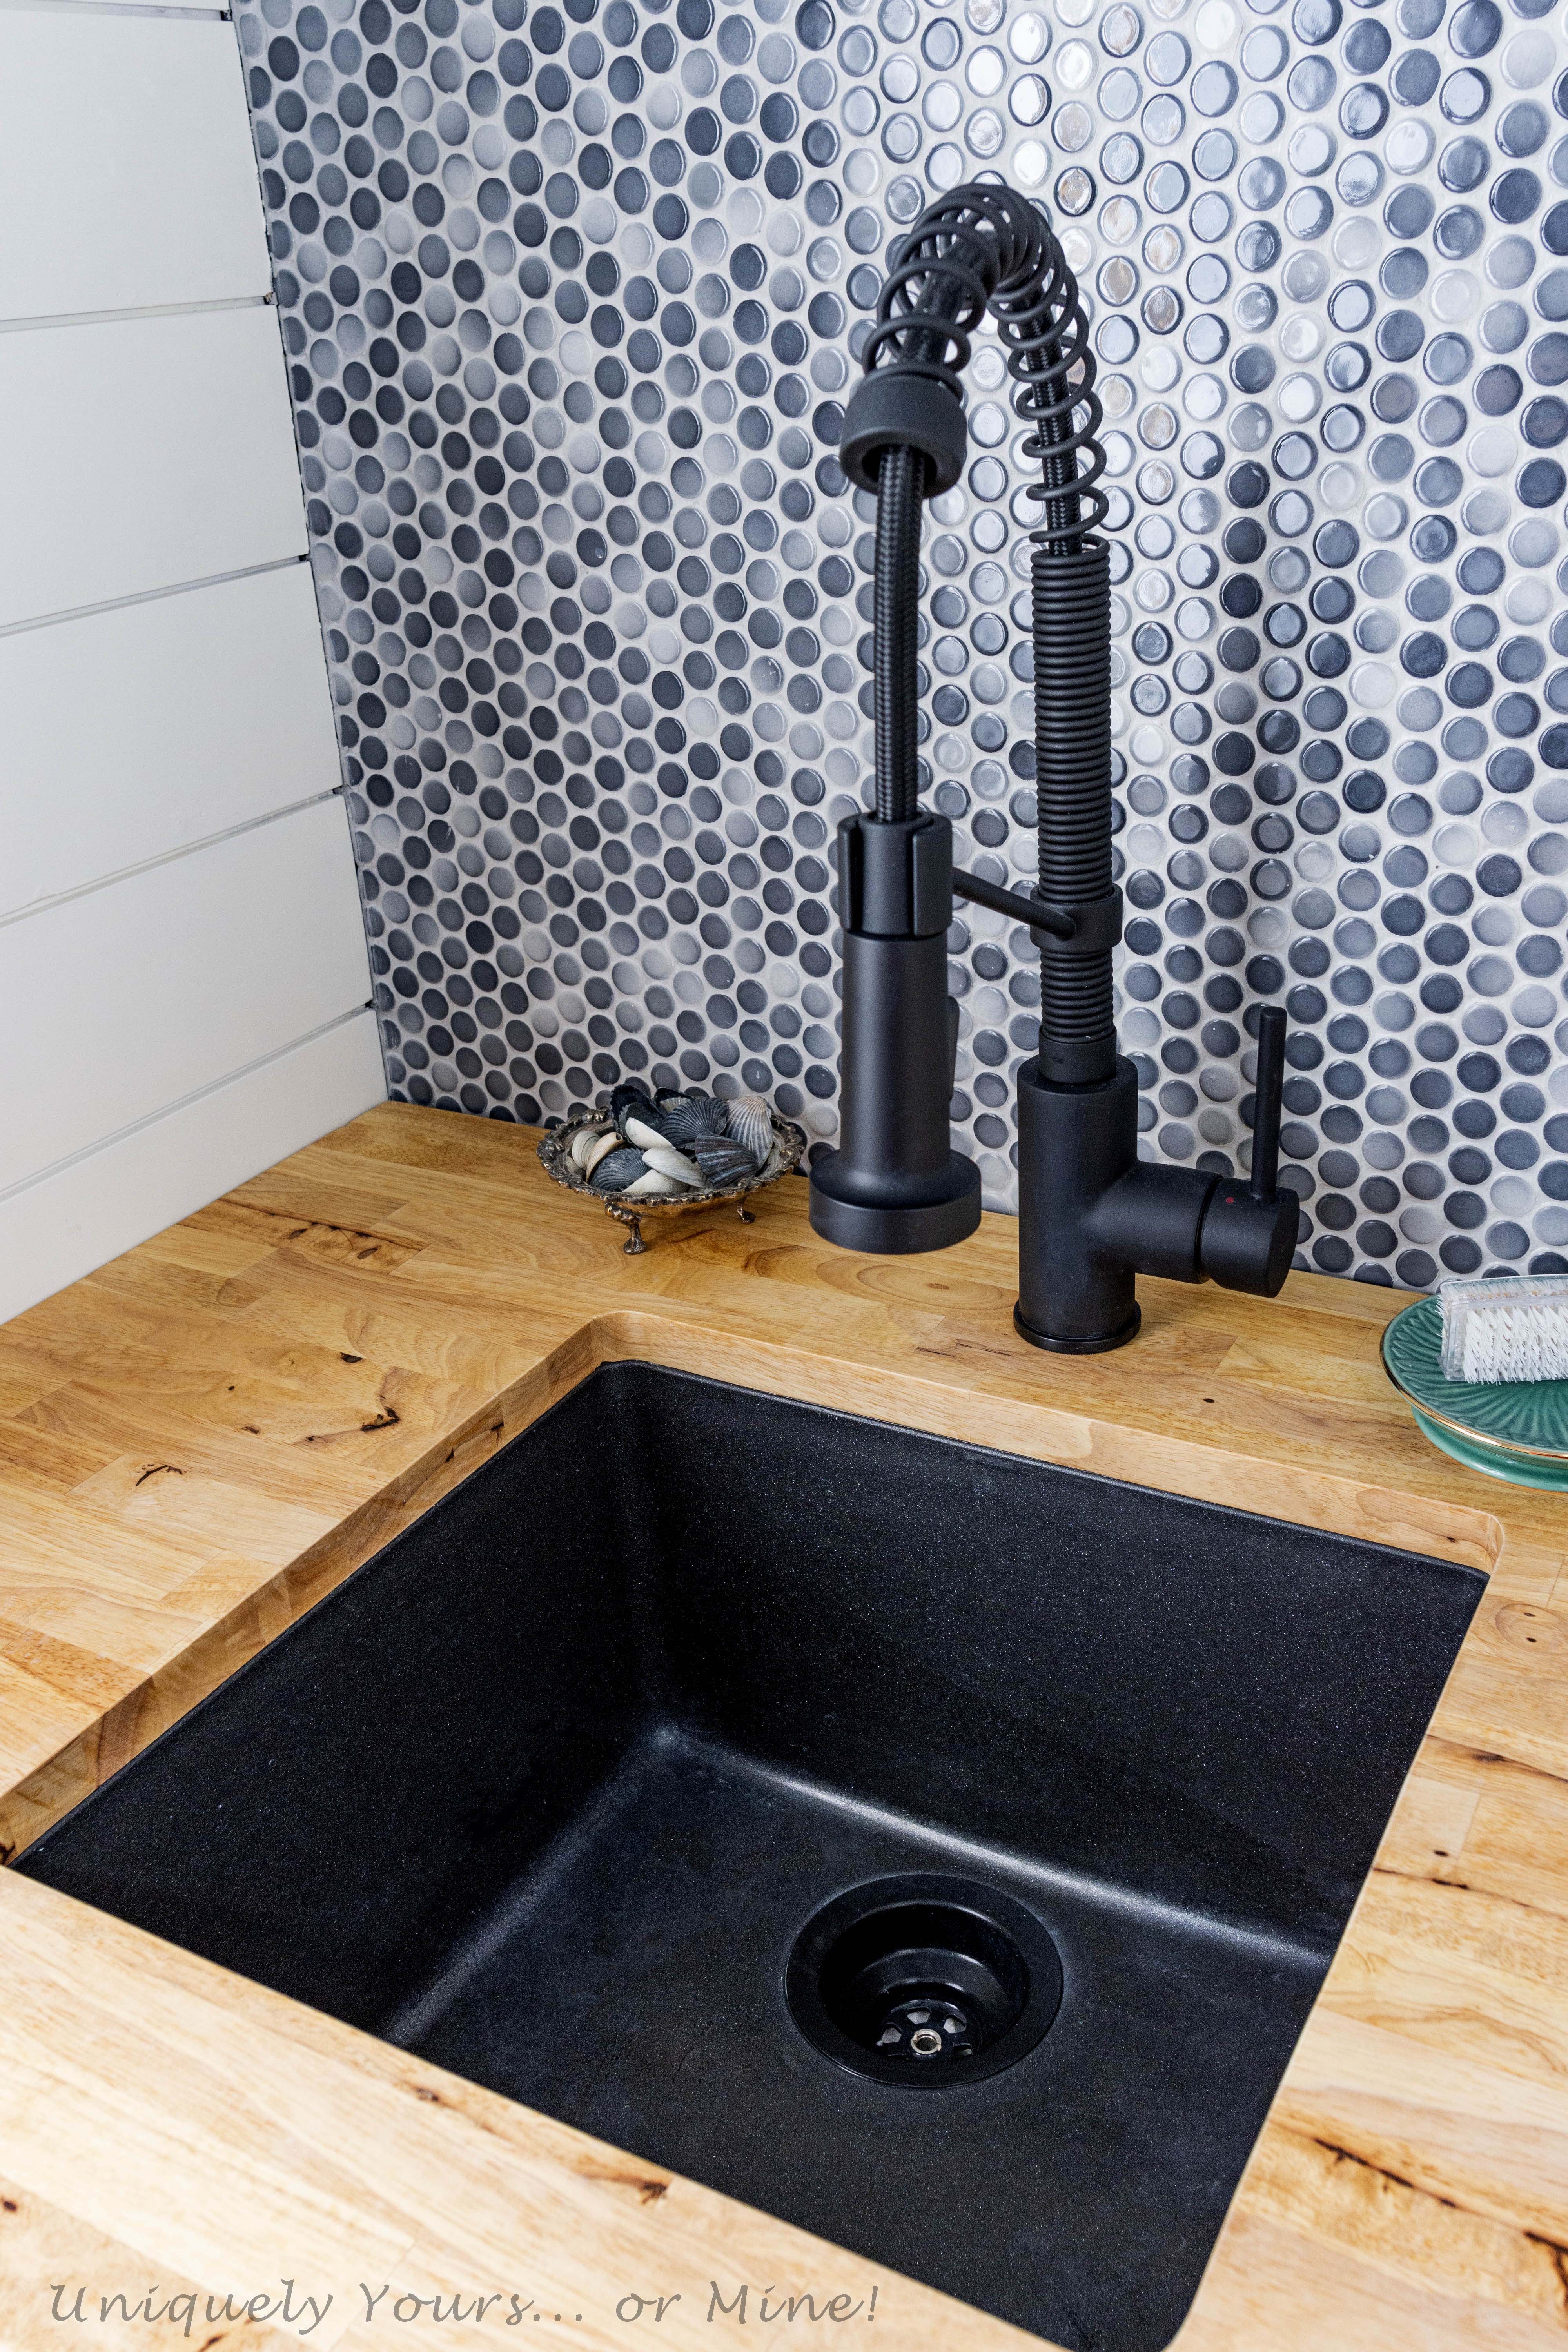
I found some great, thick butcher block countertops locally at some weird surplus store I cannot for the life of me remember the name of, but I spent about $230 for all of the countertops and I even have leftovers too!
I eventually stained the tops with the natural stain “color”, oiled then sealed with hard wax. You can see the shutoff valves for the outdoor shower and the wireless dog fence box is under the sink as well.
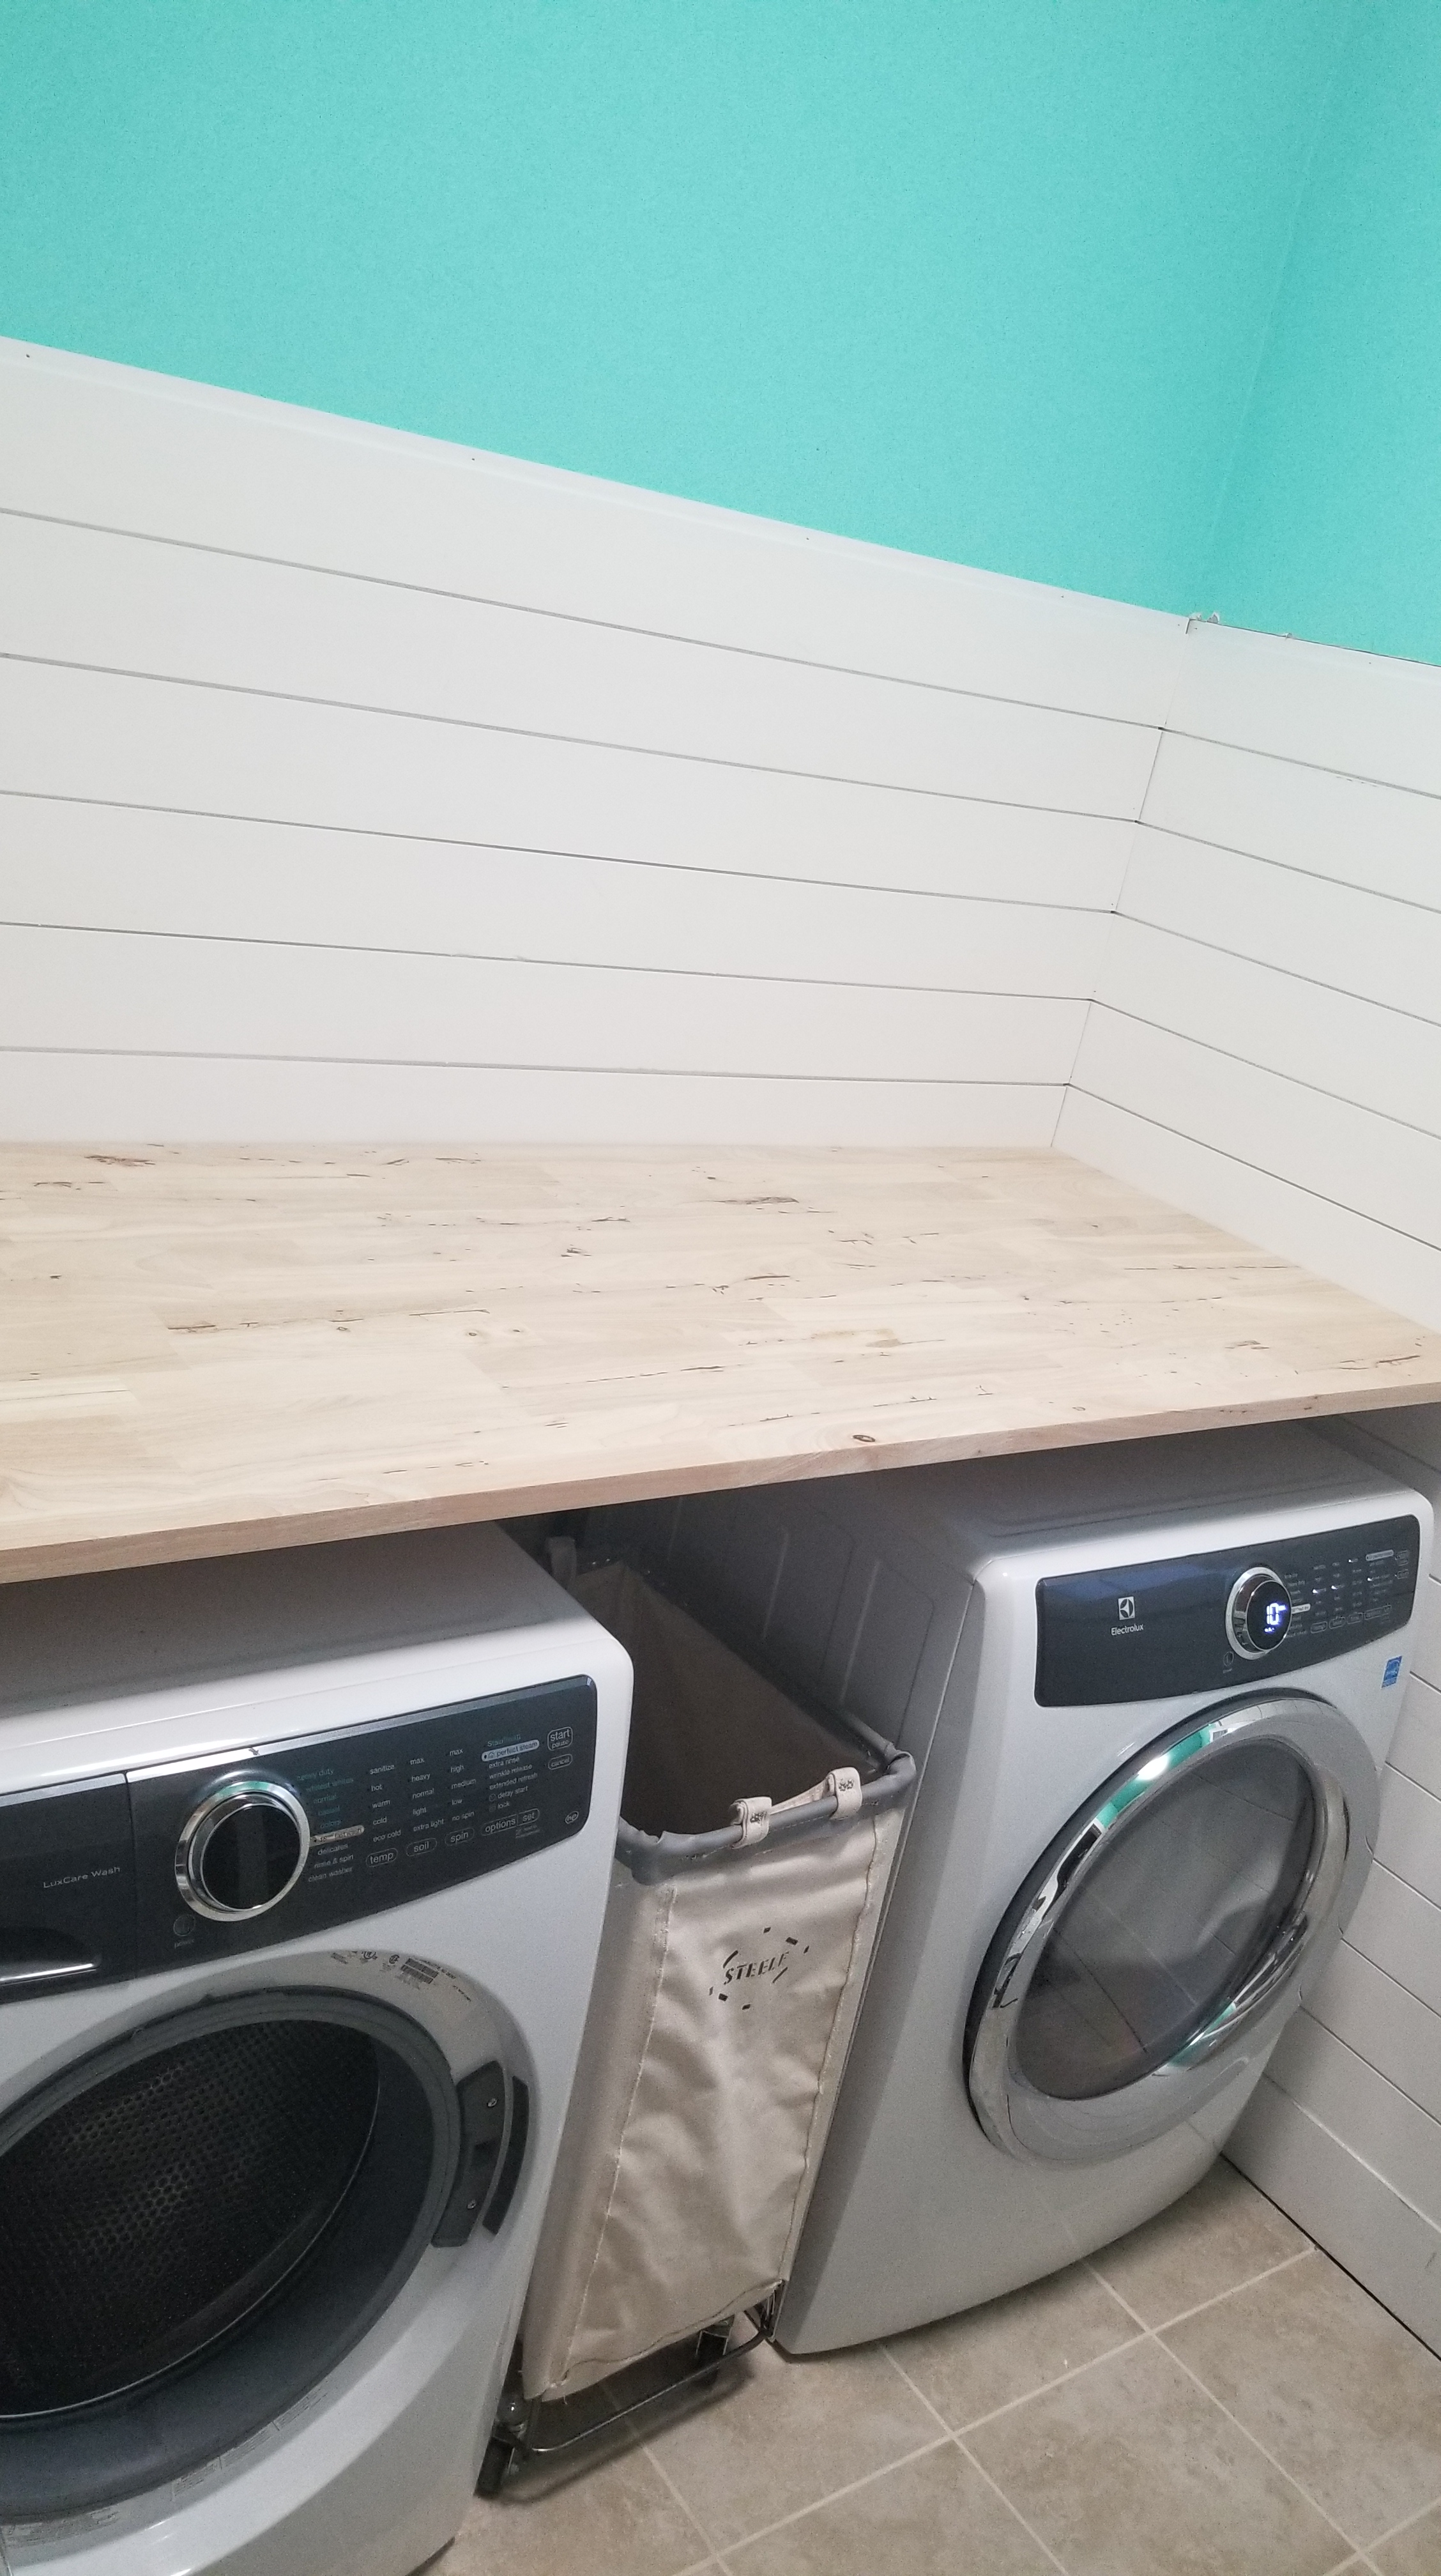
We decided to add the extra “lip” under the counter for cleaner look (hiding the drain and outlets), plus it helped with the overall rigidity of the countertop as well.
I purchased a black sink (it is some kind of granite finish, but I can’t remember what) and the black pull down faucet, which I just love… yes the sink is small, but it is just the right size for what I use it for.
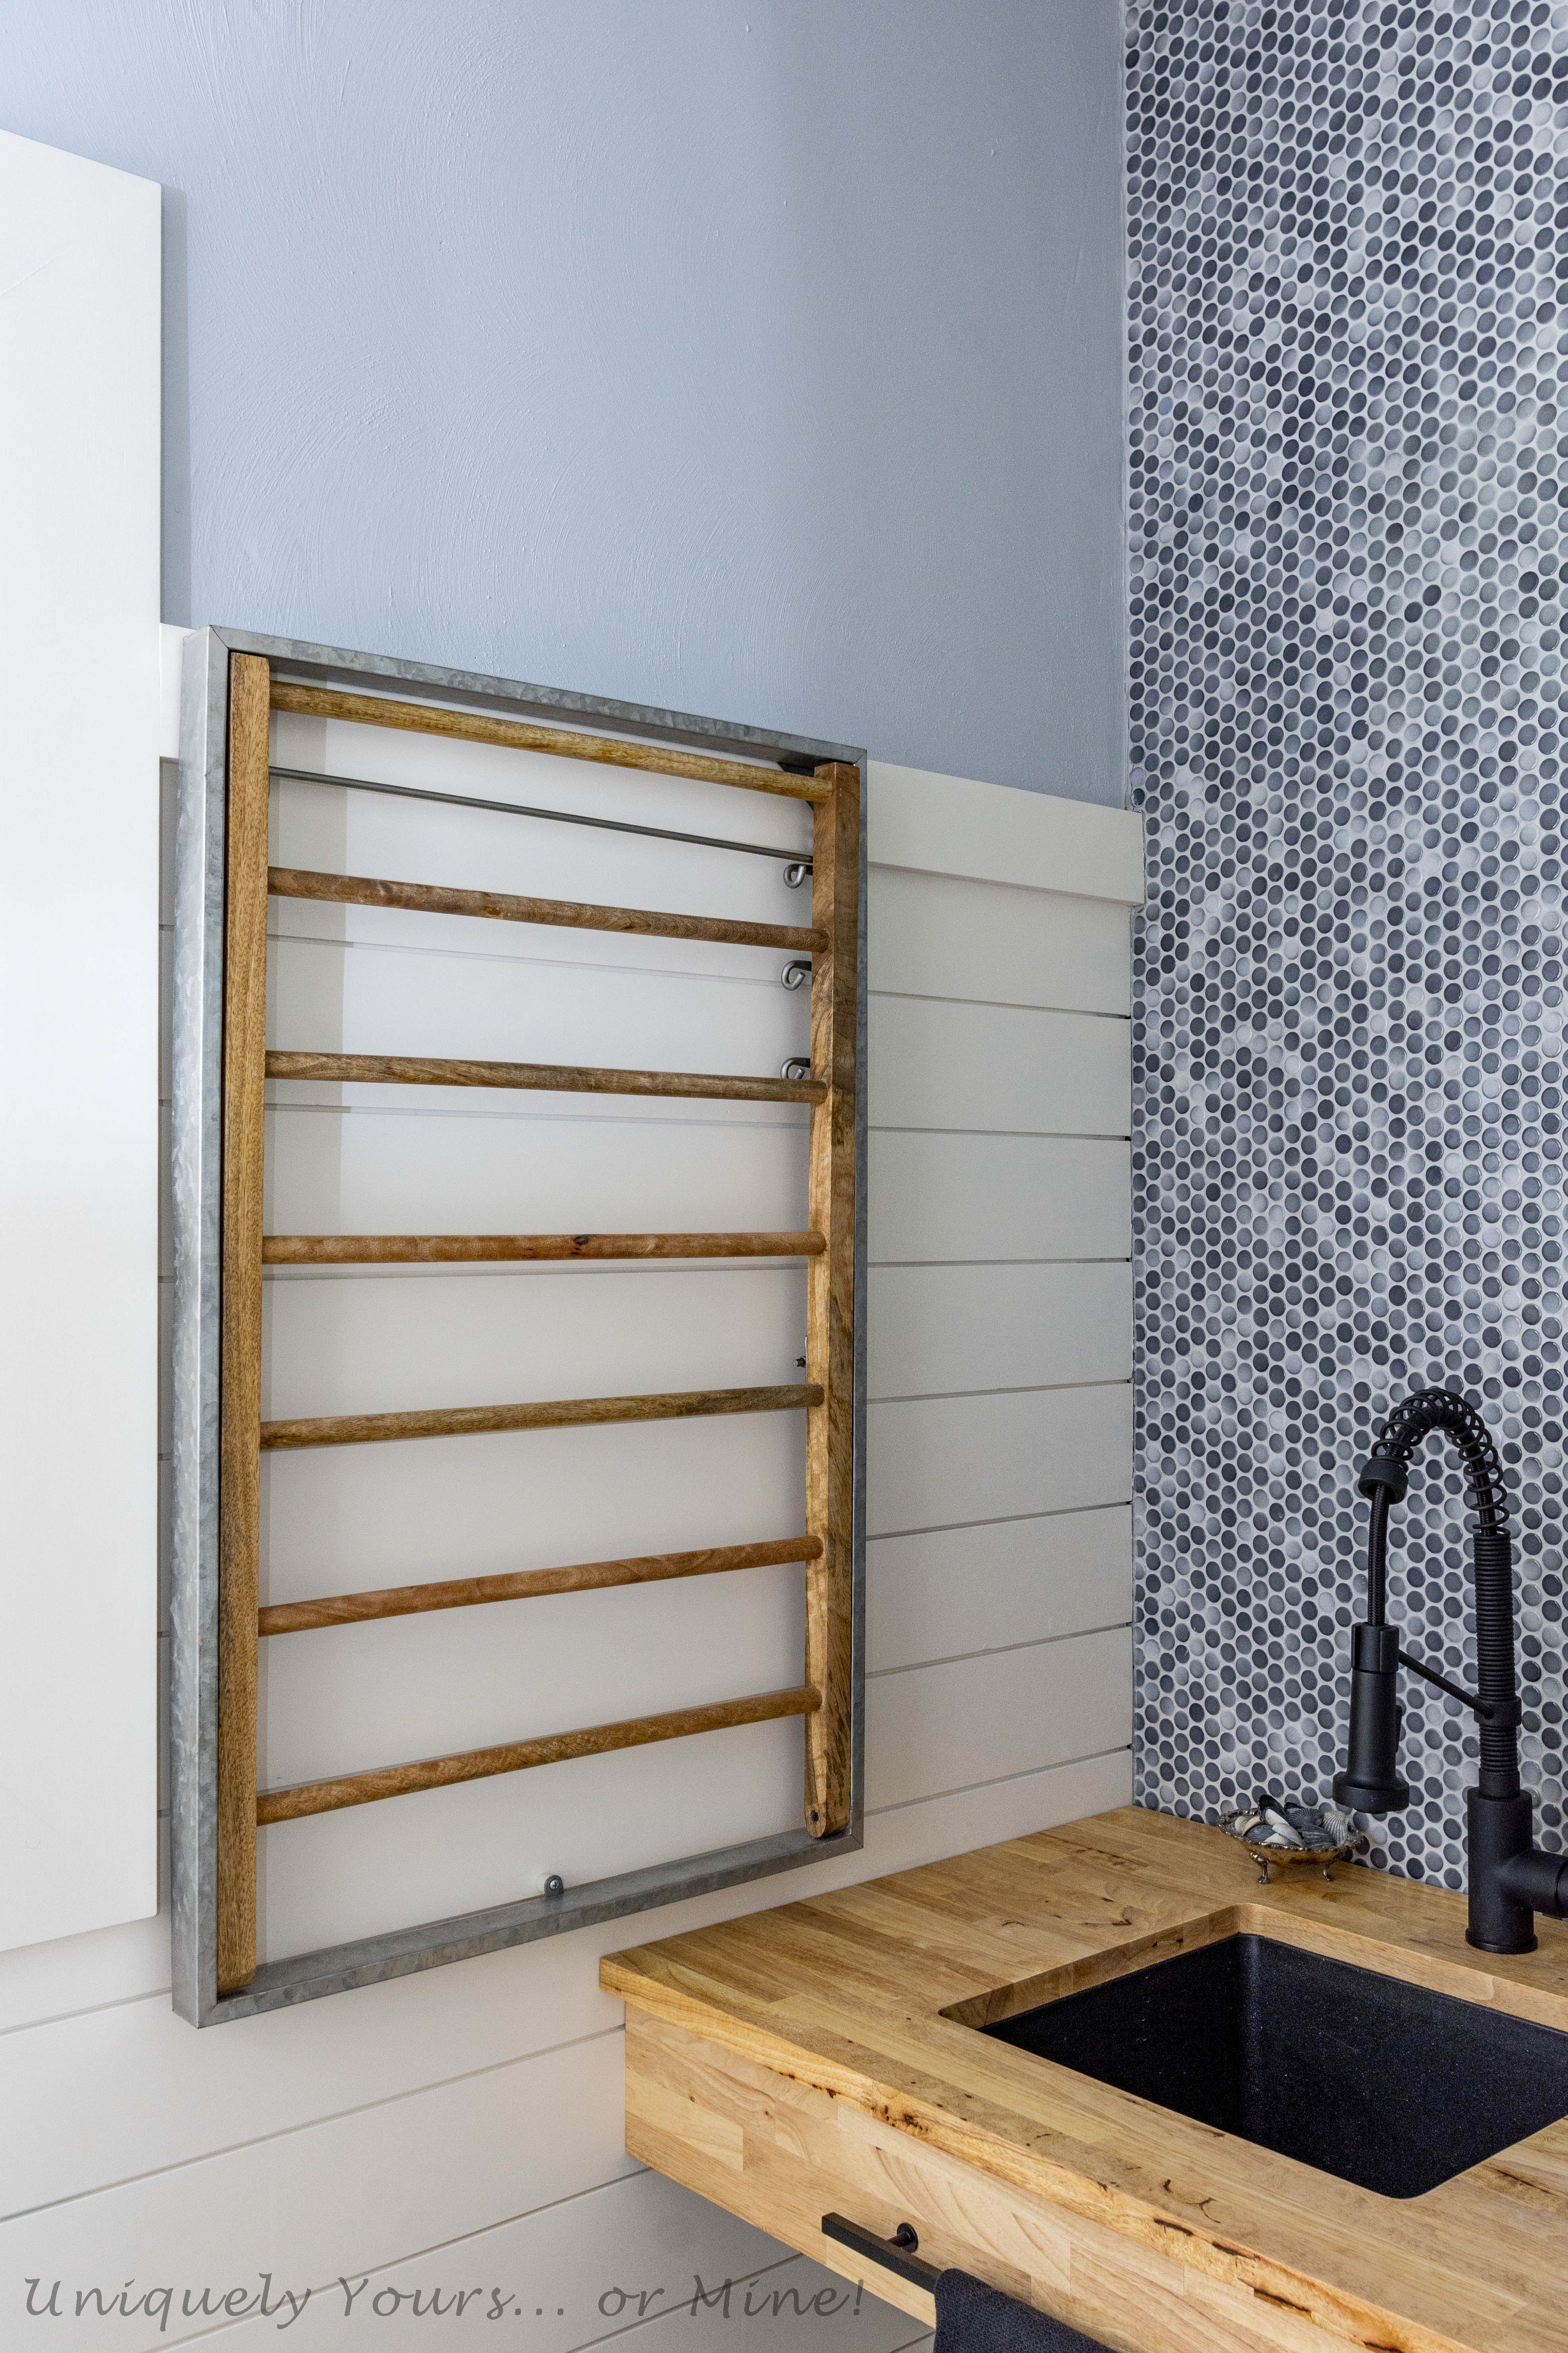
The ONLY place I had for a drying rack was beside the sink, while it is not inconvenient at all, it does feel a little forced into the space, but hey it works great and that’s what matters the most. By the way, why is it so difficult to find good drying racks, I looked for SO long before I finally pulled the trigger on this one? (I wish I had taken the ones from my last LR when I moved!)
(Damn that bright blue paint BTW)
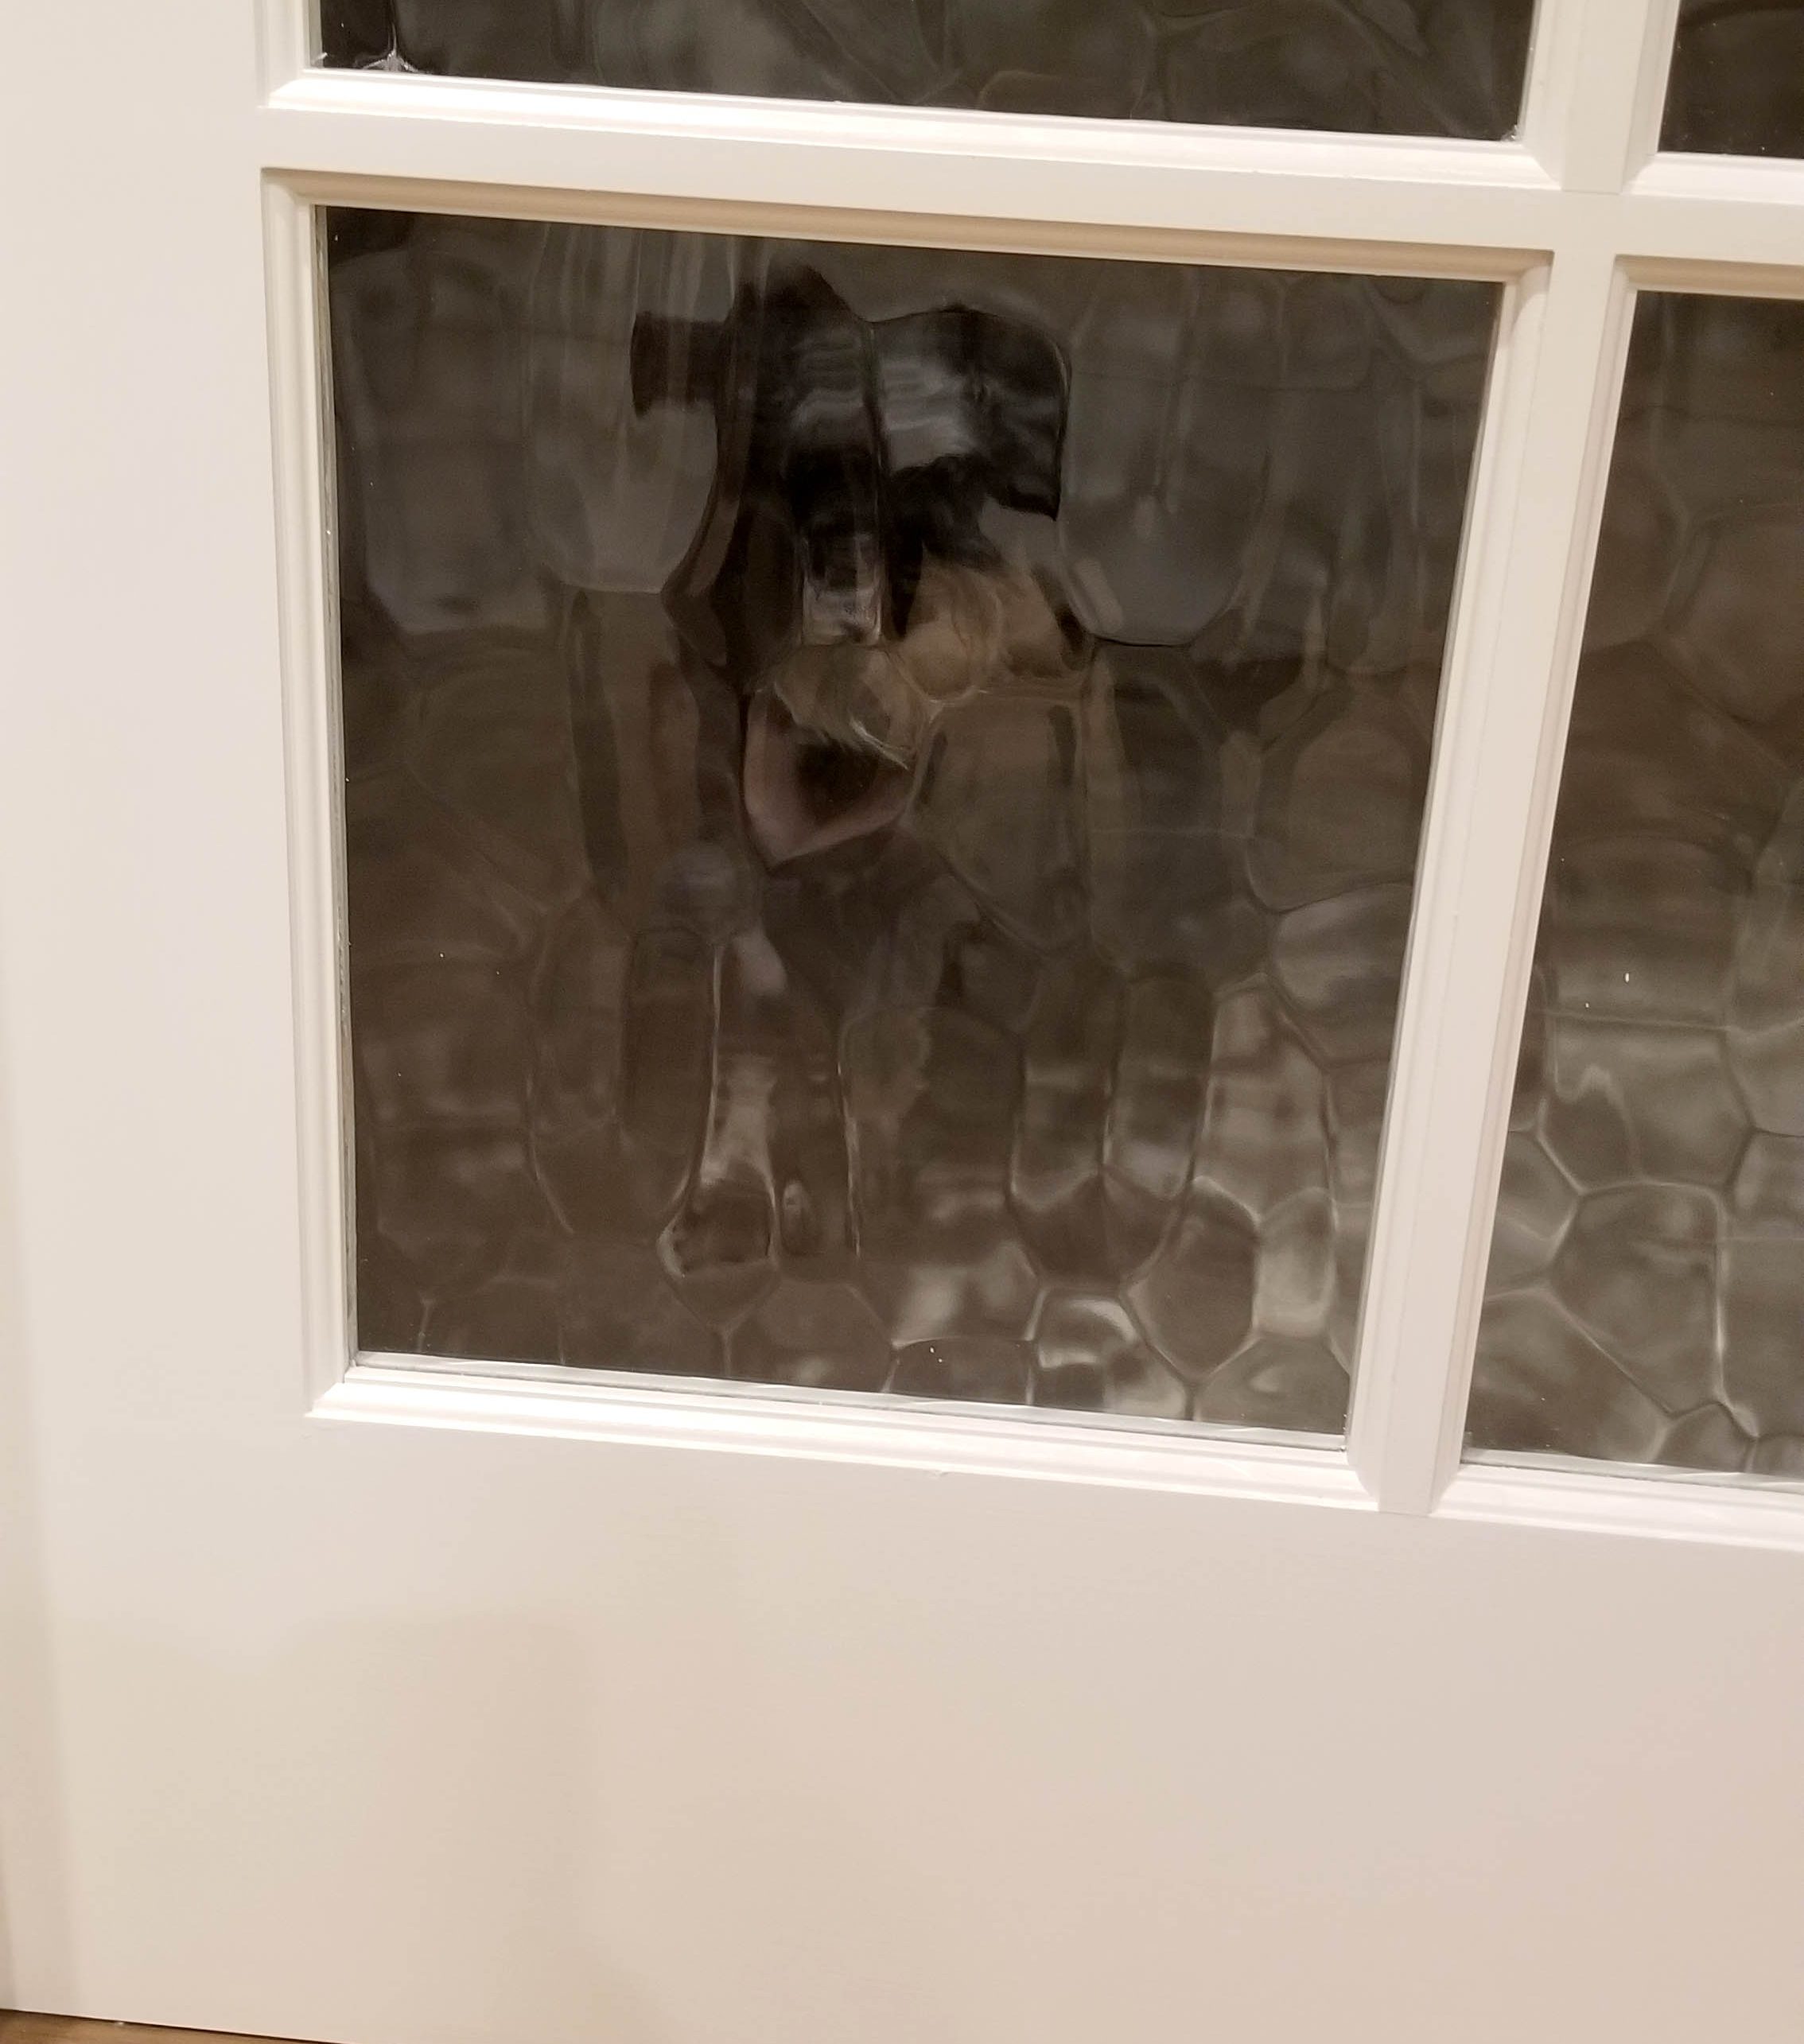
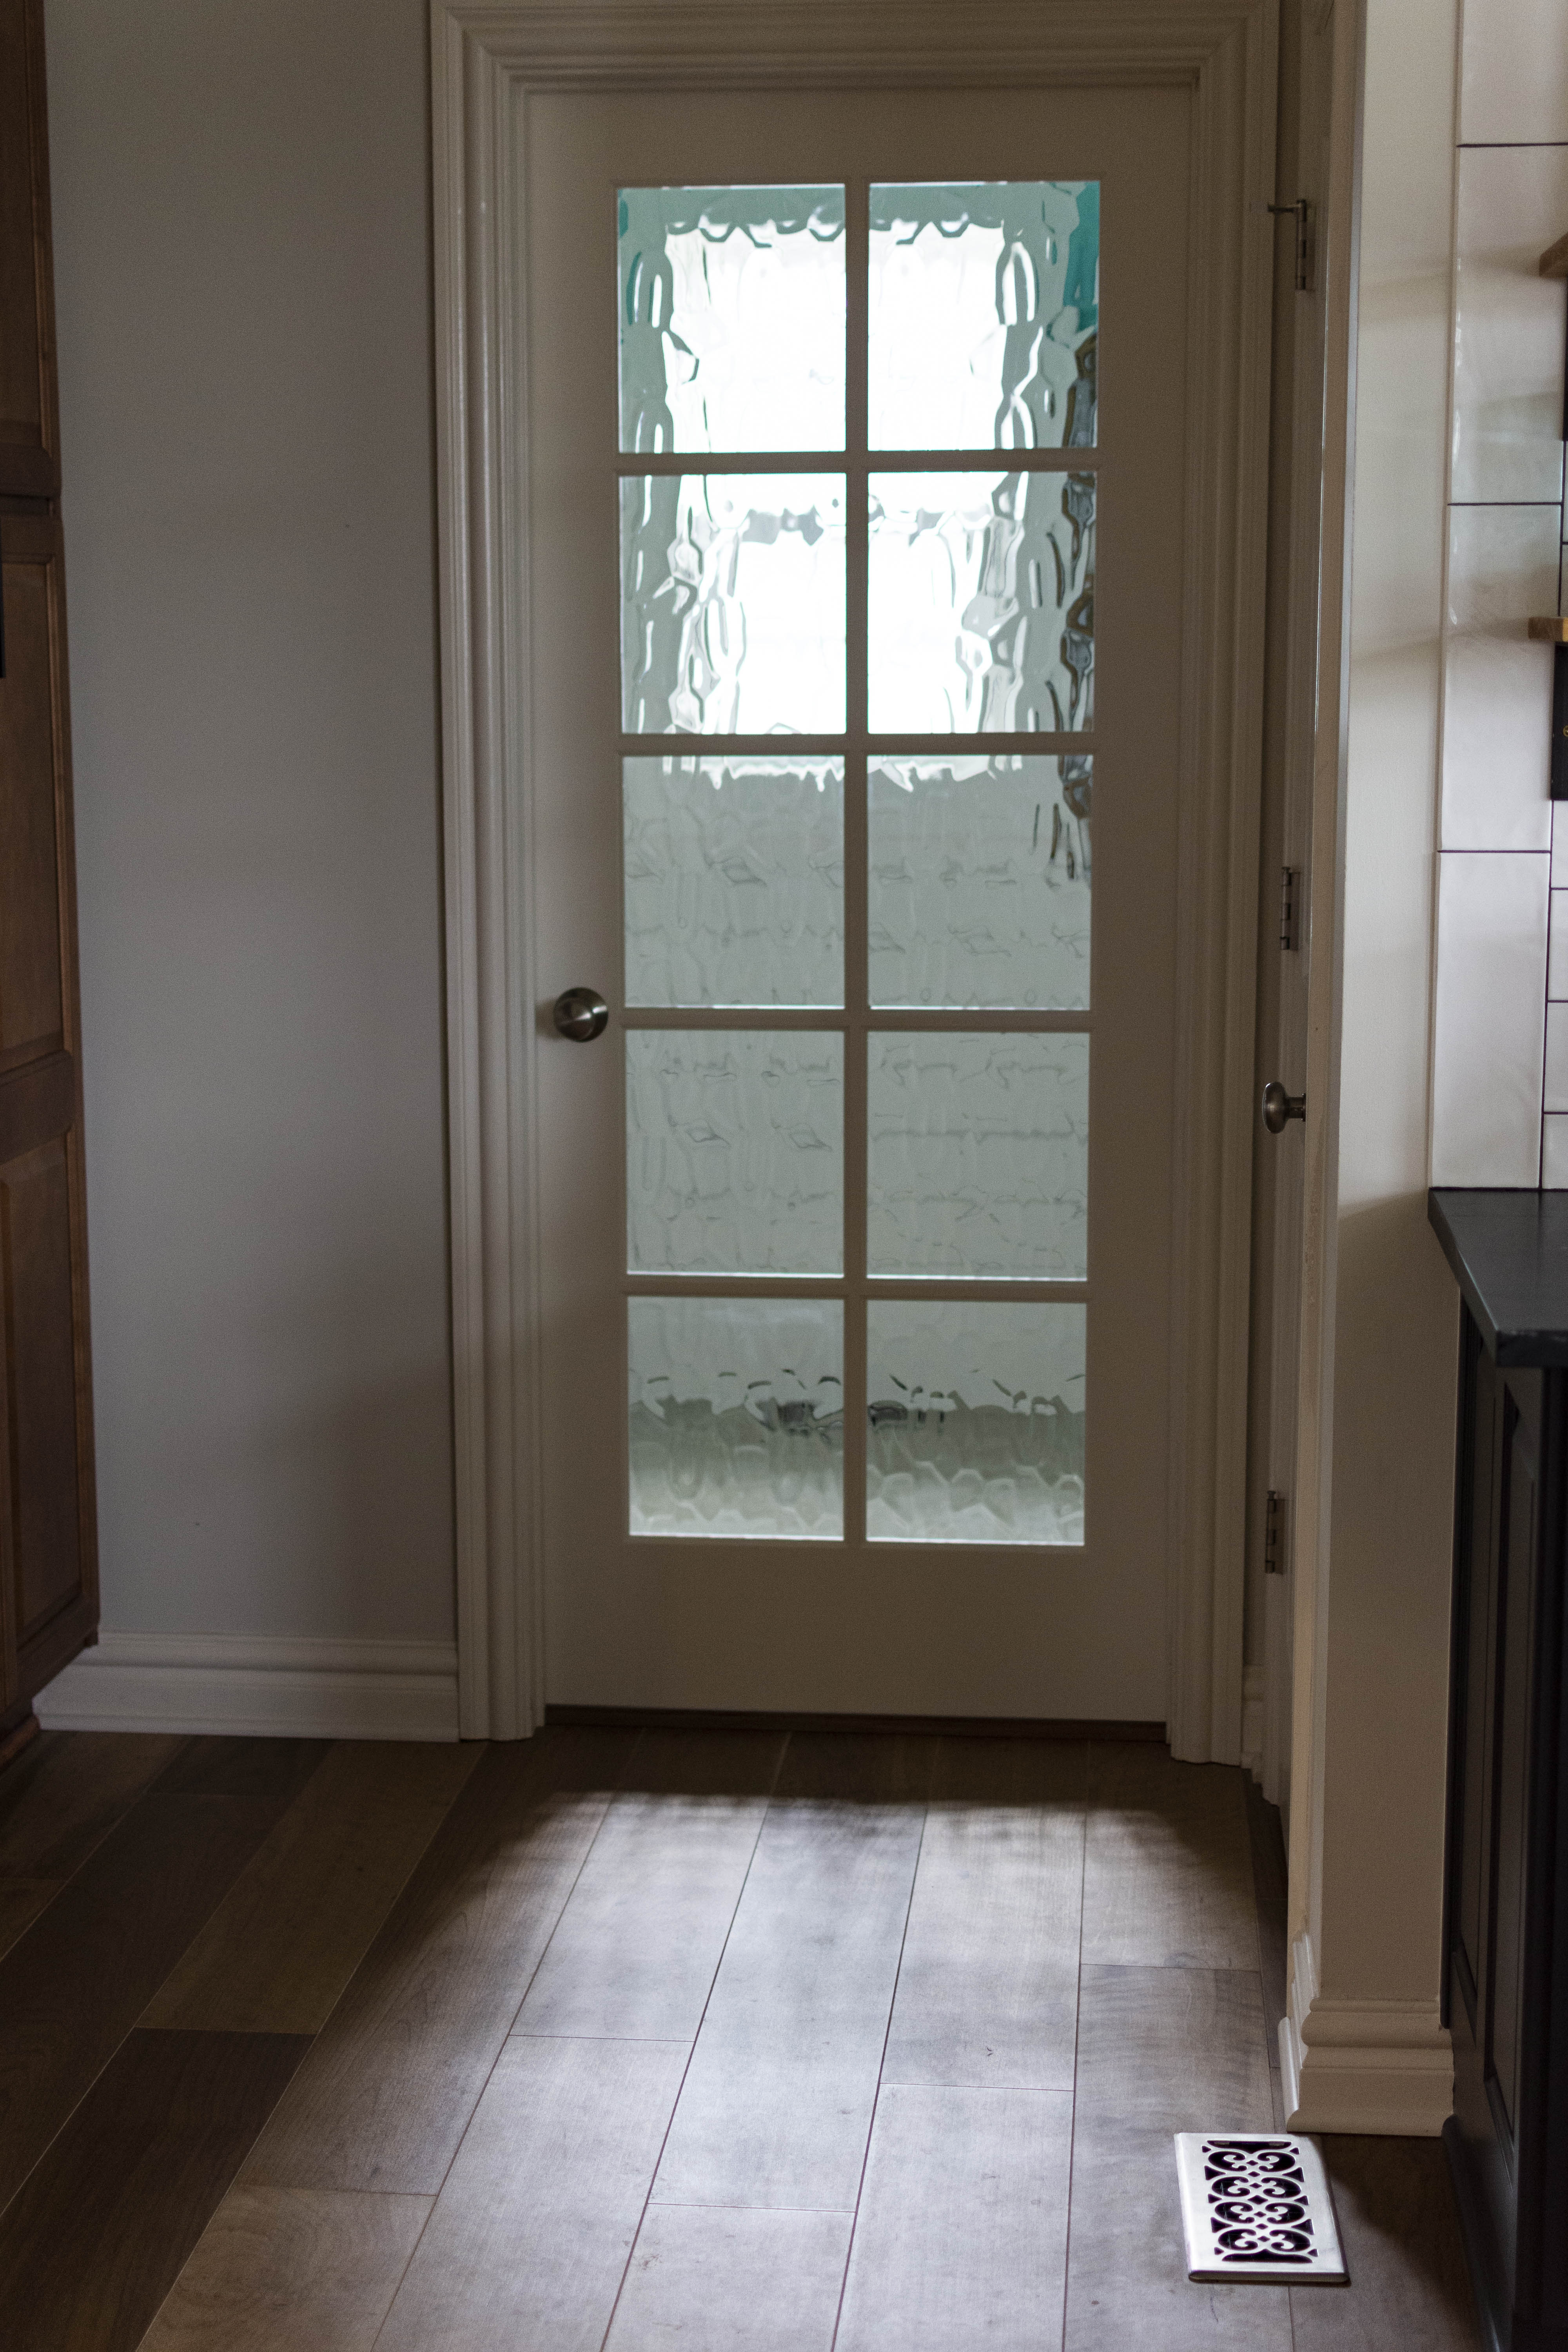
We also replaced the laundry room door with a glass french door that has a privacy “wave” in the glass. This decision was mainly due to the fact that I wanted the light from the window to spill into the kitchen to help with an area in the kitchen that doesn’t get any direct light from any other windows and can be a little dark without the overhead lights on. So you can sort of see in there, but not enough to have to worry about having a clean laundry room… if that is what keeps you up at night…
Sometimes we would accidentally shut the door and not know that our little Chewy had followed us in there, poor thing he was so patient!
I think I took this photo late one afternoon with the kitchen lights off, just look at all of the light pouring in from the window that would otherwise not be there!
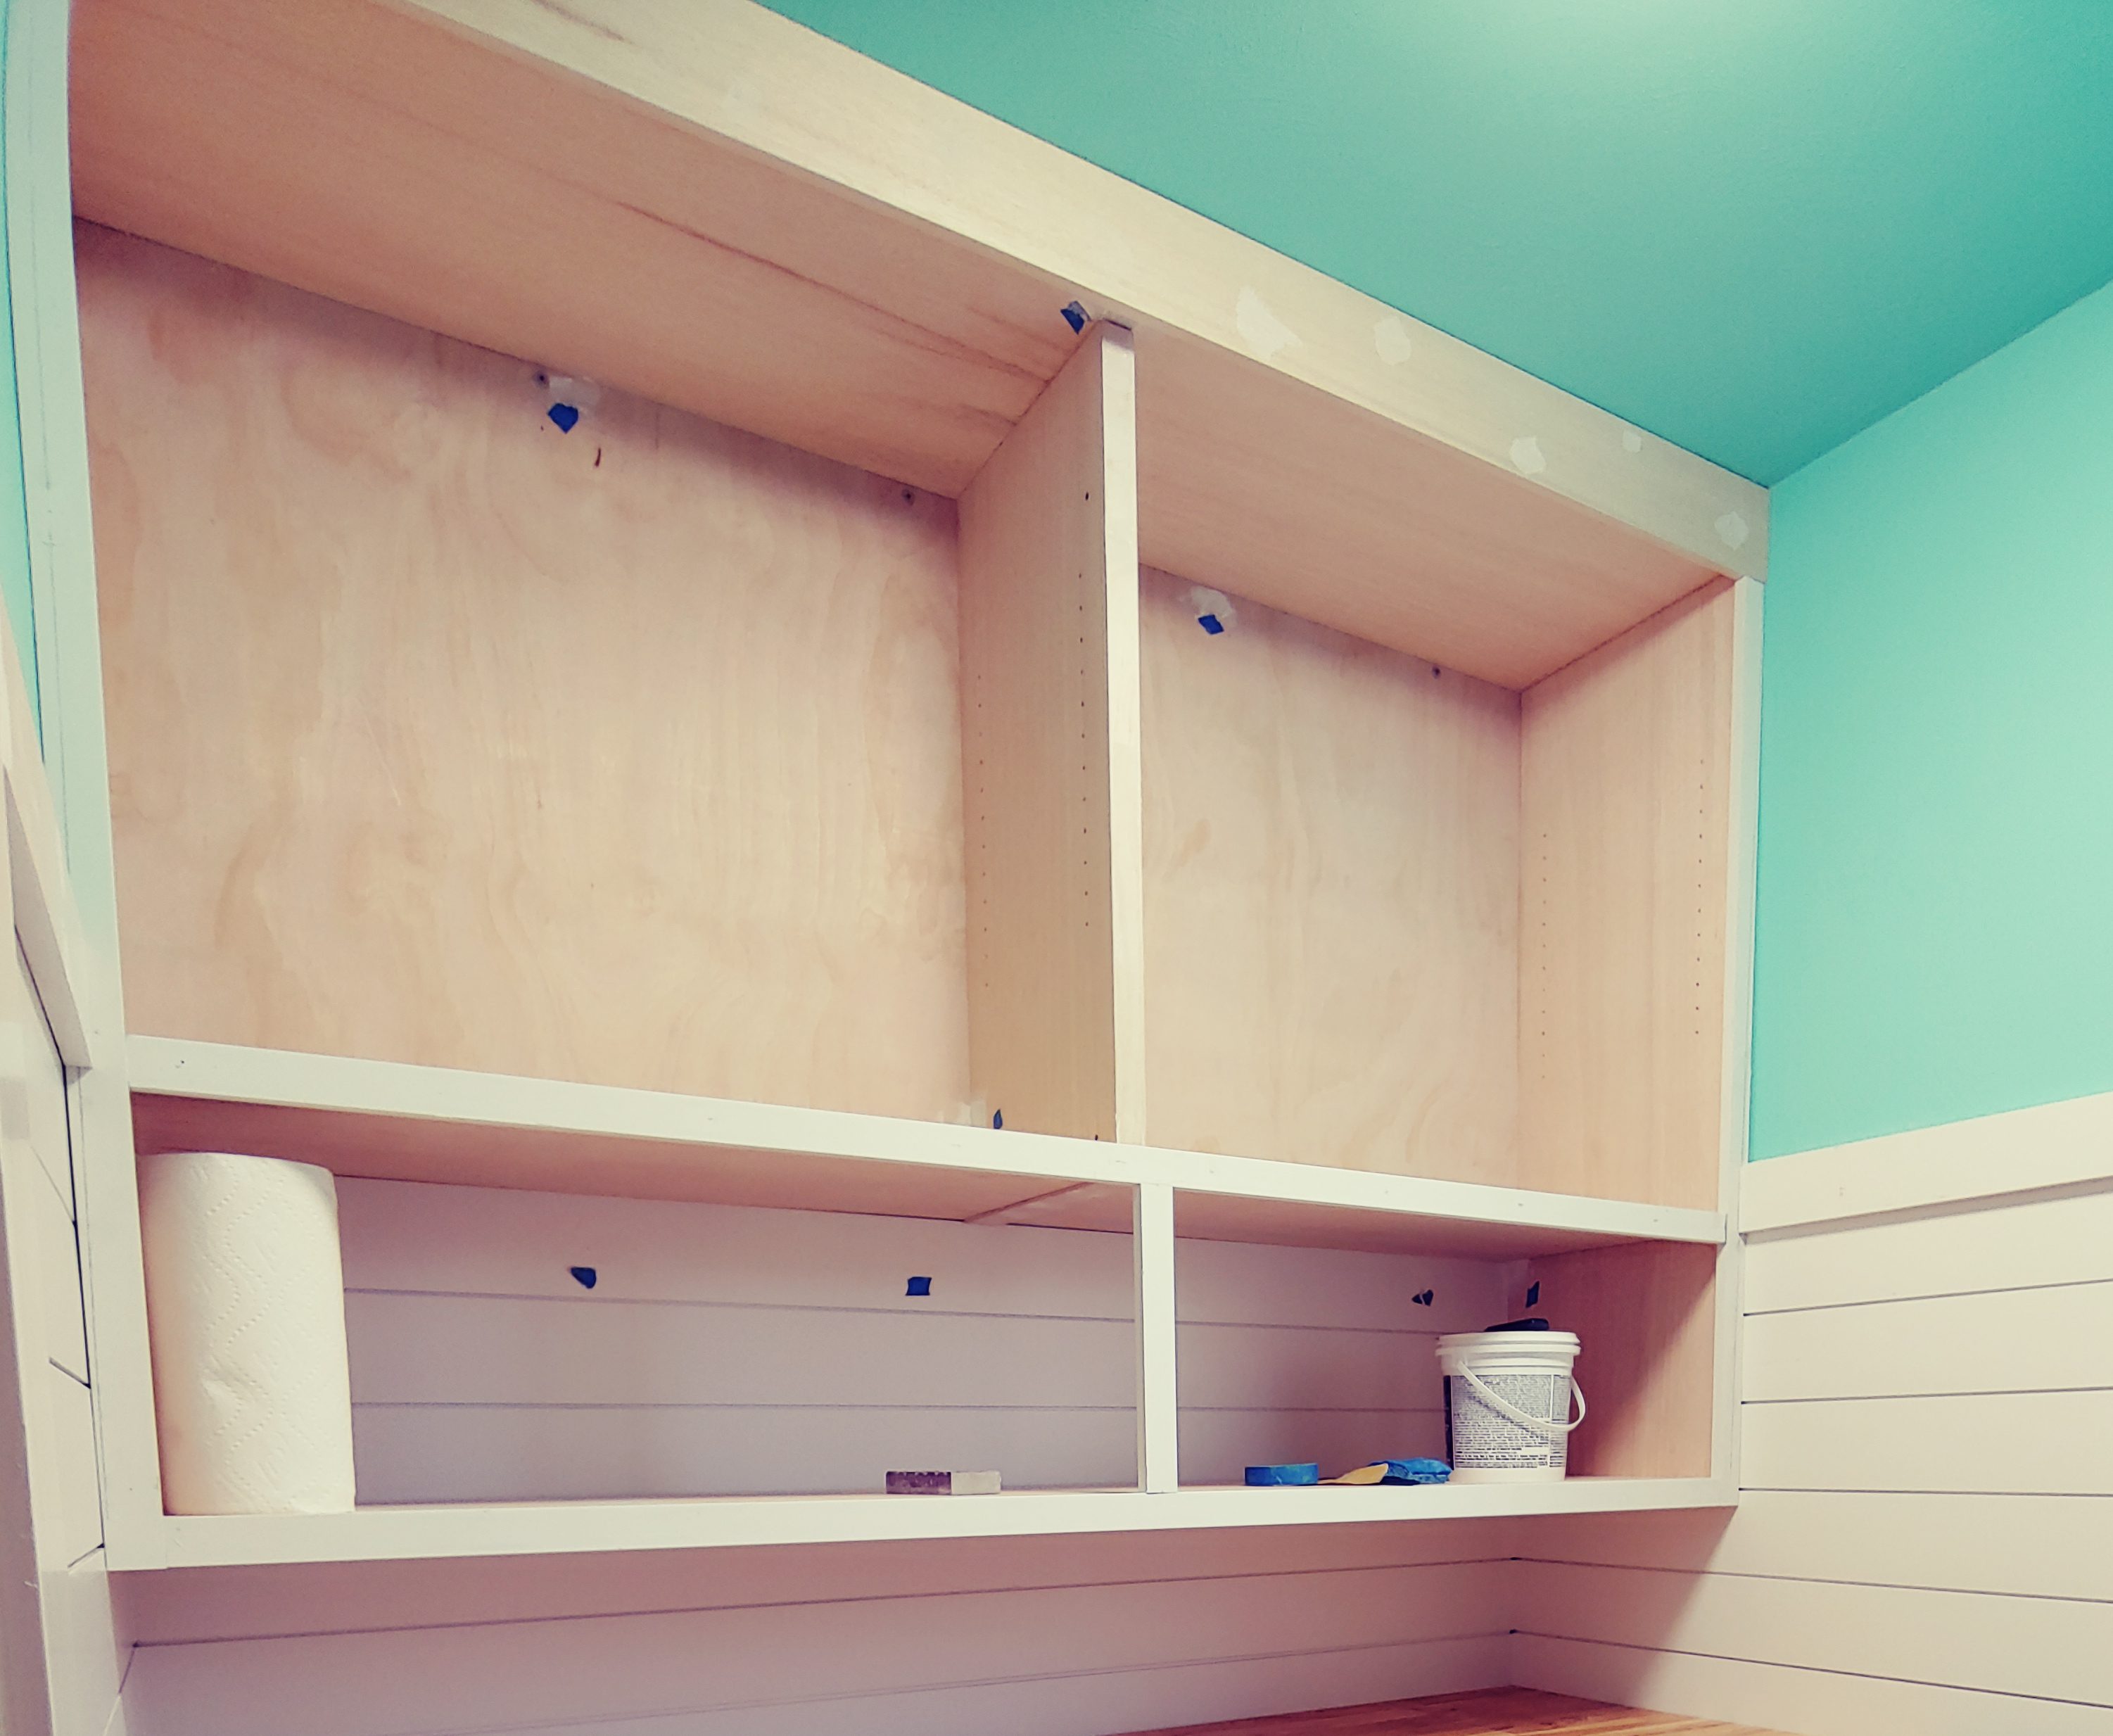
As far as the cabinets go I wish I could give you a tutorial on them, but really we kind of just winged it, and quite honestly we are not carpenters by any means! I can tell you that we built 3 “boxes” out of ¾” plywood and hung them on the wall. I designed the doors and my hubby built them. They are pretty thin which allows them to run along a pre-made plastic track made for sliding doors. They slide pretty well, but if I had to do it again I would use a different system for sliding doors, but the doors themselves are fabulous!
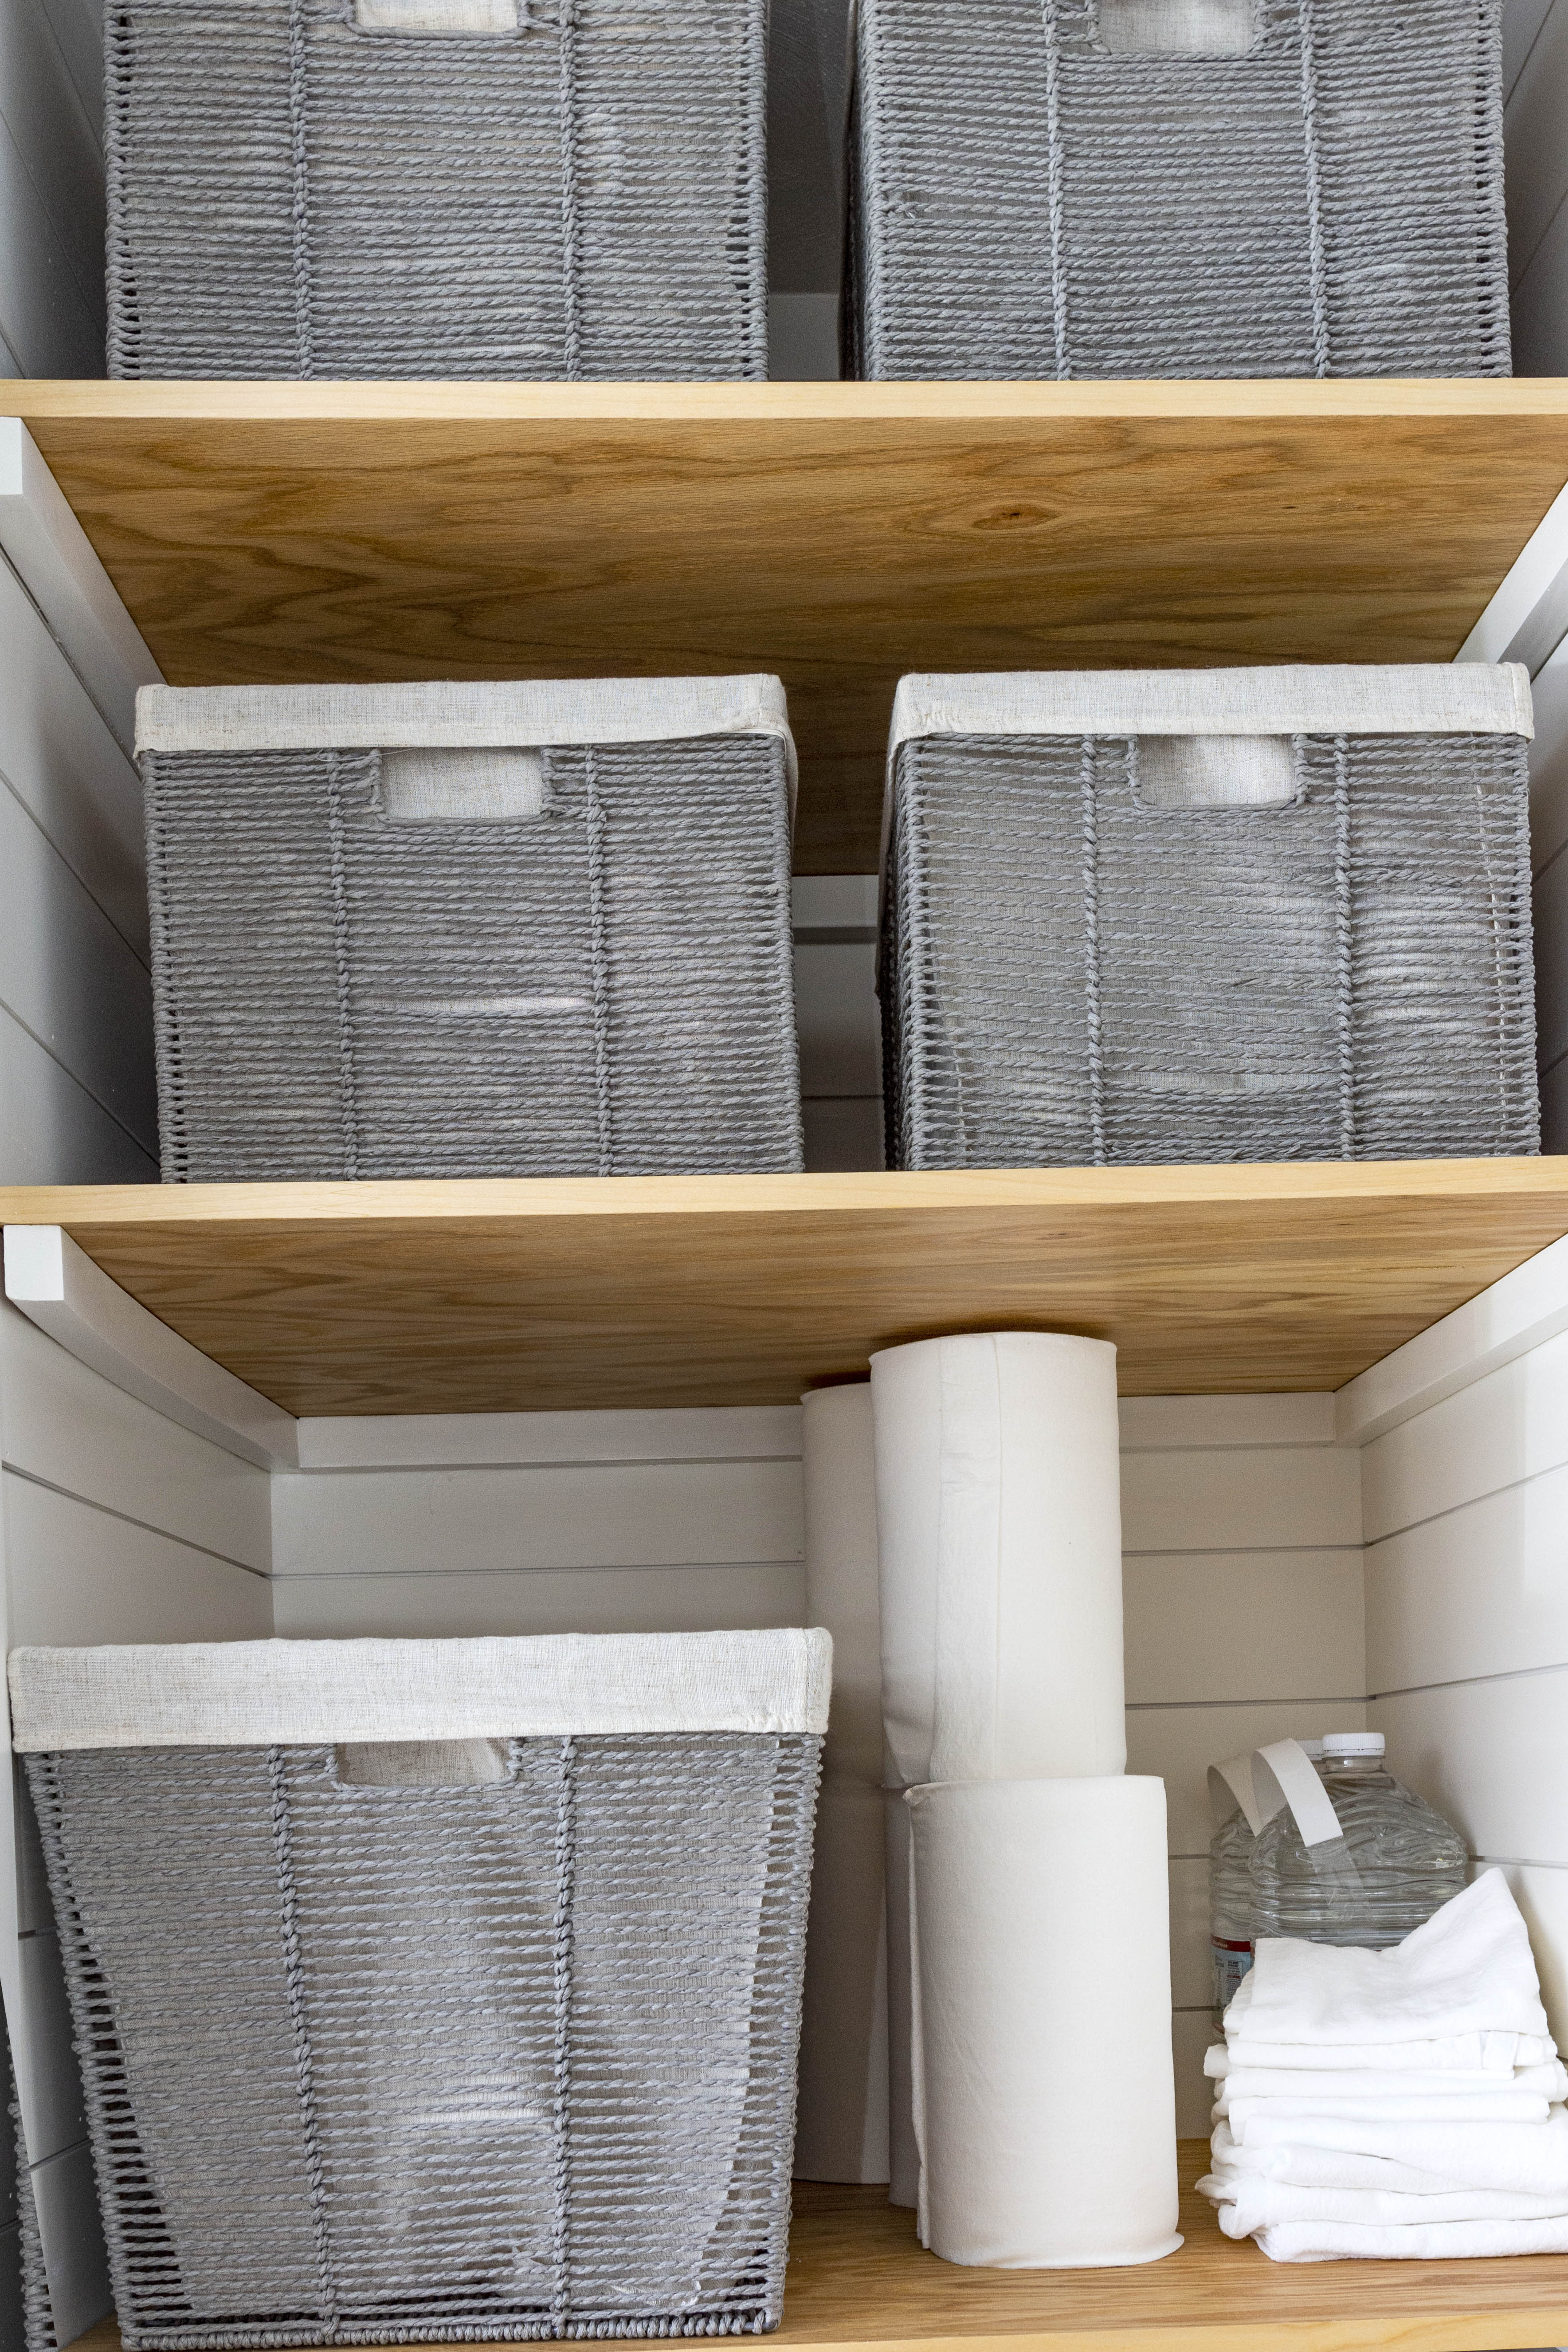
Yes, the cabinets go all the way to the 9 ft ceiling, which weirdly actually makes the ceilings seem taller?! Yes, I have to get a stool out to access them. I store out of season linens, beach towels and honestly random crap that I don’t need to get to very often… they are only about ½ full… I think I have overestimated my need for a “shit ton” of storage, but I am happy to have all of the extra storage spaces I can get my hands on (I have issues that I, as well as my super awesome hubby, are well aware of)!

A long time ago I stopped using wood putty to fill holes in wood that I will paint, spackling compound is my hole filler of choice, it is so much easier to work with and sand!
I painted all of the woodwork and cabinets the same color as the rest of the trim in the house with Benjamin Moore Advance. It is Shell White, which is a Sherwin-Williams color, but I have Benjamin Moore color match it for me. I am very picky about my paint, I use Benjamin Moore 99% of the time, but Behr is a VERY close runner up, they both are just so thick, apply and wear beautifully.

We used the same wood and process from the open closet for the interior shelves for the cabinet. Although here we used our Kreg Jig shelf pin template (which is awesome) to allow for adjustment of the shelves later on if need be. I just love how the color pops over in this corner of the room!

So, a couple of months later I bit the bullet and repainted the room “Silver Half Dollar” by Benjamin Moore, a very pretty, calm color that perfectly coordinates with the penny tile, it only took about 1.5 hrs to repaint, but I just hate redoing work so I’m bitching just a tad, but it is my own fault.. I love it, it’s very, very pretty!

Ahh.. perfectly coordinated! I may want to add a round mirror or some art on this wall at some point, but at the same time I feel like the penny tile is an art by itself so we will see…
We just used inexpensive marble threshhold pieces for the niche, they did they job!
Cutting the hole for the sink was a pain in the ARSE and I was freaking out the whole time because I didn’t want to mess it up. If I had to do this again I would probably opt for a drop in sink for that reason alone.
I love my open shelf below, it is tall enough to hold a large container of detergent, which is not as pretty as the glass carafes of detergent and softener. Yes, it gets dusty, but the benefit far outweighs the fact that I need to dust the shelf when I clean. I really don’t know why there is always such a controversy with open shelving, I love them when they can be both purposeful and pretty!
We used the same handles that we used in the kitchen renovation, they really help with the balance of the door and the scale is perfect!
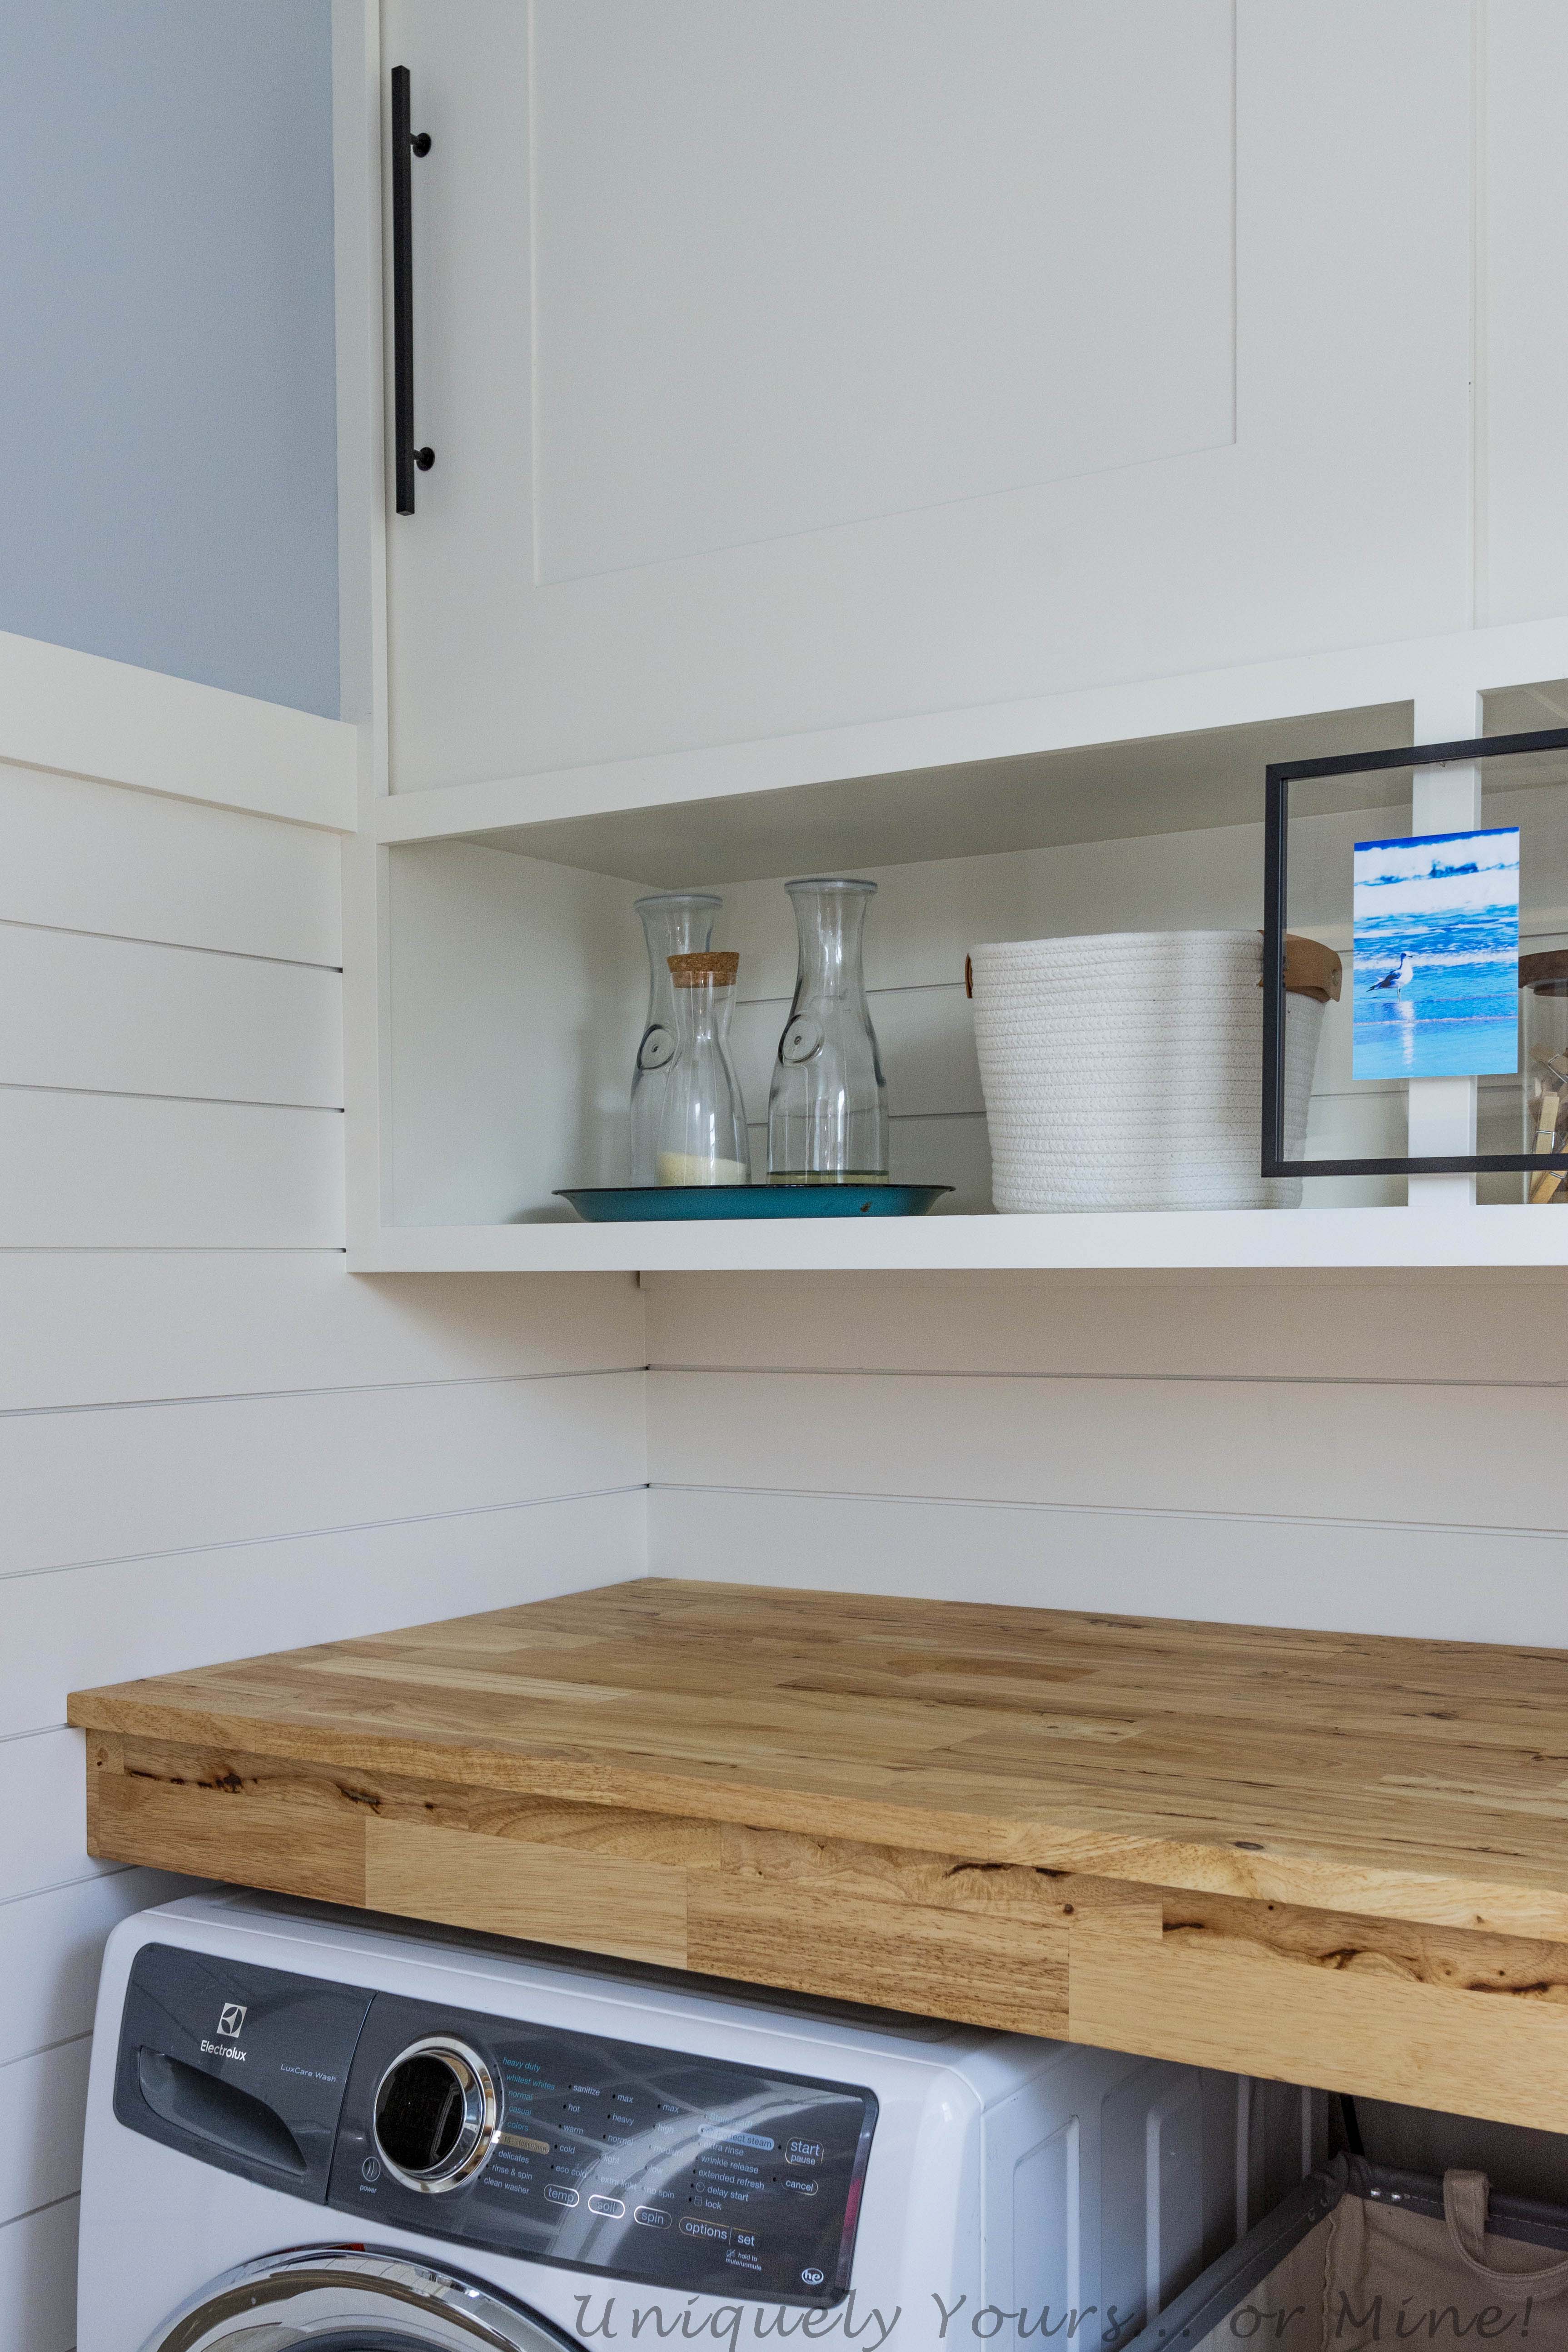
The countertop is easily removeable as it only is sitting on a wood ledge which is attached to studs in the wall, you have to unscrew the lip first which is held on by pocket screws.
I don’t hang my clothes when they are finished drying. I fold what goes in the dressers and I lay flat in a pile what is going to be hung up. When I take them upstairs to hang they are never wrinkled, so this process and layout works for me. I see lots of renovators installing rods in their laundry rooms and I just don’t understand how that system works? Do you remove all of the hangers from the closet, bring them to LR and hang up clothes then… I really want to understand, is it a preference or is one way really “better” than the other?

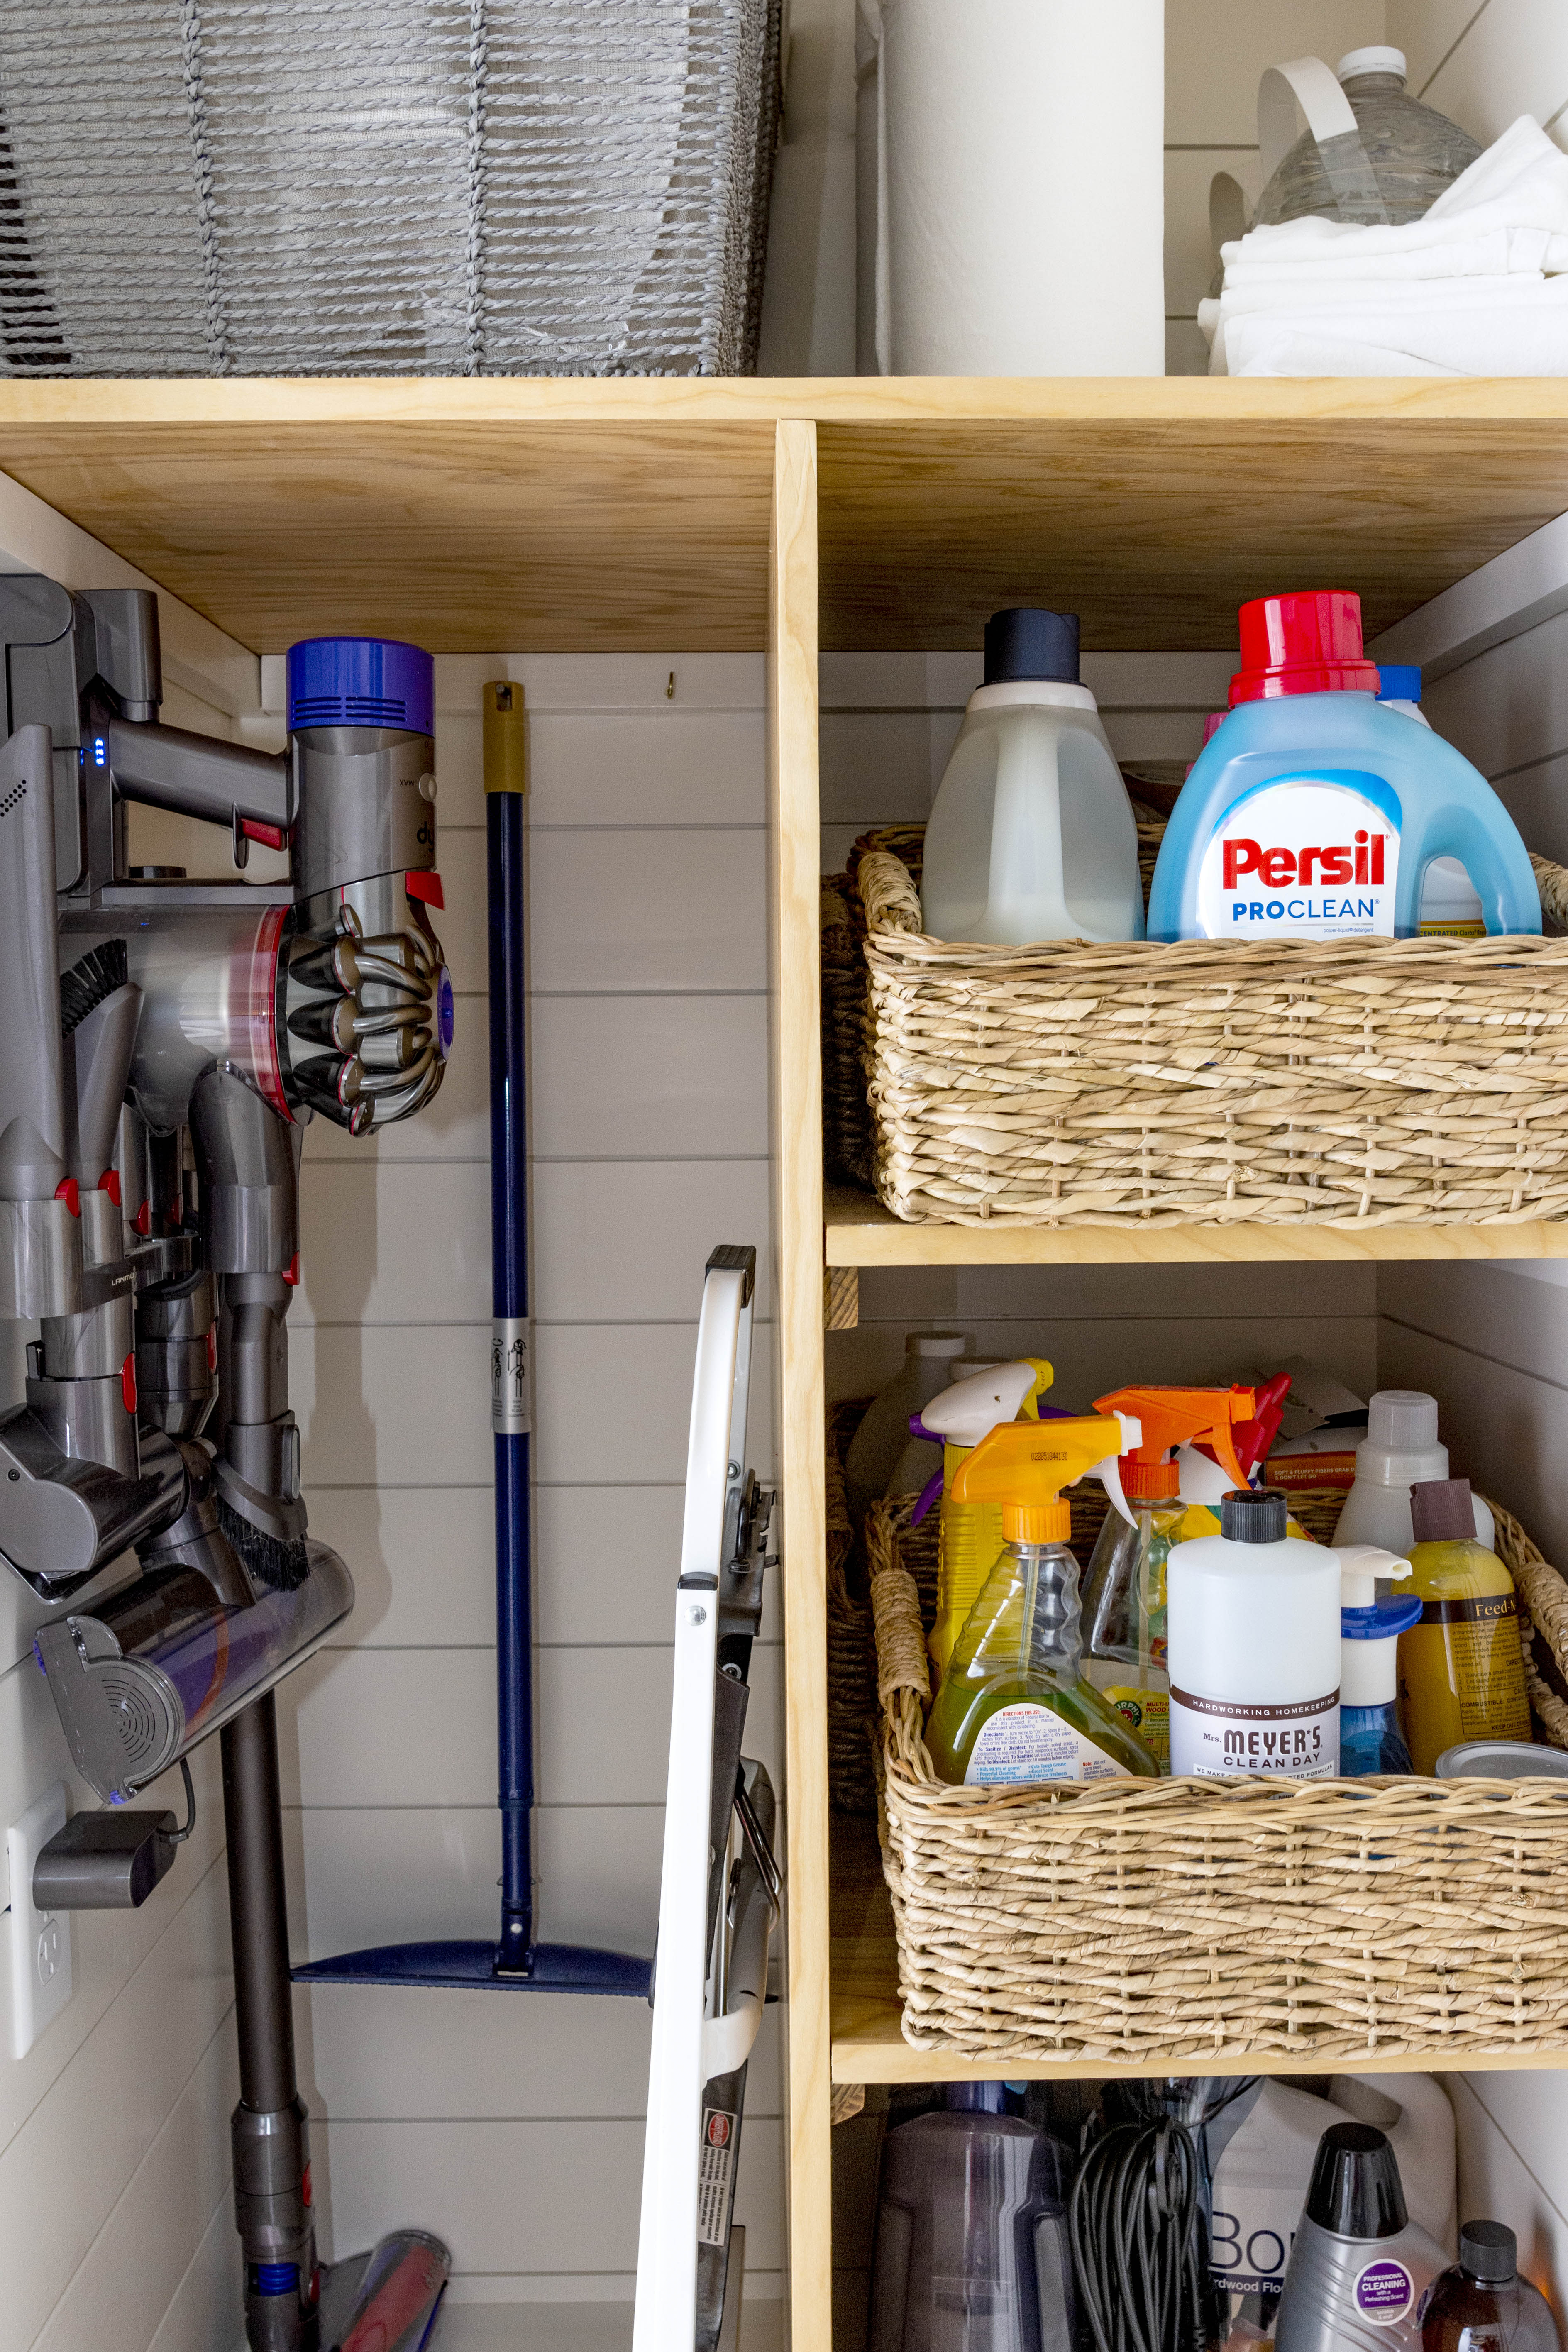
Ahh.. my open storage, how I love thee… easy to get to, easy to see, organized area for my cordless Dyson.. check, check and check! At least 1 of those baskets is empty, I’m telling you I love storage!
I am also going to put a plug in for Persil, up until about 2 years ago I exclusively used Tide, I don’t remember why I switched, but I will never go back… Persil is awesome and especially does a great job with odors in clothes (think workout) and stains..
I forgot to have my hubby cut the ends of the shelf supports at a 45 degree angle until after they were installed, it wasn’t that important for me to uninstall them, but I will remember that for next time. I did add a birch veneer band to the front of all of the shelves here and in the closet, it’s a very simple process if you ever want to tackle it yourself. Also, if you are wondering why stained shelves vs. painted, 1 I liked the look of the two surfaces together and 2 they are easier to keep looking like new.
I also replaced the “boob” light with a less obnoxious “flat boob?” light, it’s nothing fancy but it is an LED, very clean, white light, all-in-one light fixture and it does look a little nautical. Well, we liked it so much we installed the same light in my hubby’s closet.
So that’s it! I am super happy with the look and functionality of the space, it is no longer a place I “dread” using, I will never think of doing laundry as “fun” but at least I can do it in a pretty space.
Thanks as always for stopping by…
Until next time!


