Well we had a very interesting weather day here in Kentucky yesterday. I’m just outside of Louisville and we got 4” of snow, so needless to say the schools were closed and the kiddo was home. This is a very early morning shot of our backyard, it was pretty gloomy and quiet outside all day yesterday.
And Chewy (our Schnoodle) freakin’ loves the snow, buries his face in it and runs like a snow plow, but when he comes in he’s all covered in snow balls on his fringe and it takes like 10 minutes to remove them with the hair dryer… doesn’t his face say WTF Mom let me in!
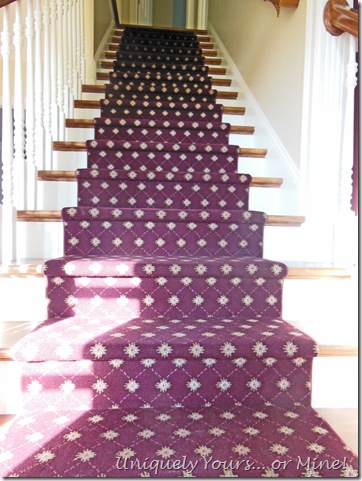
So anyway, this post is really about how productive I was yesterday… which is not always the case… I replaced the runner on our stairs AND fixed the scratches on the treads while I was at it! This is what I started with and let me say I have HATED this runner since day one, but I was not ready for a big stair renovation…
I found a couple of runners that were the right width and that I liked… I have seen a bunch of bloggers redo their stairs for “$100” with runners, let me tell you I could NOT find any runners wide enough for that kind of price. These runners cost me just over $300 in total and they were on sale… maybe I’m looking in the wrong place? Anyway, I laid out the runners to validate how the layout would work before I started the process.
Getting the original runner up was not a big deal, just a lot of staples to remove that didn’t come out with the runner when I pulled it out. That left me with a tack strip in the back and carpet padding, which I left down… and consequently stepped on the tack strips a couple of times while doing this project!
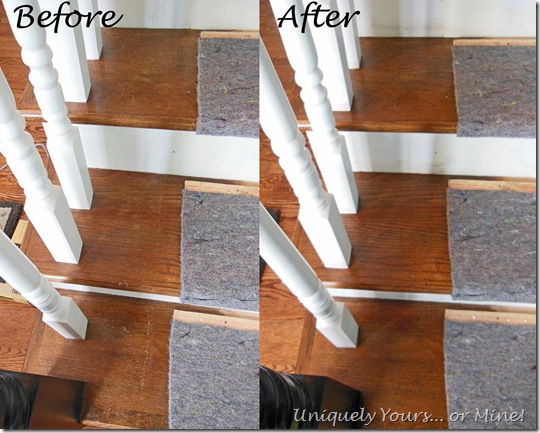
After the runner was up I worked on the scratches in the oak treads. Most of them looked a little like this…
The process I used was so simple, just wipe on more stain on the stairs, wait a couple of minutes then wipe it off. I would say the difference is pretty dramatic.
I have no idea what the original floor color was, but I used “Special Walnut” stain color, pretty awesome change right?!
I didn’t poly over the stain, just wiped the excess off good. I will eventually have the stairs refinished but for now they coordinate much better with the refinished wood floors downstairs.
Here’s my BIG HUGE tip for those of you with white stair risers and pickets. 1. wipe as much of the excess stain off of the white paint as you can before it dries, 2. once the stain is dry use Goo Gone and a paper towel to remove the rest of the stain 3. clean the Goo Gone off with a paper towel and Formula 409. SERIOUSLY, if you do this you might not need to touch up your white painted areas, but at the most you’d only have to do one coat to make it look good. Otherwise your looking at at least 2 coats to cover the areas the stain discolored, don’t say I didn’t warn you..
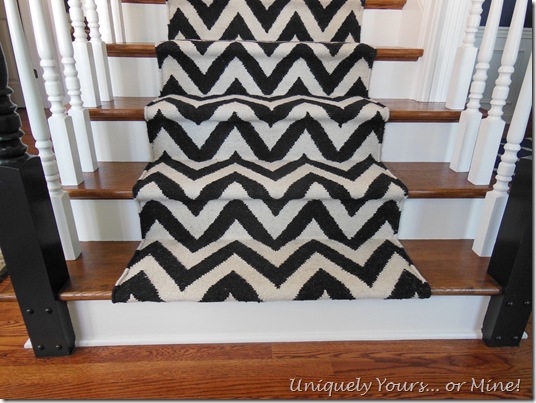
So after my white paint touch up was complete I laid out the runner and started stapling away, being sure to keep it taught and straight. This was the easiest part of this whole update. I also hammered down the tack strip under the runner so we couldn’t feel the tacks trough the carpet.
The first riser was originally carpeted but I didn’t have enough runner for it so I just filled in the staple holes and painted the riser, I like it better this way …
So I’m thrilled to death with this update. Now I don’t feel like I have to explain to guests why we have updated the whole first floor but let the old, ratty, ugly runner. While this runner is not a permanent solution for me I will be very happy if I can get 2 years out of it or until I’m ready to make a longer term commitment.
I will totally admit that this was a project I had been dreading because of the poor condition of the wood. Even though it took me the better part of the day to complete it was well worth it and nowhere near as bad as I thought it would be. I’m hoping you’re keeping warm and safe, thanks for stopping by!


Or you could tape off the pickets and risers? Nice chevron!
LikeLike
Totally right! I personally find that for me that process is more time consuming, less cost effective and I still have to touch up paint anyway, but everyone has a way that works best for them. Thanks for taking the time to comment!
LikeLike
good lordy woman!! is there anything you CAN’T do??! this looks terrific! what an update….
i remain,
impressed in richmond
LikeLike
Haha, yes, there is PLENTY I can’t do, but I’m glad you liked what I could 🙂
LikeLike
Beautiful job! The great thing about being snowed in – you can get lots done.
LikeLike
Thanks so much! It doesn’t always work that way, but I’m glad I had the motivation to get it done!
LikeLike
I want you to come hang out with me for a weekend! 🙂
LikeLike
Haha, I’m not always so productive, but I do love it when I am!
LikeLike
Fantabulous change!
LikeLike
Thanks so much Joanne!
LikeLike
I love this! So graphic!
LikeLike
Thanks so much Amy!
LikeLike
Wow! I wish I could do this with my stairs! They are carpeted from the 70’s and ugly and it would be a crap load of work – more than i’m willing to put into them since we hope to sell the house soon 😦 This turned out awesome – simple update!
LikeLike
Thanks Krista! And you’re right it is a lot of work, but I was sick and tired of looking at it and we plan on being here for some time!
LikeLike
Your new runner looks terrific. This project has been on my list for years. Maybe 2015 will be the year I finally make it happen.
LikeLike
Thanks so much! It was on my list for a long time too, it ended up being MUCH easier than I thought it would be!
LikeLike