I’m back!! I may be posting sporadically, but I’m trying to get somewhat into the swing of things since we moved from Richmond, VA to Louisville, KY… lots of boxes still to unpack… I think writing these posts will help me not dwell on how much I still have left to do! One day… one box… one area at a time… it’s slow, but it’s progress.
Anyway, on to the furniture part!
I finished this piece a couple of weeks before we moved, I loved it so much I wanted to hold onto it just in case I had a spot for it in our new home. Well I’m here now and I’m pretty sure that not only do I not have a spot for it, but I will also have to make some other hard “letting go” decisions before all is said and done… yes, it could be worse… I could NEED furniture and not have it I know, but I do tend to get “attached” to certain pieces… and I really do LOVE this one!
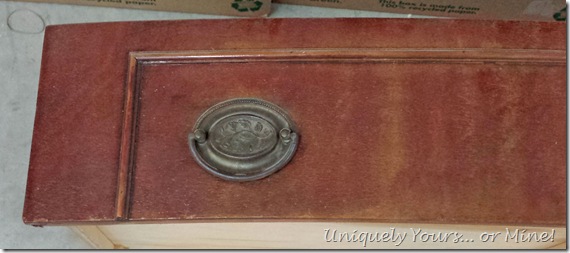
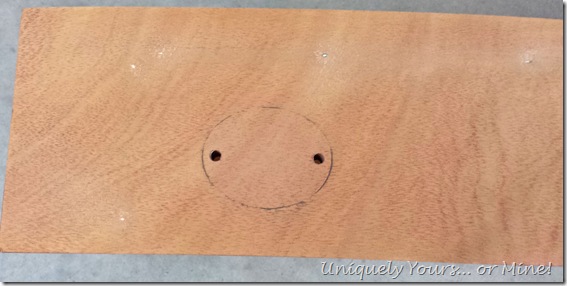
I thought it was sad that no one else wanted to tackle this beauty as I saw its potential right away! The chest had quite a bit of veneer loss on the top, not just the little piece you see missing from the front, so I enlisted the help of my SAH (Super Awesome Hubby of course) to help me remove the rest of the veneer from the top. It was not fun… he didn’t like doing it… and he gouged the crap out of the top so I wasn’t very happy… oh well I guess you get what you pay for right? ![]()
BEFORE
Just look at all of those gouges in the picture below… ARGH! I had already started filling them by the time I took this photo. I used Minwax High Performance Wood Filler which is made specifically for problems like this. If you haven’t tried this product yet, I highly recommend you do, I also use it to rebuild missing furniture pieces because you can sculpt it, it is just a great product! Basically it’s a 2 part product you mix together then you have about 5 minutes of working time with it, also you can sand it and once it hardens it is VERY durable and sort of miraculous.
The below photo is after I sanded the filler down with my orbital sander, starting with 100 grit paper and finishing up to 150 grit. If I was planning on staining the top then I would have finished with 220 grit, but when I am painting a piece I only sand to 150 grit which is still a very smooth surface for paint but still has enough grit for the paint to adhere to.
While the top was drying I started to work on the drawer fronts. There was a big piece of molding missing on one of the drawers so I chose to remove all of the molding from the drawer fronts. Sometimes I replace the molding, but I didn’t have the time or the inclination to do so with this piece.
I used a stiff spackling knife and gently pried the pieces up. The trim was attached with little nails that I removed with needle nosed pliers once I had removed all of the trim. I will usually hoard save the trim to use on future projects.
I filled the holes with stainable wood filler and sanded the entire surface down with 150 then 220 grit sandpaper, I’m going to try to stain these beauties and I hope they come out looking good.
The center decorative piece on the top drawer is actually an inlay of different wood types, so very pretty, I’m going to attempt to keep this a focal point when I start to stain the drawer fronts.
At this point I either forgot to take pictures or I’ve lost them… but I stained the drawer fronts Dark Walnut then I added another layer of Kona stain to darken them even more. I painted the cabinet Valspar Satin Black and the knobs I sprayed with Krylon Gold.
AFTER
The dark stain still allows you to see the grain, but helps hide some of the imperfections with the wood. I also waxed the drawer fronts with Annie Sloan clear wax a few days after I applied the stain.
I’m a HUGE fan of this gold spray paint of Krylon’s, it really dresses up the piece makes it feel very masculine, like I should be wearing a smoking jacket or something…
The finish isn’t “perfect” but I think it turned out much better than I could have hoped for considering what I started with.
Here is the Before and After… I much prefer the Dark Walnut / Kona stain to the original mahogany. What about you?
So now I’m back to unpacking… why oh why do I have soooo many candles??
Thanks as always for sticking with me and stopping by!
Until next time…
Linking up to these parties!
Between Naps on the Porch, The Dedicated House, Coastal Charm, A Stroll Thru Life, Elizabeth and Co., Savvy Southern Style, Domestically Speaking, From My Front Porch To Yours, French Country Cottage, My Romantic Home, Redoux Interiors, Miss Mustard Seed


Love it! I love the black and dark stain together.
LikeLike
Also, I’m glad you’re back!
LikeLike
Thanks chicka! I really wish I had a place for it..
LikeLike
It came out amazing!
LikeLike
Thanks so much Susan!
LikeLike
Wow Susan, that is just gorgeous! … Glad to hear you are getting settled in your new home!
LikeLike
Thanks Sharon… It’s hard getting back into the swing of it, but I missed it!
LikeLike
Turned out just beautiful. How did you stain it without getting stain onto the decorative inlay ?
LikeLike
Thanks Michelle! I should have been more specific with that part! It was sort of easy.. I used a small paint brush and brushed on Pecan stain on the inlay, let it dry then went forward with the rest of the process. The light stain soaks into that area so it won’t accept more stain.
LikeLike
Your piece turned out lovely. Good job.
LikeLike
Thanks so much Sharon!
LikeLike
Yay–you’re back! This turned out great! Good luck with your unpacking–hope you’re settling in and loving it.
LikeLike
Thanks Deb! I’m trying to balance “work” and exploring Louisville, but I’m not doing a very good job but it’s getting better!
LikeLike
I love the grain of the wood! It turned out beautiful – you are so talented! Welcome back! 🙂
LikeLike
Thanks so much Rebecca! It’s good to be back 🙂
LikeLike
Whew! I cringed when I first saw this beautiful mahogany bowfront chest with inlays as I thought, oh no, not another white or gray painted “re-do” thus ruining the piece. But what a relief to see someone who appreciates the original beauty and patina of such a lovely piece of furntiure! Well done!! ;o)
LikeLike
Thanks Jeanne! I try to save pieces when I can and only paint when I either have to or feel like the piece would be prettier painted… I’m glad I was able to save these drawer fronts and the beautiful inlay!
LikeLike
Welcome to Louisville! We hope you find folks friendly here and enjoy the area. The chest is wonderful with the new look. And my hat is off to you doing this in the midst of unpacking. You go girl!!!
LikeLike
Thanks so much Vicki! Everyone here is SO nice and friendly, it has been wonderful!
LikeLike
This is stunning. I love the redo, so beautiful. Thanks so much for linking to Inspire Me. Hugs, Marty
LikeLike
Thanks Marty! I love your Party!!
LikeLike
Looks perfect to me! I love it! ~Zuni
LikeLike
Thanks so much Zuni!
LikeLike
It’s beautiful Susan – and that inlay is just perfect !!!
Beautiful transformation – I’m surprised no one could see the potential in that piece too –
NO VISION lol
XOXO
LikeLike
Thanks so much Suzan! It was a HUGE pain in the rear but I was determined!
LikeLike
I often wonder how people can’t see potential. Even when it’s explained. So much work you did, it’s a shame you can’t keep it.
LikeLike
I know, it’s crazy! I’m still contemplating it… maybe I can use it for a new vanity?! Glad you liked the update!
LikeLike
Hi Susan,
I am of the strong belief that no one can have too many candles! Those little buggers can be crazy expensive so I stock up whenever I can.
Your dresser turned out gorgeous. Very high end looking. I love the depth that was achieved by staining it and painting it black. I have just started refinishing cast aways and this post was very helpful. I had never heard of the Minwax High Performance Wood Filler.
I am adding you to my list of ‘helpful blogs for furniture’!
Found you via MMS Furniture Feature Friday.
Thanks for sharing.
Fondly-Lisa
LikeLike
Thanks so much Lisa! I think I must have been a candle hoarder too 😉 good luck with your furniture refinishing!
LikeLike
Hi Susan, Actually just came upon your site from craigslist louisville. I love your work with one exception so far. The dresser you did in dark stain is just beautiful, but really think you should have left the dresser pulls as were. I don’t like the gold paint at all on this. Just my opinion.
LikeLike
Thanks Patty, I totally understand, but I was going for a more sophisticated look and the original finish on those handles was not salvageable. It’s just paint though so easy to change 😉
LikeLike
Beautiful Job Susan! I’m so glad you kept the original wood on the drawers and let the gorgeous wood grain shine through, superbly upcycled finished piece!
LikeLike
Thanks so much Brenda, I try to save beautiful wood when I can!
LikeLike
I absolutely love your choices of color…from paint, stain and “gold” on the dresser pulls. The final piece looks rich, elegant and refined. Just love it! I’m a newbe at this typs of furniture reburishing. How many coats of paint and stain was applied?
LikeLike
Thanks Claudia! I applied 3 thin coats of paint with a foam roller and one coat of stain. Good luck with your pieces!
LikeLike