I have had quite a backlog of custom pieces to get finished and this is “one” of them…
My client has a beautiful vintage Thomasville dining room set that she wants me to paint for her… a buffet, dining room table and six chairs! Whew… that’s a lot!
Here is her set… all of the pieces have great lines, but they are old, worn and need a little pick me up for sure!
Since she was a new client I wanted to start out with the buffet, one… to see if we worked well together and two… for her to decide if she likes the way I refinish the piece. This is a critical part of the process for me… I think it is important for all of the parties to be comfortable and honest with one another about their expectations and desired results… communication is key! Creating a finished product that everyone can be thrilled with is VERY important to me!
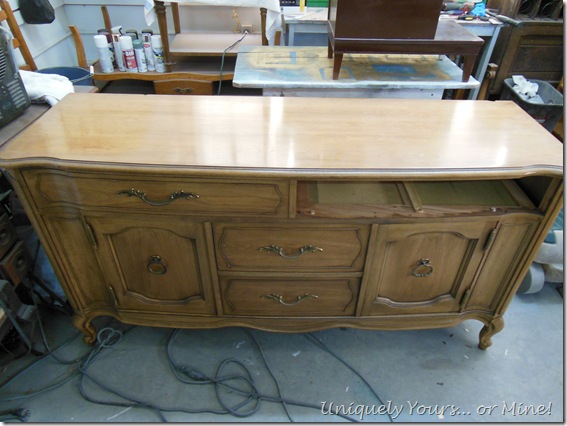
So the buffet I started out with with looked like this…
No, the other drawer is not MIA, it was at the client’s house. You see I will usually make up a sample drawer or panel for the client before painting the whole piece. As my client was a little unsure of the colors I wanted her to take the drawer home and live with the color scheme for a while to be certain… because you KNOW I hate repainting a piece!
As it turned out she and her hubby loved it…
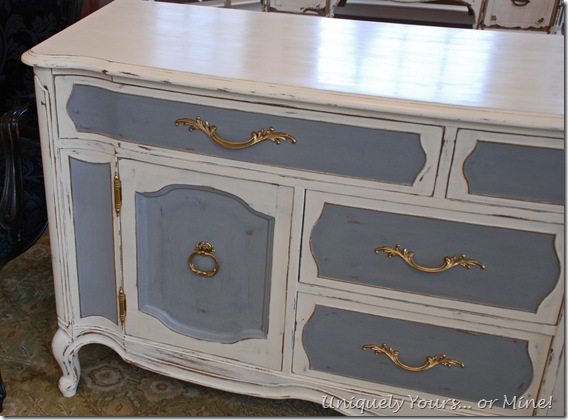
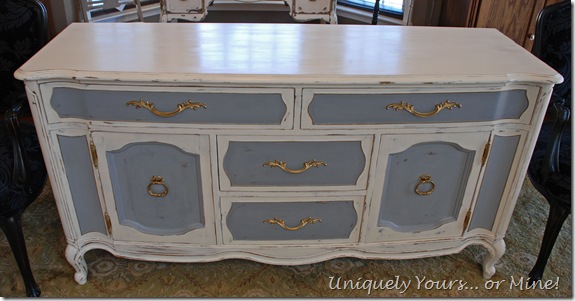
Here is the AFTER
It’s painted with Annie Sloan Chalk Paint, Old White & a custom mix of Graphite & Pure White (3:1 ratio).
I first washed the buffet down with Formula 409 and removed all of the hardware before painting. I also lightly sanded the top as it had a few blemishes that needed to be filled and sanded as well. I painted 3 coats of paint on the top, but only two coats everywhere else.
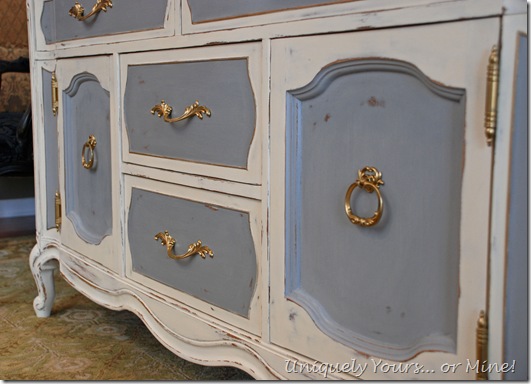
It’s very subtle and a little hard to see but I did use my gold leaf pen on the stiles around the drawers and the panels on the front of the buffet.
I painted the handles and hinges in Krylon’s 18k gold plate spray… I LOVE this stuff… it creates a beautiful gold finish!
I distressed the buffet with a combination of wet scrub sponge and sander with 220 grit paper.
After I finished distressing it I waxed it with Annie Sloan’s clear wax and then buffed it with 0000 steel wool and a soft cloth. See the sheen on the top of the buffet in the picture below… FABULOUS!
My client and her hubby (and her 2 super cute full of energy girls) came and picked up this beauty last Sunday… They seemed very happy with it and even sent me this picture…
She also asked when I would be able to get to her table and chairs… whew! But she’s great so I can’t wait to get started… just have to fit it all in!
I hoped you liked my buffet update… the table and chairs will be much more labor intensive but I’ll get it done!
As always thanks for stopping by…
Until next time!
Linking to to these parties!
Savvy Southern Style, Elizabeth & Co., Domestically Speaking, From My Front Porch to Yours, Redoux Interiors


It came out gorgeous! Thanks for the tips on how you with custom pieces. I have only done two so far and was scared to death they wouldn’t like it when I was done. It worked out okay for both, but I didn’t need all the added stress.
LikeLike
I know what you mean Susan! The first time I did it I was sooo stressed and I swore I’d never do it again! I found that if I am selective with who I work with and what kind of pieces I work on that it helps tremendously! The more custom pieces you do the more confident in the process you will be too! Good luck!
Susan
LikeLike
Just beautiful Susan! And I totally agree, I need to feel really comfortable with someone to take on a custom order!
LikeLike
Thanks Sharon! I’m glad it is not just me being picky 😉
Susan
LikeLike
This piece turned out beautifully. Love the colors
Cynthia
LikeLike
Thanks Cynthia! It was a great piece to work on for sure!
Susan
LikeLike
oooh i love that buffet! it’s gorgeous! love the colors!
LikeLike
Very nice job. I love the gold and the little gold accent w/the pen is a fab idea!
LikeLike
Thanks Beth, sometimes the pen gets gunky because of the chalk paint though.. It can be frustrating but I still find it to be the easier way to apply gold..
LikeLike
The dresser is beautiful! Love what colors you chose. By the way, I can’t reply to your comments because you’ve got the “no reply” set up on your settings. Those who get comments sent to email can’t respond to you. It’s an easy fix, if you want 🙂
LikeLike
Thanks Kathleen! I think the no reply thing is because I replied through google instead of my WordPress account.. Argh! Thanks for letting me know!
Susan
LikeLike
Looks great!!
LikeLike
Susan, the buffet looks beautiful. Great job again! I often visit, but found this on SSS.
Jeannie
LikeLike
Thanks So much Jeannie! I always appreciate you dropping by 🙂
LikeLike
THAT’S Graphite & Old White? I never would have thought that!
lovely
LikeLike